This Simple Homemade No-Knead Bread is wonderfully crusty on the outside, soft and fluffy inside, and incredibly easy to make. With just a handful of pantry staples and almost no hands-on work, you can have a beautiful bakery-style homemade loaf without kneading or complicated bread-making techniques.
If you’ve always wanted to make homemade bread but felt intimidated by kneading, shaping, and complicated instructions, this Simple Homemade No-Knead Bread is the perfect place to start. All you need is flour, water, yeast, a little honey or sugar, salt, and olive oil to create a rustic loaf with a deeply golden crust and wonderfully airy interior.
The secret is the long resting time. Instead of kneading the dough to develop structure, you simply stir everything together and leave the sticky, shaggy dough to rest for 8–12 hours. During that time, the dough becomes bubbly, airy, and full of flavor with practically no effort from you.
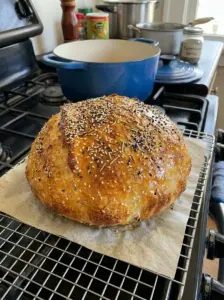
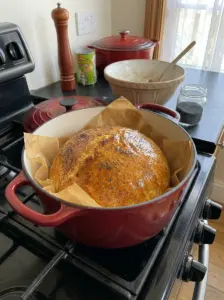
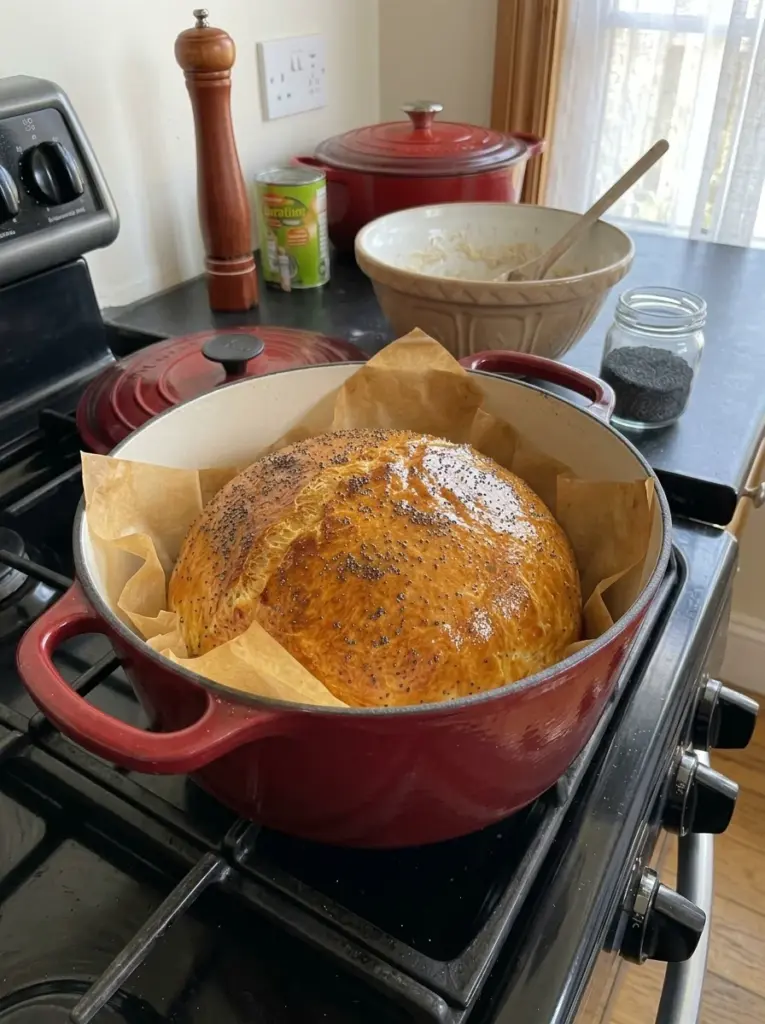
Baking the loaf inside a preheated Dutch oven traps steam around the dough, helping create that gorgeous crisp crust while keeping the inside soft and tender. Finish it with a little melted butter and optional sesame or poppy seeds, and you’ll have a beautiful homemade loaf that’s perfect for slicing, dipping, toasting, and serving alongside your favorite meals.
Let’s dive into everything you need to know to make this easy no-knead bread at home.
Why You’ll Love This Simple Homemade No-Knead Bread
There’s so much to love about this easy homemade bread recipe:
Absolutely no kneading required. Simply stir the ingredients together, cover the bowl, and allow time to do most of the work.
Beautifully crusty exterior. Baking the bread in a hot Dutch oven helps create a deeply golden, crisp crust reminiscent of rustic bakery bread.
Soft and fluffy inside. Beneath that crusty exterior is a tender, airy crumb that’s perfect for slicing.
Made with pantry staples. Flour, yeast, salt, water, and a little sweetener are the foundation of this incredibly simple loaf.
Minimal hands-on preparation. You’ll only need about 10 minutes of actual prep time.
Perfect for beginners. There are no complicated shaping techniques or intensive bread-making skills required.
Versatile enough for any meal. Enjoy it with butter, use it for sandwiches and toast, or serve thick slices alongside soups, stews, and pasta.
Ingredients You’ll Need
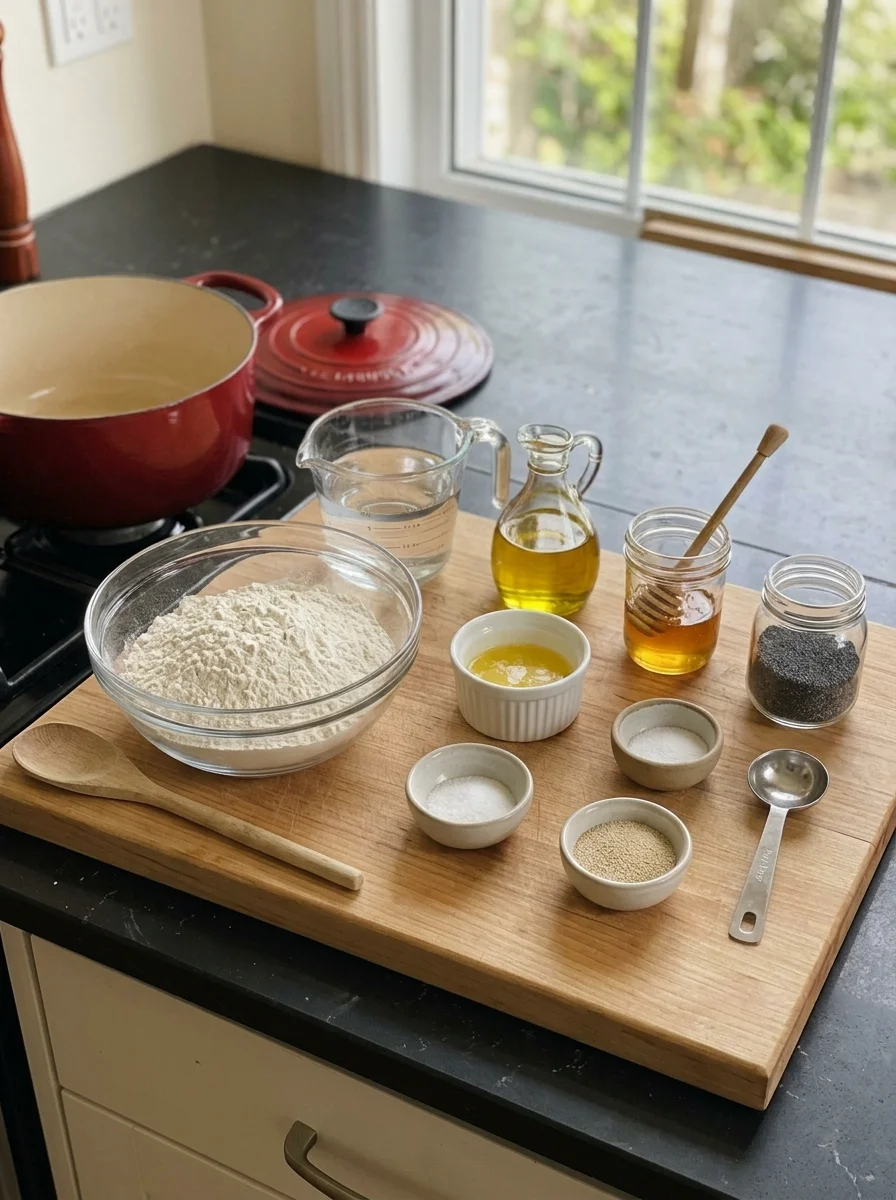
Here’s everything you’ll need to make this simple homemade no-knead bread and why each ingredient matters.
- 3 cups all-purpose flour — Forms the structure of the loaf while producing a soft, tender interior.
- 1 ½ cups warm water — Hydrates the flour and helps create the sticky, high-moisture dough needed for a light, airy crumb.
- 2 ¼ tsp instant yeast — Provides the leavening that allows the dough to expand and develop its fluffy texture.
- 1 tbsp honey or granulated sugar — Adds a subtle touch of sweetness and rounds out the flavor of the bread.
- 1 ½ tsp salt — Enhances the flavor of the loaf and balances the mild sweetness.
- 1 tbsp olive oil — Adds a little richness and tenderness to the bread.
- 1 tbsp melted butter, for brushing — Gives the freshly baked crust additional buttery flavor and a beautiful finish.
- 1 tsp sesame seeds or poppy seeds, optional — Adds a decorative finish along with a subtle nutty flavor and extra texture.
How to Make Simple Homemade No-Knead Bread
This bread requires very little hands-on work. The majority of the preparation time is simply allowing the dough to rest and develop.
Step 1: Combine the Dry Ingredients
In a large mixing bowl, whisk together the all-purpose flour, instant yeast, honey or sugar, and salt.
Mix until everything is evenly distributed.
Step 2: Add the Water and Olive Oil
Pour the warm water and olive oil into the bowl.
Using a wooden spoon or sturdy spatula, stir everything together until a sticky, shaggy dough forms.
There’s no need to knead the dough. In fact, its sticky consistency is exactly what you’re looking for.
Step 3: Let the Dough Rest Overnight
Cover the bowl tightly with plastic wrap or a clean kitchen towel.
Leave the dough at room temperature for 8–12 hours, or overnight.
By the end of the resting period, the dough should look noticeably expanded and bubbly.
Step 4: Gently Shape the Loaf
Lightly flour a sheet of parchment paper.
Carefully turn the risen dough onto the parchment and gently shape it into a round loaf.
Avoid aggressively kneading or handling the dough. You want to preserve as much of the air that developed during the long rise as possible.
Step 5: Let the Dough Rest Again
Loosely cover the shaped dough and allow it to rest for another 30–45 minutes.
Meanwhile, preheat your oven to 425°F (220°C).
Place your Dutch oven with its lid inside the oven while it preheats.
Step 6: Transfer the Dough to the Dutch Oven
Carefully remove the hot Dutch oven from the oven.
Using the parchment paper as a sling, gently lower the dough into the Dutch oven.
Be careful when handling the pot, as both the Dutch oven and lid will be extremely hot.
Step 7: Bake Covered
Place the lid on the Dutch oven and bake the bread for 25 minutes.
Keeping the pot covered during this first stage traps moisture around the loaf.
Step 8: Finish Baking Uncovered
Carefully remove the lid.
Continue baking for another 10–15 minutes, or until the loaf develops a deeply golden-brown crust.
The finished bread should also sound hollow when lightly tapped.
Step 9: Brush with Butter
Carefully remove the loaf from the Dutch oven and transfer it to a wire cooling rack.
While the bread is still warm, lightly brush the top with melted butter.
Sprinkle with sesame seeds or poppy seeds if desired.
Step 10: Cool Before Slicing
Allow the bread to cool for at least 30 minutes before slicing.
Although freshly baked bread is tempting to cut immediately, this resting period gives the crumb time to finish setting and produces cleaner slices.
How to Serve Simple Homemade No-Knead Bread
This rustic homemade loaf works with almost any meal. Try serving it:
- Warm with butter — Keep things simple with a thick slice and your favorite butter.
- With soups and stews — The crusty exterior makes it excellent for dipping into hearty soups and rich stews.
- Alongside pasta — Serve slices with pasta dishes for soaking up extra sauce.
- For sandwiches — Cut into sturdy slices and fill with your favorite meats, cheeses, vegetables, and spreads.
- As breakfast toast — Toast slices until crisp and top with butter, jam, honey, or other breakfast favorites.
- With eggs — Serve toasted slices alongside scrambled, fried, or poached eggs.
- For dipping — Pair with seasoned olive oil for an easy appetizer or side dish.
Tips for the Best Homemade No-Knead Bread
Don’t worry about sticky dough. This dough is supposed to be sticky and shaggy. Avoid adding lots of extra flour just because it doesn’t resemble traditional kneaded dough.
Use warm, not hot, water. The water should feel pleasantly warm. Excessively hot water can damage the yeast.
Don’t rush the long rest. The 8–12 hour resting period is an important part of this no-knead method and allows the dough to develop before baking.
Look for bubbles and expansion. After the long rest, the dough should be noticeably larger and bubbly.
Handle the risen dough gently. Avoid kneading the dough when shaping it. Gentle handling helps preserve the air that developed during the long rise.
Preheat the Dutch oven. Heating the Dutch oven along with the oven helps the bread begin baking immediately after it goes into the pot.
Use parchment paper for easy transfer. The parchment makes moving the soft dough into the extremely hot Dutch oven much easier.
Bake uncovered for a darker crust. Removing the lid for the final 10–15 minutes allows the exterior to become deeply golden and crisp.
Let the loaf cool before slicing. Waiting at least 30 minutes gives the soft interior time to finish setting.
Storage Information
Allow the bread to cool completely before storing it.
Keep the loaf in an airtight container or bread bag at room temperature for up to 3 days.
For longer storage, slice the completely cooled loaf and freeze the individual slices for up to 2 months.
When ready to serve, thaw the slices at room temperature. You can also toast them to restore some of the bread’s crisp exterior.
Frequently Asked Questions
Do I really need to let the dough rest for 8–12 hours?
Yes. The long resting period is an important part of this no-knead method. It gives the dough time to expand and develop without traditional kneading.
Can I prepare the dough overnight?
Absolutely. Mixing the dough in the evening and allowing it to rest overnight is one of the easiest ways to prepare this recipe.
Why is my no-knead dough so sticky?
That’s normal. This recipe produces a soft, sticky, shaggy dough. Avoid adding excessive flour, as doing so can make the finished bread heavier and drier.
Why do I need to preheat the Dutch oven?
A thoroughly heated Dutch oven provides an intensely hot baking environment as soon as the dough goes inside. The covered pot also traps moisture around the bread during the first portion of baking, helping the loaf develop its rustic crust.
Can I skip the sesame or poppy seeds?
Yes. They’re completely optional and are mainly used to add extra texture, flavor, and visual appeal.
How do I know when my bread is finished baking?
The loaf should have a deeply golden-brown exterior and sound hollow when lightly tapped. The total baking time is approximately 35–40 minutes.
Why shouldn’t I slice the bread immediately?
The interior continues to set after the loaf leaves the oven. Waiting at least 30 minutes helps prevent a gummy or compressed crumb and makes the bread easier to slice.
Can I freeze homemade no-knead bread?
Yes. Let the bread cool completely, slice it, and freeze the slices for up to 2 months. Thaw them at room temperature and toast before serving if desired.
Recipe Card
Prep Time: 10 minutes
Resting Time: 8–12 hours
Cook Time: 40 minutes
Total Time: About 9 hours, including rising time
Servings: 12 slices
Calories: ~175 per slice
This Simple Homemade No-Knead Bread is proof that you don’t need complicated techniques or hours of hands-on work to bake a beautiful loaf at home. With its deeply golden, crusty exterior and soft, fluffy center, it’s an easy homemade bread you’ll want to make again and again.
Mix the dough before bed, let it work its magic overnight, and bake up a warm, rustic loaf that’s perfect for buttered slices, toast, sandwiches, soups, and everyday meals.
Print
Simple Homemade No-Knead Bread
Ingredients
Here’s everything you’ll need to make this simple homemade no-knead bread and why each ingredient matters.
- 3 cups all-purpose flour — Forms the structure of the loaf while producing a soft, tender interior.
- 1 ½ cups warm water — Hydrates the flour and helps create the sticky, high-moisture dough needed for a light, airy crumb.
- 2 ¼ tsp instant yeast — Provides the leavening that allows the dough to expand and develop its fluffy texture.
- 1 tbsp honey or granulated sugar — Adds a subtle touch of sweetness and rounds out the flavor of the bread.
- 1 ½ tsp salt — Enhances the flavor of the loaf and balances the mild sweetness.
- 1 tbsp olive oil — Adds a little richness and tenderness to the bread.
- 1 tbsp melted butter, for brushing — Gives the freshly baked crust additional buttery flavor and a beautiful finish.
- 1 tsp sesame seeds or poppy seeds, optional — Adds a decorative finish along with a subtle nutty flavor and extra texture.
Instructions
This bread requires very little hands-on work. The majority of the preparation time is simply allowing the dough to rest and develop.
Step 1: Combine the Dry Ingredients
In a large mixing bowl, whisk together the all-purpose flour, instant yeast, honey or sugar, and salt.
Mix until everything is evenly distributed.
Step 2: Add the Water and Olive Oil
Pour the warm water and olive oil into the bowl.
Using a wooden spoon or sturdy spatula, stir everything together until a sticky, shaggy dough forms.
There’s no need to knead the dough. In fact, its sticky consistency is exactly what you’re looking for.
Step 3: Let the Dough Rest Overnight
Cover the bowl tightly with plastic wrap or a clean kitchen towel.
Leave the dough at room temperature for 8–12 hours, or overnight.
By the end of the resting period, the dough should look noticeably expanded and bubbly.
Step 4: Gently Shape the Loaf
Lightly flour a sheet of parchment paper.
Carefully turn the risen dough onto the parchment and gently shape it into a round loaf.
Avoid aggressively kneading or handling the dough. You want to preserve as much of the air that developed during the long rise as possible.
Step 5: Let the Dough Rest Again
Loosely cover the shaped dough and allow it to rest for another 30–45 minutes.
Meanwhile, preheat your oven to 425°F (220°C).
Place your Dutch oven with its lid inside the oven while it preheats.
Step 6: Transfer the Dough to the Dutch Oven
Carefully remove the hot Dutch oven from the oven.
Using the parchment paper as a sling, gently lower the dough into the Dutch oven.
Be careful when handling the pot, as both the Dutch oven and lid will be extremely hot.
Step 7: Bake Covered
Place the lid on the Dutch oven and bake the bread for 25 minutes.
Keeping the pot covered during this first stage traps moisture around the loaf.
Step 8: Finish Baking Uncovered
Carefully remove the lid.
Continue baking for another 10–15 minutes, or until the loaf develops a deeply golden-brown crust.
The finished bread should also sound hollow when lightly tapped.
Step 9: Brush with Butter
Carefully remove the loaf from the Dutch oven and transfer it to a wire cooling rack.
While the bread is still warm, lightly brush the top with melted butter.
Sprinkle with sesame seeds or poppy seeds if desired.
Step 10: Cool Before Slicing
Allow the bread to cool for at least 30 minutes before slicing.
Although freshly baked bread is tempting to cut immediately, this resting period gives the crumb time to finish setting and produces cleaner slices.