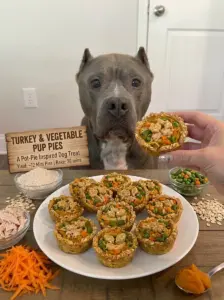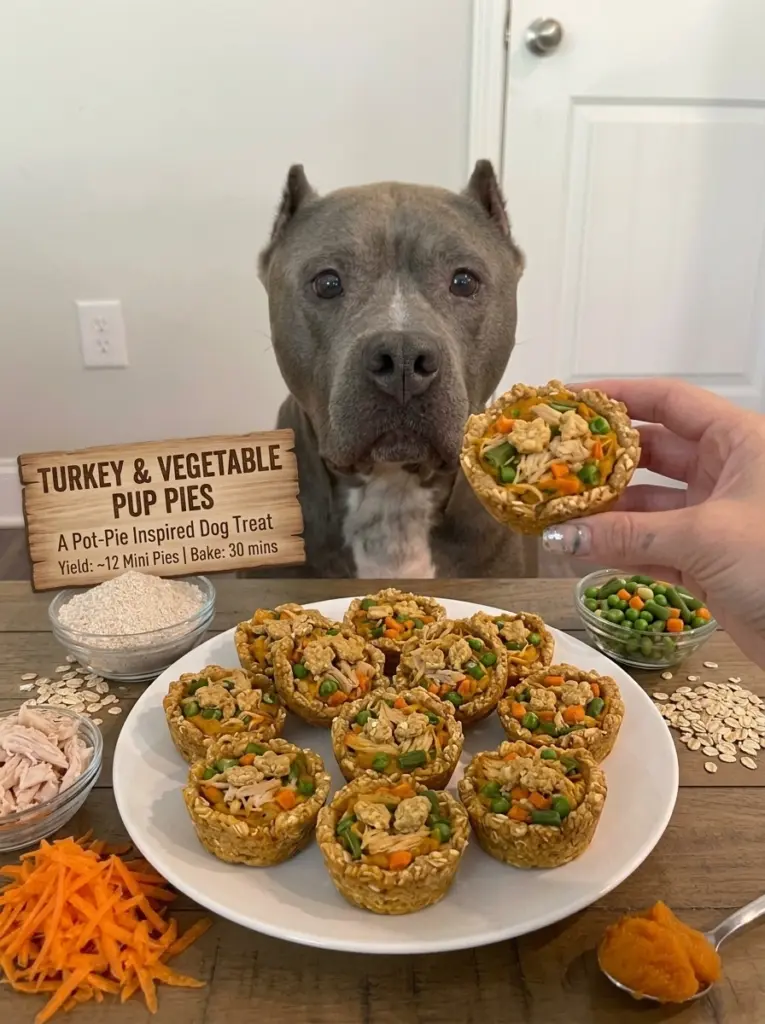
These Turkey & Vegetable Pup Pies take the comforting idea of a classic homemade pot pie and turn it into an adorable, dog-safe treat. Tender lean turkey, naturally sweet carrots, green peas, green beans, and creamy pumpkin come together in a savory filling, tucked into a simple oat-based crust and baked into individual mini pies your pup will love.
This recipe involves a few more steps than a basic biscuit or muffin, since it includes both a simple “crust” and a savory filling, but each part is straightforward on its own. Because it uses real turkey and egg, there are some important safety notes worth paying close attention to before you get started.
A quick but important note before you start: even with dog-friendly ingredients, homemade treats like these should only make up a small part of your dog’s overall diet. Every dog has different nutritional needs and sensitivities, so if your dog has any known allergies, digestive issues, or health conditions, check with your veterinarian before introducing a new treat.
Why Your Dog Will Love This Recipe
- A fun, special-occasion treat. The individual pie format makes these feel extra special compared to a standard biscuit or muffin.
- Savory, pot-pie-inspired flavor. Turkey, carrots, peas, green beans, and pumpkin combine for a hearty, comforting flavor combination.
- Soft, tender filling with a simple crust. The contrast between the savory filling and light oat crust gives these pies satisfying texture.
- Customizable. You can adjust the vegetable mix or add other dog-safe ingredients to suit your pup’s preferences.
- Great for training, celebrations, or simply spoiling your dog. Their charming presentation makes them a nice choice for birthdays or other special days.
Ingredients for Turkey & Vegetable Pup Pies
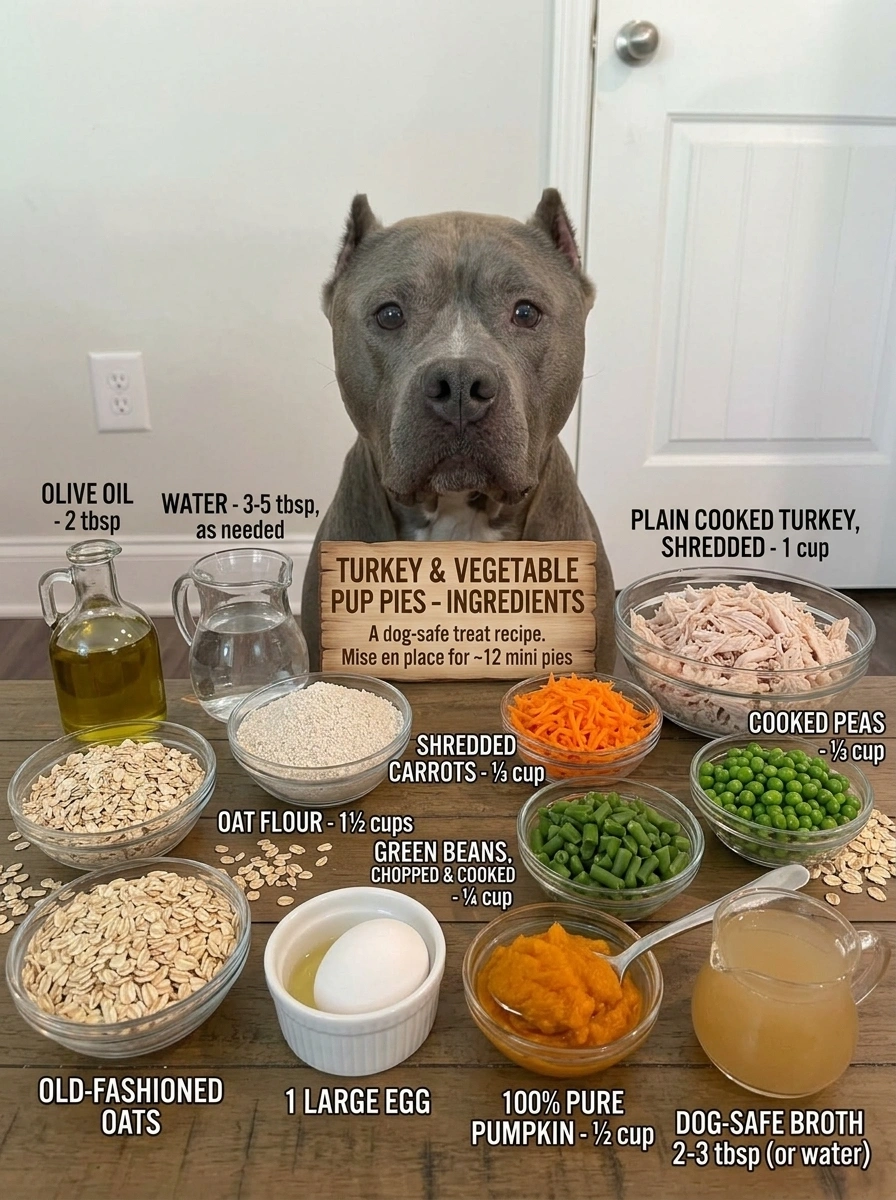
For the Oat Crust
- 1½ cups oat flour (blended from old-fashioned rolled oats)
- 2 tablespoons olive oil
- 3–5 tablespoons water, as needed
For the Turkey & Vegetable Filling
- 1 cup cooked turkey breast, finely shredded
- ⅓ cup finely shredded carrots
- ⅓ cup green peas, cooked
- ¼ cup green beans, finely chopped and cooked
- ½ cup pumpkin purée (100% pure pumpkin)
- 1 large egg
- 2–3 tablespoons water or dog-safe unsalted turkey or chicken broth, if needed
Ingredient Notes
Turkey breast. Use only plain, fully cooked, boneless turkey with the skin and excess fat removed, and no salt, butter, onion, garlic, gravy, sauces, or seasoning. Onion and garlic are toxic to dogs, so it’s best to cook plain turkey specifically for this recipe rather than repurposing seasoned leftovers.
Oat flour. Blending rolled oats into a fine flour creates a simple, dog-safe crust that holds together well without needing butter or shortening, keeping the overall recipe lighter and more appropriate for dogs.
Carrots, peas, and green beans. These are all classic, dog-friendly pot-pie vegetables. Finely shredding the carrots and chopping the green beans helps them cook through evenly within the filling.
Pumpkin purée. Use 100% pure pumpkin purée, not pumpkin pie filling, which contains added sugar and spices that aren’t appropriate for dogs. Pumpkin adds moisture and a mild natural flavor to the filling, and helps bind it together.
Egg. The egg helps bind the filling and adds a bit of extra protein. This recipe bakes long enough to cook the egg thoroughly.
Broth, if using. If your filling needs a bit more moisture, use only a plain, unsalted, dog-safe turkey or chicken broth with no onion or garlic. Many broths made for human consumption contain ingredients unsafe for dogs, so check the label closely or use a broth made specifically for pets.
Substitutions and Variations
- Chicken instead of turkey: Plain, fully cooked, boneless chicken breast can be used in place of turkey in an equal amount.
- Sweet potato: A small amount of cooked, mashed sweet potato can be swapped in for part of the pumpkin purée for a slightly different flavor.
- Different vegetable mix: Feel free to adjust the ratio of carrots, peas, and green beans based on what your dog enjoys, keeping the total vegetable volume roughly the same.
- Whole-wheat flour crust: If you’d prefer a firmer crust, you can substitute part of the oat flour with whole-wheat flour, though the texture will be slightly denser.
- Mini muffin pan instead of ramekins: If you don’t have small ramekins or a mini pie pan, a mini muffin tin works well for individual portions.
Kitchen Equipment
- Mini muffin pan, small ramekins, or a mini pie pan
- Food processor or blender, for making oat flour
- Two mixing bowls (one for crust, one for filling)
- Rolling pin
- Small round cutter (to match your pan size)
- Wire cooling rack
How to Make Turkey & Vegetable Pup Pies
Step 1: Preheat and Prep
Preheat the oven to 350°F (175°C) and lightly grease your mini muffin pan, ramekins, or mini pie pan.
Step 2: Make the Oat Crust
Blend the rolled oats into a fine oat flour. In a bowl, combine the oat flour and olive oil, then add water a tablespoon at a time, mixing until a soft, workable dough forms. Roll the dough out to about ⅛ inch thick, then cut rounds to fit the bottoms (and, if desired, tops) of your muffin cups or ramekins. Press the dough gently into the bottom of each cup, going slightly up the sides.
Step 3: Prepare the Turkey and Vegetables
Use plain, fully cooked, boneless turkey with the skin and excess fat removed, and finely shred it. Make sure the carrots are finely shredded, the peas are cooked, and the green beans are finely chopped and cooked.
Step 4: Make the Filling
In a separate bowl, combine the shredded turkey, carrots, peas, green beans, pumpkin purée, and egg, mixing until well combined. If the mixture seems too thick to spoon easily, add water or dog-safe broth a tablespoon at a time until it reaches a moist, scoopable consistency.
Step 5: Fill the Pies
Spoon the turkey and vegetable filling into each crust-lined cup, filling almost to the top. If you cut extra dough rounds for tops, gently place one over each filled cup and press the edges lightly to seal, or leave them open-faced for a simpler presentation.
Step 6: Bake
Bake for 25 to 30 minutes, or until the crusts are lightly golden and the filling is firm and fully set. Because this recipe contains turkey and egg, make sure the filling is completely cooked through before removing the pies from the oven.
Step 7: Cool and Serve
Let the pup pies cool completely in the pan before gently removing them, since they’ll hold together much better once fully cooled.
Expert Tips for the Best Results
- Double-check your turkey and any broth for hidden seasoning. This is the most important safety step in the whole recipe — onion, garlic, and excess sodium are unsafe for dogs, even in small amounts.
- Don’t roll the crust too thick. A thinner crust bakes through more reliably and keeps these treats from becoming overly dense.
- Press the crust gently into the cups. Pressing too hard can thin out the bottom too much, making it more likely to break when you remove the pies later.
- Let the filling cool slightly before serving. Freshly baked filling will be very hot; make sure the pies have cooled to room temperature before offering them to your dog.
- Cool completely before removing from the pan. This helps the crust set fully and makes for much cleaner removal.
Common Mistakes to Avoid
Using seasoned turkey or broth. Turkey or broth containing onion, garlic, excessive sodium, gravy, or other seasonings is unsafe for dogs, even in small amounts. Always use plain versions prepared specifically for this recipe.
Not cooking the filling through. Because this recipe contains turkey and egg, it’s especially important to bake until the filling is completely firm and set, not just until the crust looks golden.
Rolling the crust unevenly. Inconsistent thickness can lead to some crusts baking through while others stay underdone.
Removing the pies from the pan too soon. Warm crusts are more fragile and can break apart. Let the pies cool fully before handling them.
Overfilling the pies. Filling the cups too far past the rim can cause the filling to overflow during baking, making a mess and leading to uneven cooking.
How to Serve Turkey & Vegetable Pup Pies
These pup pies make a fun, special treat for birthdays, holidays, or simply spoiling your dog on an ordinary day. Their soft filling and light crust also make them a good option for dogs who prefer softer treats over crunchy biscuits. As with any homemade treat, serve them in moderation alongside your dog’s regular, balanced diet.
Make-Ahead Instructions
You can prepare a batch of these pup pies ahead of a special occasion and store them in the refrigerator or freezer until you’re ready to serve them. Because this recipe contains turkey and egg, it’s best suited to shorter-term refrigerator storage or longer-term freezing rather than sitting out at room temperature.
Storage Instructions
Refrigerating
Because these pies contain fresh turkey, egg, and vegetables, store them in an airtight container in the refrigerator for up to 3 to 4 days.
Freezing
For longer storage, freeze the pies individually in a freezer-safe container or bag for up to 2 to 3 months. Thaw in the refrigerator before serving rather than at room temperature, which is the safer approach for treats containing meat and egg.
Reheating
Reheating isn’t necessary, since these pies are meant to be served at room temperature after thawing or coming out of the refrigerator.
Frequently Asked Questions
Can I make these pup pies ahead of time? Yes. They’re a great make-ahead treat for special occasions — store them in the refrigerator for up to 3 to 4 days or in the freezer for up to 2 to 3 months.
How long do these pup pies last? Because they contain fresh turkey, egg, and vegetables, they should be stored in the refrigerator for no more than 3 to 4 days, or frozen for up to 2 to 3 months for longer storage.
Can I freeze homemade turkey pup pies? Yes. Freeze them individually in a freezer-safe container or bag, and thaw them in the refrigerator before serving.
Can I use chicken instead of turkey? Yes. Plain, fully cooked, boneless chicken breast works as a direct substitute for turkey in this recipe.
Do I need to make a top crust, or can these be open-faced? A top crust is optional. Leaving them open-faced with just the filling on top of the bottom crust works fine and simplifies the recipe.
What if I don’t have a mini muffin pan or ramekins? A mini muffin tin works well as a substitute for small ramekins, and either option will give you nicely portioned individual treats.
How do I know the filling is fully cooked? The filling should look firm and fully set, with no wet or jiggly areas, and the crust should be lightly golden. Because this recipe contains turkey and egg, it’s important to confirm the filling is fully cooked before removing the pies from the oven.
How many of these pies can I give my dog? These are a special treat, not a complete meal, so portion size should stay small relative to your dog’s regular diet. The right amount depends on your dog’s size, weight, and food intake, so check with your veterinarian if you’re unsure, especially for small dogs.
Final Recipe Summary
These Turkey & Vegetable Pup Pies combine lean shredded turkey, carrots, peas, green beans, and pumpkin in a savory filling tucked into a simple oat crust, baked into charming individual pies for your dog. Because this recipe contains fresh turkey, egg, and vegetables, it calls for careful ingredient prep, thorough baking, and a shorter refrigerator storage window of 3 to 4 days, though individual pies freeze well for longer storage. Their special, homemade presentation makes them a lovely choice for birthdays, holidays, or simply treating your pup to something extra.
Prep Time: 30–35 minutes Cook Time: 25–30 minutes Total Time: Approximately 1 hour Yield: Approximately 12 mini pup pies (depending on pan size)
Print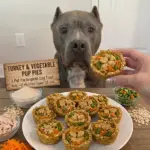
Turkey & Vegetable Pup Pies
- Total Time: Approximately 1 hour
- Yield: Approximately 12 mini pup pies (depending on pan size) 1x
Ingredients
For the Oat Crust
- 1½ cups oat flour (blended from old-fashioned rolled oats)
- 2 tablespoons olive oil
- 3–5 tablespoons water, as needed
For the Turkey & Vegetable Filling
- 1 cup cooked turkey breast, finely shredded
- ⅓ cup finely shredded carrots
- ⅓ cup green peas, cooked
- ¼ cup green beans, finely chopped and cooked
- ½ cup pumpkin purée (100% pure pumpkin)
- 1 large egg
- 2–3 tablespoons water or dog-safe unsalted turkey or chicken broth, if needed
Instructions
Preheat the oven to 350°F (175°C) and lightly grease your mini muffin pan, ramekins, or mini pie pan.
Blend the rolled oats into a fine oat flour. In a bowl, combine the oat flour and olive oil, then add water a tablespoon at a time, mixing until a soft, workable dough forms. Roll the dough out to about ⅛ inch thick, then cut rounds to fit the bottoms (and, if desired, tops) of your muffin cups or ramekins. Press the dough gently into the bottom of each cup, going slightly up the sides.
Use plain, fully cooked, boneless turkey with the skin and excess fat removed, and finely shred it. Make sure the carrots are finely shredded, the peas are cooked, and the green beans are finely chopped and cooked.
In a separate bowl, combine the shredded turkey, carrots, peas, green beans, pumpkin purée, and egg, mixing until well combined. If the mixture seems too thick to spoon easily, add water or dog-safe broth a tablespoon at a time until it reaches a moist, scoopable consistency.
Spoon the turkey and vegetable filling into each crust-lined cup, filling almost to the top. If you cut extra dough rounds for tops, gently place one over each filled cup and press the edges lightly to seal, or leave them open-faced for a simpler presentation.
Bake for 25 to 30 minutes, or until the crusts are lightly golden and the filling is firm and fully set. Because this recipe contains turkey and egg, make sure the filling is completely cooked through before removing the pies from the oven.
Let the pup pies cool completely in the pan before gently removing them, since they’ll hold together much better once fully cooled.
- Prep Time: 30–35
- Cook Time: 25–30 minutes