Ingredients
This recipe makes one standard loaf of sourdough bread. Here’s exactly what you’ll need:
- 200 grams stiff starter, at peak or slightly before peak
- 385 grams bread flour
- 325 grams water, for the dough
- 8 grams salt
- 5 grams water, for dissolving the salt
A few notes on ingredients: bread flour is important here because its higher protein content compared to all-purpose flour gives you stronger gluten development, which is especially helpful when you’re working on a compressed same day timeline. If you only have all-purpose flour on hand, you can still make this recipe, but expect a slightly less structured crumb and possibly a touch less oven spring.
Your starter should be stiff, meaning it has a lower hydration than a typical 100% hydration liquid starter — think more of a dough-like consistency than a pancake-batter consistency. If you don’t normally keep a stiff starter, you can convert your regular starter by feeding it with less water than usual a day or two ahead of baking.
Instructions
In the morning, combine your 385 grams of bread flour with 325 grams of water in a large mixing bowl. Mix just until no dry flour remains — you don’t need to knead it at this stage. Cover the bowl and let it rest for at least 1 hour. This autolyse period allows the flour to fully absorb the water and lets natural enzymes begin breaking down starches, which jumpstarts gluten development before any additional mixing begins.
After the hour of autolyse is complete, add your 200 grams of stiff starter (at peak or just before peak) to the bowl. Mix well for about 7 to 15 minutes, until the starter is completely incorporated into the dough and you no longer see any streaks or lumps of starter. This step is essential — thorough incorporation ensures even fermentation throughout the entire dough.
Let the dough rest, covered, for 20 minutes. This short rest allows the dough to relax slightly and gives the starter a chance to begin activating within the dough before you introduce salt.
Dissolve your 8 grams of salt in 5 grams of water, then add this salted water to the dough. Using the rubaud method, mix the dough with a diving, folding motion — scooping your hand underneath the dough, stretching it up, and folding it back over itself — continuously for several minutes. Keep going until, as the original recipe puts it, your shoulder hurts, or longer. This vigorous mixing method builds significant gluten strength in a short amount of time, which is key to getting good structure on a same day timeline.
After 20 to 30 minutes, perform your first round of coil folds. To do a coil fold, wet your hands, gently lift the center of the dough upward, letting the edges fold underneath as the dough naturally coils under its own weight. Rotate the bowl a quarter turn and repeat on all sides.
Repeat the coil fold process at least one more time, for a total of at least three rounds throughout bulk fermentation. Check on your dough every 20 minutes to assess whether it needs another round. If the dough is holding its shape well and feels strong and elastic, you can leave it alone. If it looks flat or is spreading out in the bowl, give it another round of coil folds to build additional strength.
Continue to let the dough bulk ferment, checking every 20 minutes, until it has puffed up to about 70 to 80 percent larger than its original size and passes the poke test (gently poke the dough with a wet finger — if the indentation slowly springs back partway, it’s ready). For reference, this typically takes about 4 to 5 hours after the starter is mixed in, in a home kept around 19–20°C (66–68°F). If your kitchen is warmer, this may happen faster, so keep a close eye on your dough rather than relying strictly on the clock.
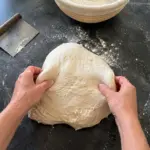
Once your dough has passed the poke test and shows good volume, turn it out onto a lightly floured surface and shape it into a boule or batard, whichever you prefer. Use gentle but firm motions to build surface tension without deflating all the gas you’ve worked to build.
Place your shaped dough into a banneton or bowl lined with a floured towel, then transfer it to the fridge for 1 hour before baking. This short chill firms up the dough, making it easier to score cleanly and helping it hold its shape during the initial oven spring.
If you want to do decorative scoring, move your dough to the freezer for the final 20 minutes of this chilling period instead of the fridge, and use a fresh, sharp lame. The extra-firm dough surface makes intricate scoring patterns much cleaner and easier to execute.
While your dough chills, preheat your oven to 500°F with your Dutch oven or baking vessel inside. Once your dough is ready to bake, turn the oven down to 450°F (or 400°F if you’re using a gas oven).
Remove your dough from the fridge or freezer, score it with your lame using whatever pattern you like, and transfer it into your preheated baking vessel. Add your steam source at this point (see notes below). Bake with the lid on for 30 minutes.
After 30 minutes, turn the oven temperature down to 400°F (or 380°F for gas ovens), remove the lid, and continue baking uncovered for an additional 15 minutes, or until the crust is deeply golden brown and the loaf sounds hollow when tapped.
Your bread is fully baked when it reaches an internal temperature of about 210°F. Use an instant-read thermometer inserted into the center of the loaf to confirm doneness.
Remove the loaf from the oven and transfer it to a wire cooling rack. Resist the urge to cut into it right away — let it cool completely, ideally for at least 1 hour, so the crumb can finish setting. Cutting too early can result in a gummy interior.