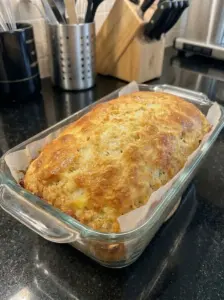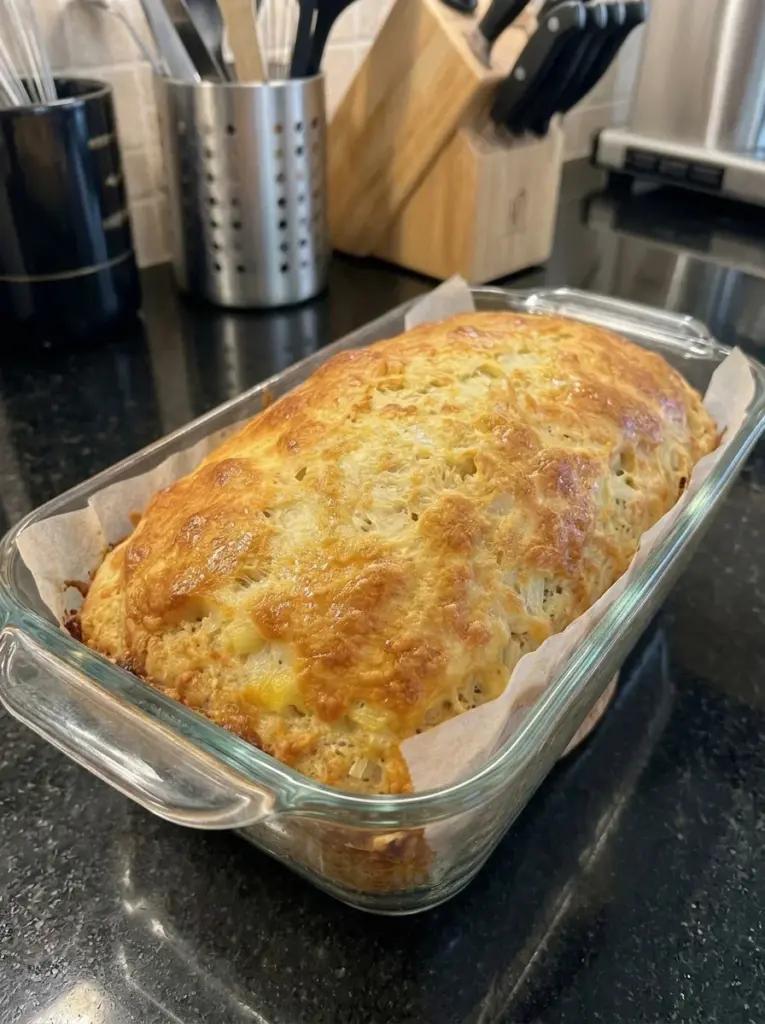
Plain mashed potatoes give this homemade loaf a tender, moist crumb that works beautifully for toast, sandwiches, and buttered slices alongside dinner. A little butter or olive oil enriches the dough, and a final butter brushing softens the golden crust.
The dough comes together with a sturdy spoon rather than a mixer or a traditional kneading session. Two rises give it time to expand before baking in a loaf pan. The most useful details are simple: measure the mashed potato, keep the dough soft, and wait for the baked loaf to cool before slicing.
This recipe uses one full cup of plain mash. Potato moisture varies, so the extra liquid is an adjustment rather than an ingredient you must add automatically. A soft, tacky dough is the goal—not a dry ball and not a pourable batter.
Recipe at a Glance
- Potato preparation and mixing: About 25–35 minutes, allowing longer if cooling is needed
- First rise: Approximately 60–90 minutes
- Second rise: Approximately 30–45 minutes
- Bake time: Approximately 35–45 minutes
- Cooling: About 1½–2 hours, or until cool through the center
- Total time: Approximately 4–5½ hours, including cooling; allow longer in a cool kitchen
- Yield: One 9 × 5-inch loaf, about 12 slices
- Equipment: Saucepan, potato masher, large bowl, sturdy spoon, scraper, loaf pan, and rack
Why You’ll Love This Bread
- A potato-enriched crumb: Cooked potato contributes moisture and a tender texture.
- No stand mixer required: Mix with a spoon and shape gently by hand.
- Simple pantry ingredients: Flour, yeast, salt, sugar, water, and fat form the dough.
- Useful for several meals: Serve with soup, make sandwiches, or toast for breakfast.
- A soft crust finish: Brushing the hot loaf with butter adds flavor and tenderness.
- Easy freezer portions: Slice the cooled bread and save some for later.
What Makes Potato Bread Different?
This is a wheat-based yeast bread enriched with cooked potato. Potato changes the dough’s moisture and handling, but it does not replace the flour or make the loaf gluten-free.
No-knead means you skip repeated working of the dough on the counter. Thorough stirring still matters: every pocket of flour needs to be hydrated, and the mashed potato should be distributed evenly.
Expect a soft sandwich-style loaf with a fairly close crumb. The dough may feel sticky even when properly mixed, and a potato-rich loaf needs thorough baking and cooling to avoid a compressed-looking center.
Ingredients
For the Dough
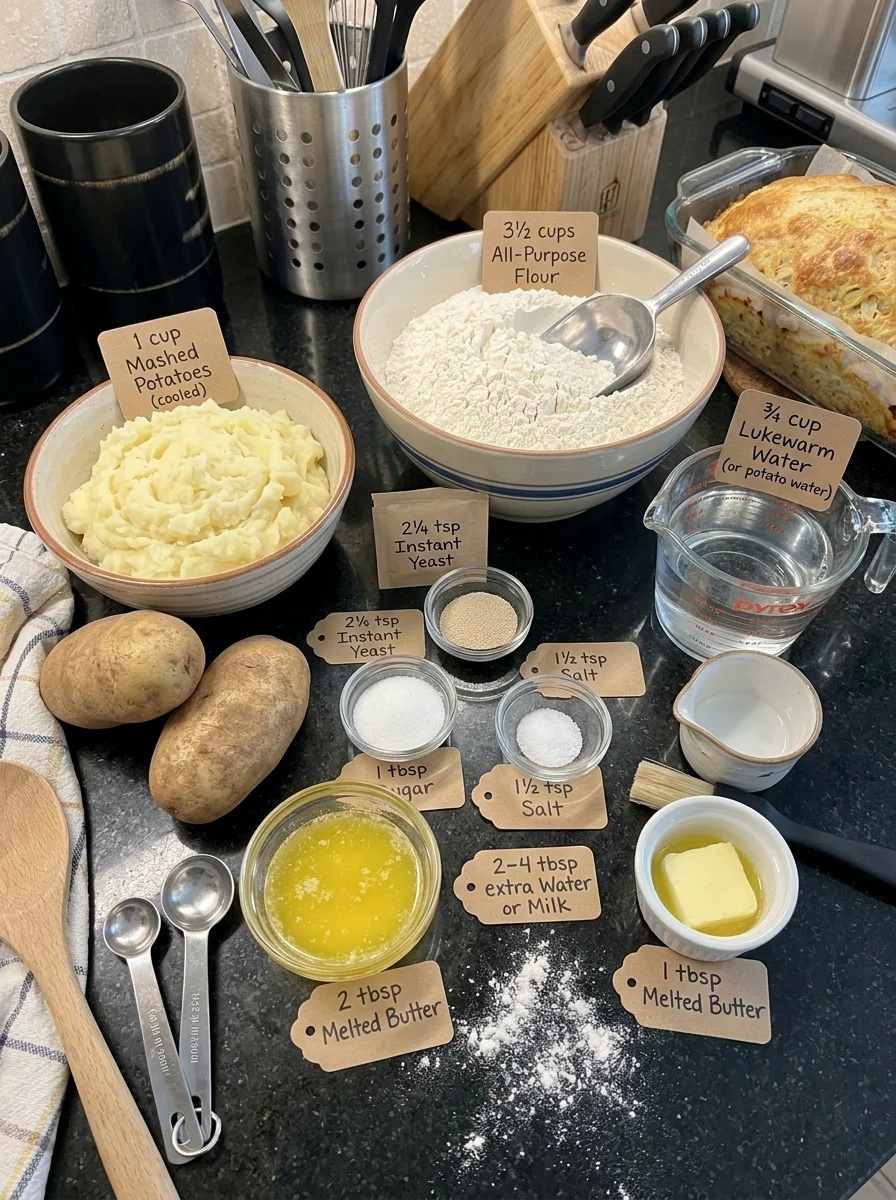
- 1 cup plain mashed potatoes, smooth and cooled to lukewarm or room temperature
- 3½ cups all-purpose flour, spooned and leveled
- 2¼ teaspoons instant yeast, one standard packet
- 1 tablespoon granulated sugar
- 1½ teaspoons salt
- ¾ cup lukewarm unsalted potato cooking water or regular water
- 2 tablespoons melted, slightly cooled butter or olive oil
- 2–4 tablespoons additional water or milk, only if needed
For the Pan and Finish
- A little butter or cooking spray, for greasing
- A little flour, for shaping
- 1 tablespoon melted butter, for brushing the baked loaf
Ingredient Notes
Mashed potato: Use plain potato without added milk, butter, cheese, or seasonings. Drain well before mashing and measure the finished mash rather than adding whatever two potatoes produce. Russet potatoes are a useful starting point; other types may hold different amounts of moisture.
Flour: All-purpose flour provides the intended tender crumb. Spoon into the measuring cup and level rather than scooping firmly. Bread flour can give more structure and chew but may need a different liquid adjustment.
Yeast: Instant yeast can be mixed directly with flour. Check freshness and follow the package’s storage instructions. An old or poorly stored product can slow or limit the rise.
Potato water: Use unsalted cooking water if reserving it for the dough. Salted potato water adds an unknown amount of salt. Let it cool until lukewarm before mixing; hot water can damage the yeast.
Additional liquid: Hold it back initially. Dry, well-drained mash may need more water, while wetter mash may need none. Milk adds a little richness if used, but water keeps the base simpler.
Butter or oil: Either can work at the listed amount, with different flavor. Butter should be melted and slightly cooled. The tablespoon brushed on after baking is separate from the two tablespoons in the dough.
Salt: Salt crystal sizes differ, so use the same type consistently when repeating the recipe. Coarse kosher salt and fine table salt are not always equal by volume.
How to Make It
1. Cook and Mash the Potatoes
Peel and cube about two medium potatoes. Place in a saucepan, cover with unsalted water, and simmer until fork-tender, approximately 12–15 minutes after reaching a simmer.
Reserve some cooking water if using it, then drain the potatoes thoroughly. Return them briefly to the warm pan off the heat so excess surface moisture can evaporate. Mash until smooth without adding milk or butter.
Measure one cup and let it cool until no longer hot. Reserve extra mash for another use. Cool the reserved water separately.
2. Combine the Dry Ingredients
Whisk the flour, instant yeast, sugar, and salt in a large bowl. Break up any compacted flour before adding wet ingredients.
Use a bowl with enough room for the dough to roughly double during its first rise.
3. Mix the Dough
Stir the measured mash with the three-quarter cup of lukewarm water and butter or oil to loosen it. Add to the flour mixture and stir firmly with a sturdy spoon.
Scrape the bottom and sides until no dry flour remains. Continue stirring for about a minute to make a cohesive dough.
If dry flour will not incorporate, add extra water or milk one tablespoon at a time. Stop once the dough is soft and tacky. You may not need the full allowance.
If sticky but cohesive, let it rest for 10 minutes before deciding it needs flour. This rest is part of the first rise. Avoid repeatedly dusting the bowl until the dough feels dry.
4. Allow the First Rise
Cover to prevent a dry skin. Leave in mild warmth for about 60–90 minutes, until roughly doubled, allowing more time in a cool kitchen.
Use the expansion as the main cue. Ingredient temperature, yeast activity, and room conditions change the schedule. A strongly heated spot is not a reliable shortcut.
5. Shape the Loaf
Grease a 9 × 5-inch loaf pan. Lightly flour the work surface and your hands, then use a scraper to ease the dough out.
Gently pat into a rough rectangle with a short side about as wide as the pan. Roll into a log, tuck the ends if needed, and place seam-side down in the pan.
The surface does not need to be perfectly smooth. A scraper or lightly damp fingers can help position sticky dough without incorporating lots of flour.
6. Let It Rise Again
Cover loosely and let rise for about 30–45 minutes, or until fuller and puffy, approaching the pan rim. The exact height depends on pan dimensions and dough structure.
A light fingertip indentation should return slowly partway. If it springs back immediately, allow more time. If the dough looks fragile and begins to sink, handle carefully and bake promptly.
Meanwhile, preheat the oven to 375°F with a rack near the center.
7. Bake Thoroughly
Bake for approximately 35–45 minutes, checking toward the earlier end. The crust should become golden and the center should be set. A moist, potato-rich dough may need longer than the range in some ovens.
If the top browns too quickly, cover loosely with foil. A center temperature around 195–205°F is a useful doneness guide for this loaf, alongside its structure; crust color alone is not enough.
Insert the thermometer into the middle of the loaf without touching the pan. Do not continue baking indefinitely to dry out a crumb that will naturally remain moist.
8. Brush and Cool
Brush the hot loaf with the finishing butter. Rest in the pan for about 10 minutes, then turn out carefully onto a wire rack.
Cool for about 1½–2 hours, or until the center is no longer warm. A loaf this moist benefits from patience before slicing. Cutting it hot can squash the crumb and leave a gummy impression even when it has baked through.
9. Slice and Serve
Use a serrated knife and a gentle sawing motion. Slice as needed for immediate use or cut the cooled loaf for freezer portions.
For warm serving, reheat individual slices after the loaf has cooled rather than cutting straight from the oven.
Tips for a Tender Loaf
Measure the mash. Potato count is only a preparation estimate; the recipe uses one measured cup.
Drain well. Excess cooking water makes the dough harder to assess and can encourage unnecessary flour additions.
Mix thoroughly. No-knead dough still needs even hydration and no large potato lumps.
Keep adjustments small. Add liquid by the tablespoon and flour only sparingly after a rest.
Follow both rises. A lighter crumb depends on adequate expansion before baking, not just yeast quantity.
Cool fully. This is especially useful for clean sandwich slices and a stable interior.
Troubleshooting
| Problem | Possible cause | Helpful adjustment |
|---|---|---|
| Dough is dry | Packed flour or dry mash | Add reserved liquid gradually during mixing. |
| Dough is very sticky | Wet mash or soft dough | Rest briefly and use a scraper before adding more flour. |
| Dough rises slowly | Cool ingredients or weak yeast | Allow more time in mild warmth and check product freshness. |
| Loaf is dense | Excess flour or incomplete proofing | Keep the dough soft and wait for visible expansion. |
| Center seems gummy | Underbaking, excess moisture, or early slicing | Drain potato well, check doneness, and cool fully. |
| Loaf sinks | Overproofing or an unset center | Watch the final rise and verify baking doneness. |
| Crust browns too fast | Oven heat or enriched dough | Tent loosely and finish baking the center. |
| Bottom feels damp | Steam trapped in pan or packaging | Turn out after the short rest and wrap only when cool. |
Variations
Herb Potato Bread
Add a small amount of dried thyme or finely chopped rosemary to the flour. Start lightly so the loaf remains useful for different meals.
Sesame Topping
Brush the proofed loaf gently with a little water or milk and sprinkle with sesame seeds. These are additional ingredients beyond the basic formula.
Garlic Butter Toast
Toast cooled slices and brush with freshly prepared garlic butter. This gives a savory variation without changing the dough’s moisture.
Dairy-Free Preparation
Use olive oil in the dough, water for any adjustment, and omit the finishing butter or choose a suitable dairy-free alternative. Check all products if avoiding dairy for an allergy.
Dinner Rolls
The dough can be portioned into smaller rolls, but pan arrangement, proofing, and baking time change. Check much earlier than the loaf timing and verify the middle rolls are set.
Serving Suggestions
Thick toast works well with butter and jam, eggs, or nut butter. For lunch, use fully cooled slices for turkey sandwiches or grilled cheese.
Serve alongside vegetable soup, beef stew, or roasted chicken. A little toasting strengthens the surface for wetter fillings and adds contrast to the tender crumb.
Day-old slices can become French toast or croutons. Reheat only what you plan to eat rather than repeatedly warming the whole loaf.
Storage and Freezing
Once fully cool, store the plain loaf in an airtight bread bag or container for about 2–3 days in a cool, dry kitchen. Freeze sooner in warm or humid conditions or when you will not finish it promptly.
Refrigeration often makes bread stale faster, so freezing is generally more useful for longer storage. Slice, separate with parchment if desired, wrap well, and freeze for up to 3 months for best quality.
Toast slices from frozen or thaw wrapped portions at room temperature. Several thawed slices can be warmed in a 300°F oven until pleasantly warm, checking to prevent drying.
Discard moldy bread rather than cutting away only the visible area. Bread with meat, cheese, or other perishable fillings needs storage appropriate to the filling.
Frequently Asked Questions
Can I use leftover mashed potatoes?
Use only plain, properly stored mash without added butter, milk, cheese, or seasonings. Dinner mash varies considerably and does not give the same predictable liquid balance.
Can I use instant potato flakes?
Dry flakes are not a cup-for-cup replacement for prepared mash. Rehydrated products also vary. The formula is written for one cup of plain cooked potato.
Can I use bread flour?
Yes, with a potentially chewier crumb and different water absorption. Assess the dough before adding the optional extra liquid.
Can I use active dry yeast?
Follow its manufacturer’s directions. If dissolving first, use some of the measured water rather than adding an extra portion. Rising time may change.
Does the dough need traditional kneading?
No. Firm stirring and gentle shaping are the intended method. Do not compensate for stickiness by kneading in large amounts of flour.
Is potato bread gluten-free?
No. This loaf contains wheat flour. Potato enriches the dough but does not remove gluten.
Why did the original total time seem shorter?
The original range largely describes preparation, rising, and baking. Complete cooling adds another 1½–2 hours, which matters when planning when the loaf will be ready to slice.
Are the calories 180–220 per slice?
The lower end may fit this formula, but actual totals depend on flour measurement, potato quantity, fat choice, and slice size. Using typical values, the batch may be roughly 2,000–2,200 calories with finishing butter, or about 165–185 per twelfth. Calculate from your ingredients for greater precision.
Recipe Card
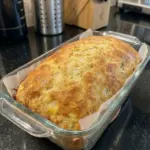
Fluffy No-Knead Mashed Potato Bread
A soft wheat loaf enriched with one cup of plain mashed potato and finished with melted butter. Mix with a spoon and allow two rises before baking.
Prep: About 25–35 minutes | Rise: 1½–2¼ hours | Bake: 35–45 minutes | Cool: About 1½–2 hours
Total: Approximately 4–5½ hours, including cooling
Yield: One 9 × 5-inch loaf, about 12 slices
Ingredients
- 1 cup plain smooth mashed potatoes, cooled
- 3½ cups all-purpose flour, spooned and leveled
- 2¼ teaspoons instant yeast
- 1 tablespoon sugar
- 1½ teaspoons salt
- ¾ cup lukewarm unsalted potato water or regular water
- 2 tablespoons melted, slightly cooled butter or olive oil
- 2–4 tablespoons additional water or milk, only if needed
- 1 tablespoon melted butter, for finishing
- A little flour for shaping and butter or spray for the pan
Instructions
- Cook peeled potato chunks until tender. Drain well, reserve unsalted cooking water if desired, and mash without additions. Measure one cup and cool to lukewarm or room temperature.
- Combine flour, yeast, sugar, and salt in a large bowl.
- Stir mash with measured water and butter or oil, then add to dry ingredients. Mix firmly until cohesive and no dry flour remains. Add extra liquid gradually only if needed.
- Cover and rise for 60–90 minutes, until roughly doubled, allowing longer in cool conditions.
- Grease a 9 × 5-inch pan. Shape dough gently into a log on a lightly floured surface and place seam-side down.
- Cover and rise for 30–45 minutes, until puffy and approaching the rim. Preheat the oven to 375°F.
- Bake for 35–45 minutes or until set and golden, using approximately 195–205°F at the center as a guide. Tent with foil if needed.
- Brush with finishing butter. Rest in the pan for 10 minutes, then cool fully on a rack before slicing.
Notes
- Measure cooked mash rather than relying only on potato count.
- Extra liquid is optional; potato moisture varies.
- Rising and baking times are estimates. Use dough expansion and doneness cues.
- Store fully cooled bread for about 2–3 days in a cool kitchen or freeze slices for up to 3 months for best quality.
- Approximate calories: 165–185 per twelfth with finishing butter, before toppings. Calculate from actual ingredients for precision.
Final Thoughts
Smooth, well-drained mash and a soft dough are the starting points for this loaf. Give both rises time to develop, bake the center thoroughly, and let the bread cool before slicing. Those details help turn a simple potato-enriched dough into tender bread for toast, sandwiches, and dinner.
Fluffy No-Knead Mashed Potato Bread
- Total Time: Approximately 4–5½ hours, including cooling
Ingredients
- 1 cup plain smooth mashed potatoes, cooled
- 3½ cups all-purpose flour, spooned and leveled
- 2¼ teaspoons instant yeast
- 1 tablespoon sugar
- 1½ teaspoons salt
- ¾ cup lukewarm unsalted potato water or regular water
- 2 tablespoons melted, slightly cooled butter or olive oil
- 2–4 tablespoons additional water or milk, only if needed
- 1 tablespoon melted butter, for finishing
- A little flour for shaping and butter or spray for the pan
Instructions
- Cook peeled potato chunks until tender. Drain well, reserve unsalted cooking water if desired, and mash without additions. Measure one cup and cool to lukewarm or room temperature.
- Combine flour, yeast, sugar, and salt in a large bowl.
- Stir mash with measured water and butter or oil, then add to dry ingredients. Mix firmly until cohesive and no dry flour remains. Add extra liquid gradually only if needed.
- Cover and rise for 60–90 minutes, until roughly doubled, allowing longer in cool conditions.
- Grease a 9 × 5-inch pan. Shape dough gently into a log on a lightly floured surface and place seam-side down.
- Cover and rise for 30–45 minutes, until puffy and approaching the rim. Preheat the oven to 375°F.
- Bake for 35–45 minutes or until set and golden, using approximately 195–205°F at the center as a guide. Tent with foil if needed.
- Brush with finishing butter. Rest in the pan for 10 minutes, then cool fully on a rack before slicing.
- Prep Time: About 25–35 minutes
- Cook Time: Rise: 1½–2¼ hours | Bake: 35–45 minutes | Cool: About 1½–2 hours