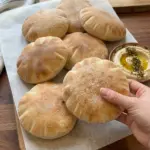
Ingredients
For the Pita Bread
- 3 cups all-purpose flour
- 2 1/4 tsp active dry yeast
- 1 tsp sugar
- 1 tsp salt
- 1 cup warm water
- 2 tbsp olive oil
- 2 tbsp plain Greek yogurt
Instructions
Pour the warm water into a large mixing bowl. Add the active dry yeast and sugar and stir gently.
Let the mixture sit for 5 to 10 minutes, until it becomes slightly foamy on top.
Foaming is a good indication that your yeast is active and ready to use.
Step 2: Mix the Dough
Add the flour, salt, olive oil, and Greek yogurt to the yeast mixture.
Stir everything together until the ingredients begin forming a shaggy dough.
It doesn’t need to look perfectly smooth at this point. Kneading will develop the dough’s structure.
Step 3: Knead Until Smooth
Transfer the dough to a lightly floured work surface.
Knead for approximately 6 to 8 minutes, until the dough becomes smooth, soft, and elastic.
Try not to continuously add flour while kneading. Too much additional flour can make the finished pita dense or dry.
Step 4: Let the Dough Rise
Lightly oil a clean bowl and place the dough inside.
Cover with a clean kitchen towel or plastic wrap and leave it somewhere warm for approximately 60 to 90 minutes, or until doubled in size.
The exact rising time can vary depending on the temperature of your kitchen, so pay attention to the size of the dough rather than relying entirely on the clock.
Step 5: Divide the Dough
Gently punch down the risen dough to release excess gas.
Divide it into 8 approximately equal pieces.
Shape each piece into a smooth ball.
Step 6: Rest the Dough Balls
Cover the dough balls with a clean towel and allow them to rest for 10 to 15 minutes.
This short rest helps relax the gluten, making the dough much easier to roll without constantly springing back.
Step 7: Roll the Pitas
Working with one dough ball at a time, roll it into a round approximately 6 to 7 inches wide and 1/4-inch thick.
Try to maintain an even thickness across the entire pita. Uneven sections may cook at different speeds.
Keep the remaining dough balls covered while you work so their surfaces don’t dry out.
Step 8: Heat the Skillet
Place a large cast-iron skillet or heavy-bottomed pan over medium-high heat.
Allow it to become thoroughly hot before cooking the first pita.
There is no need to add oil to the skillet.
Step 9: Cook the First Side
Carefully place one rolled pita into the hot, dry skillet.
Cook for approximately 1 to 2 minutes.
Small bubbles should begin forming across the surface while the underside develops golden-brown spots.
Step 10: Flip and Finish Cooking
Flip the pita and cook the second side for another 1 to 2 minutes.
The pita may puff significantly as steam develops inside.
Once cooked through with attractive golden spots on both sides, remove it from the skillet.
Step 11: Keep the Pitas Soft
Immediately place the cooked pita beneath a clean kitchen towel.
This is important because the towel traps some of the bread’s natural moisture and prevents it from drying out while the remaining pitas cook.
Repeat the process with all the remaining dough.