
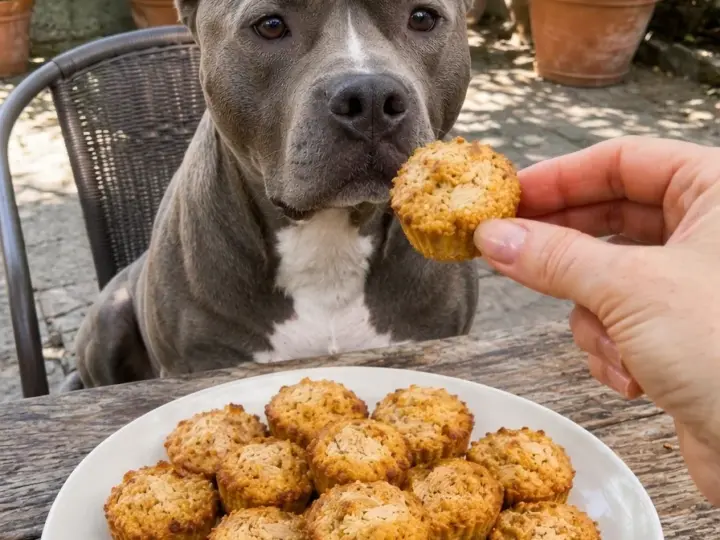
Chicken & Rice Pup Cups are little baked bites made from tender shredded chicken, soft white rice, and just a touch of oat flour and egg to hold everything together. They bake in a mini muffin pan with lightly golden edges, which makes them easy to portion, freeze, and hand out as an occasional treat. There’s no salt, onion, garlic, or seasoning anywhere in the recipe.
If you already have cooked chicken and rice on hand, this comes together in about an hour from start to finish, most of it hands-off baking and cooling. Below you’ll find the recipe along with notes on food safety, portioning, and storage.
An important note before you start: these are occasional treats, not a complete daily diet. Chicken and rice alone don’t provide balanced nutrition. Keep all treats combined to about 10% of your dog’s daily calories, and check with your veterinarian first if your dog has allergies, pancreatitis, diabetes, kidney disease, or any other health condition.
Why Your Dog Will Love This Recipe
- Only five ingredients. Chicken, rice, egg, oat flour, and water, with nothing hidden or processed.
- Soft, tender texture. These bake up soft inside with lightly golden edges, easy to chew and easy to break apart.
- Easy to portion. The mini muffin format gives you ready-made, treat-sized servings.
- Freezer-friendly. Bake a batch and keep a stash for later.
- Great for leftovers. If you’ve cooked plain chicken and rice for another recipe, this is a simple way to use them.
Ingredients for Chicken & Rice Pup Cups
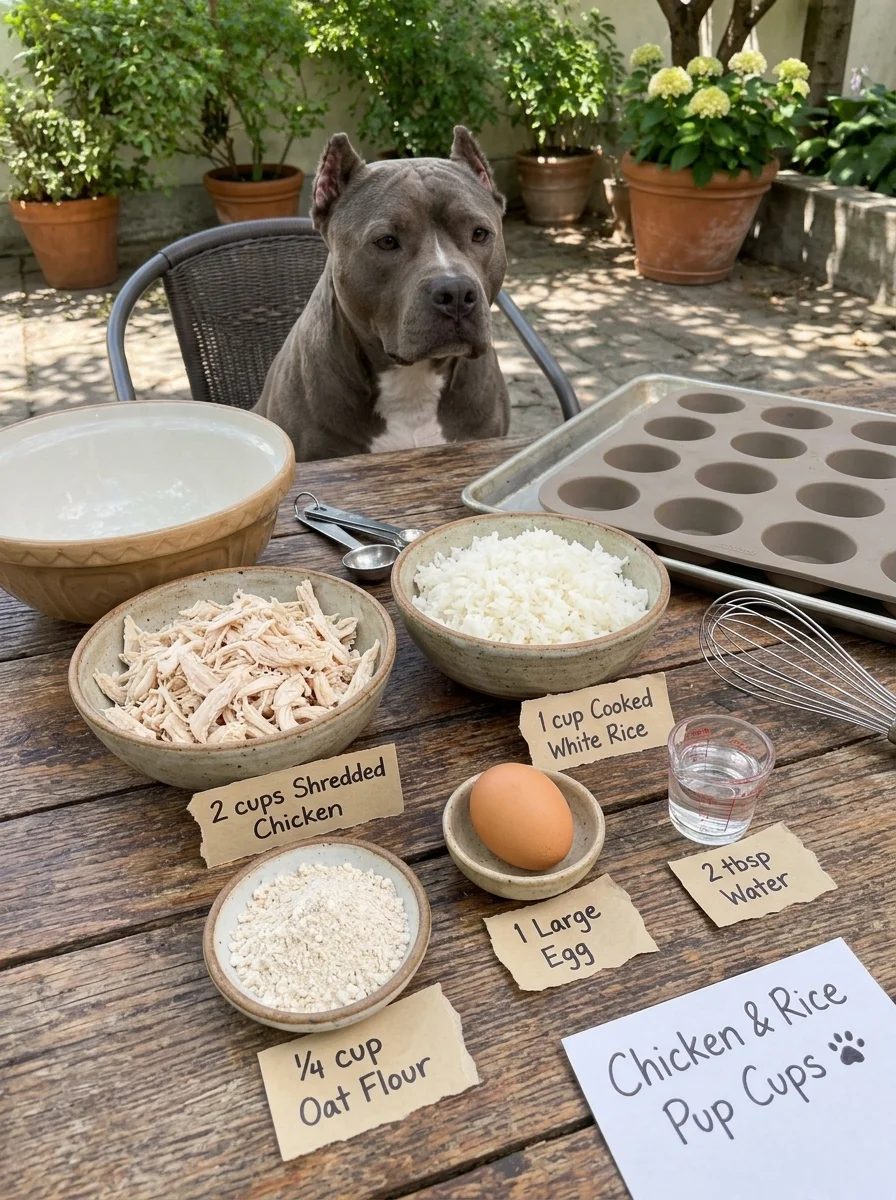
- 2 cups (280 g) plain cooked chicken, finely shredded, skin and bones removed
- 1 cup (160 g) plain cooked white rice
- 1 large egg
- ¼ cup (25 g) plain oat flour
- 2 tablespoons (30 ml) water
Starting from scratch: If you don’t have cooked chicken and rice, cook unseasoned chicken thoroughly to 165°F (74°C) and prepare plain white rice in water according to its package directions. Measure both after cooking, and allow extra time for the cooking and cooling.
Ingredient Notes
Cooked chicken. Use plain chicken with no salt, seasoning, marinade, onion, garlic, or sauce. Remove all skin and bones, since cooked bones can splinter and skin adds fat. Shred it finely and cut any long strands into short pieces so the mixture holds together and bakes evenly. Don’t use rotisserie chicken or leftovers from a seasoned meal, which often contain onion, garlic, or salt.
Cooked white rice. Plain white rice is soft and mild, and it helps bind the cups. Cook it in plain water with no salt, butter, or oil, and break up any clumps before mixing.
Egg. The egg binds the mixture so the cups hold together. It’s cooked fully during baking.
Oat flour. Plain oat flour absorbs moisture and helps set the cups. You can make your own by grinding plain rolled oats in a blender or food processor until fine.
Water. A small amount of water loosens the mixture so it blends evenly.
Substitutions and Variations
- Turkey instead of chicken: Plain, fully cooked, finely shredded turkey works in an equal amount, at the same 165°F (74°C) safe temperature.
- Brown rice: Plain cooked brown rice can replace white rice. Cook it until soft and break up any clumps.
- Pumpkin: Stir in 2 to 3 tablespoons of 100% pure pumpkin purée, not pie filling, for extra moisture and fiber. You may need an extra tablespoon of oat flour if the mixture feels loose.
- Finely grated carrot: A tablespoon or two of finely grated, cooked carrot adds color and a little extra texture.
- Regular muffin pan: A standard muffin pan makes larger cups. Fill them about two-thirds full, bake longer, and check that the centers reach 165°F (74°C).
Kitchen Equipment
- 24-cavity silicone mini muffin pan
- Baking sheet, to hold the silicone pan steady
- Mixing bowl and whisk
- Food thermometer
- Small spoon or cookie scoop
- Wire cooling rack
How to Make Chicken & Rice Pup Cups
Step 1: Preheat and Prep
Heat your oven to 350°F (175°C). Set a 24-cavity silicone mini muffin pan on a baking sheet. The baking sheet keeps the flexible pan from bending when you move it.
Step 2: Prep the Chicken and Rice
Finely shred the chicken, cutting any long strands into short pieces. Break up any clumps in the cooked rice so it mixes evenly.
Step 3: Mix
Whisk the egg and water together in a mixing bowl. Stir in the oat flour, chicken, and rice until evenly combined. Let the mixture stand for 5 minutes so the oat flour can absorb moisture and the mixture firms up slightly.
Step 4: Fill the Cups
Divide the mixture between the cavities, using about 1½ to 2 tablespoons per cup, depending on your pan. Press gently so the mixture holds together and fills each cavity evenly.
Step 5: Bake
Bake for 20 to 25 minutes, until the cups are set with lightly golden edges. Check several cups with a food thermometer. The centers should reach 165°F (74°C).
Step 6: Cool
Leave the cups in the pan for 5 minutes, then carefully release them onto a wire rack. Cool completely before serving, about 20 minutes.
Expert Tips for the Best Results
- Check the temperature in several cups. Ovens and pans vary, so test more than one rather than assuming they’re all done.
- Shred the chicken finely. Long strands keep the cups from holding together and make them crumbly.
- Let the mixture rest. The 5-minute stand time helps the oat flour absorb moisture and gives you cups that hold their shape.
- Press the mixture in gently. Light pressure helps the cups stay intact without making them dense.
- Use silicone for easy release. Silicone pans make it much easier to pop the cups out cleanly.
- Cool completely before serving. The cups firm up as they cool.
Common Mistakes to Avoid
Using seasoned chicken. Salt, onion, garlic, and sauces are unsafe or unsuitable for dogs. Start with plain, unseasoned chicken.
Skipping the temperature check. Golden edges alone don’t prove the centers are fully cooked. Check for 165°F (74°C).
Leaving clumps of rice or long strands of chicken. These make the cups fall apart when you release them from the pan.
Releasing the cups too soon. Give them 5 minutes in the pan first so they set.
Serving them warm. Cool them completely so they’re safe to eat and have their final texture.
Overfeeding. Even small treats add up. Keep all treats to about 10% of daily calories.
How to Serve
Break a cooled cup into pieces appropriate for your dog’s size. For small dogs, a cup may be several servings, and for larger dogs it may be a small treat or a training reward. Because these are occasional treats, serve them alongside your dog’s regular balanced diet rather than in place of it.
Make-Ahead Instructions
These are easy to make ahead. Bake a batch, cool it completely, and freeze most of it in portions so you can pull out just what you need. If you’re starting from scratch, cook the chicken and rice a day ahead and refrigerate them, then bake the cups when you’re ready.
Storage Instructions
Refrigerating
Store cooled cups in an airtight container in the refrigerator for up to 3 to 4 days.
Freezing
Freeze cooled cups in a single layer on a tray, then transfer them to a freezer-safe container or bag for up to 2 to 3 months. Freezing them separately first keeps them from sticking together.
Thawing and Serving
Thaw in the refrigerator rather than on the counter. Don’t refreeze thawed cups.
Frequently Asked Questions
Can I use raw chicken? This recipe is written for already-cooked chicken. Cook plain chicken thoroughly to 165°F (74°C) first, then shred it.
How long do these keep in the refrigerator? Up to 3 to 4 days in an airtight container.
Can I freeze them? Yes. Freeze cooled cups for up to 2 to 3 months and thaw them in the refrigerator.
Can I use brown rice? Yes, as long as it’s plain and cooked until soft.
What can I use instead of oat flour? Plain oat flour works best here. Check with your veterinarian before substituting other flours, especially if your dog has food sensitivities.
Why are my cups falling apart? Common causes are chicken that wasn’t shredded finely, clumps of rice, skipping the 5-minute rest, or releasing them from the pan before they’ve rested. Mixing the egg in well also helps.
How do I know they’re done? They should be set with lightly golden edges, and the centers should reach 165°F (74°C) on a food thermometer.
How many can I give my dog? It depends on your dog’s size, weight, and regular diet. A common guideline is to keep all treats combined within 10% of daily calories. Ask your veterinarian for guidance, especially for small dogs.
Final Recipe Summary
These Chicken & Rice Pup Cups turn plain cooked chicken and rice into soft, golden mini bites that are easy to portion and freeze. With just five ingredients and a quick bake, they make a simple occasional treat, but they aren’t a complete diet on their own. Keep treats to about 10% of your dog’s daily calories and serve them alongside regular balanced meals.
Print
Chicken & Rice Pup Cups
Description
Yield: About 24 mini cups
Prep Time: 15 minutes
Bake Time: 20–25 minutes
Cooling Time: 20 minutes
Total Time: 55–60 minutes, using already-cooked chicken and rice
Ingredients
- 2 cups (280 g) plain cooked chicken, finely shredded, skin and bones removed
- 1 cup (160 g) plain cooked white rice
- 1 large egg
- ¼ cup (25 g) plain oat flour
- 2 tablespoons (30 ml) water
Instructions
Heat your oven to 350°F (175°C). Set a 24-cavity silicone mini muffin pan on a baking sheet. The baking sheet keeps the flexible pan from bending when you move it.
Finely shred the chicken, cutting any long strands into short pieces. Break up any clumps in the cooked rice so it mixes evenly.
Whisk the egg and water together in a mixing bowl. Stir in the oat flour, chicken, and rice until evenly combined. Let the mixture stand for 5 minutes so the oat flour can absorb moisture and the mixture firms up slightly.
Divide the mixture between the cavities, using about 1½ to 2 tablespoons per cup, depending on your pan. Press gently so the mixture holds together and fills each cavity evenly.
Bake for 20 to 25 minutes, until the cups are set with lightly golden edges. Check several cups with a food thermometer. The centers should reach 165°F (74°C).
Leave the cups in the pan for 5 minutes, then carefully release them onto a wire rack. Cool completely before serving, about 20 minutes.