
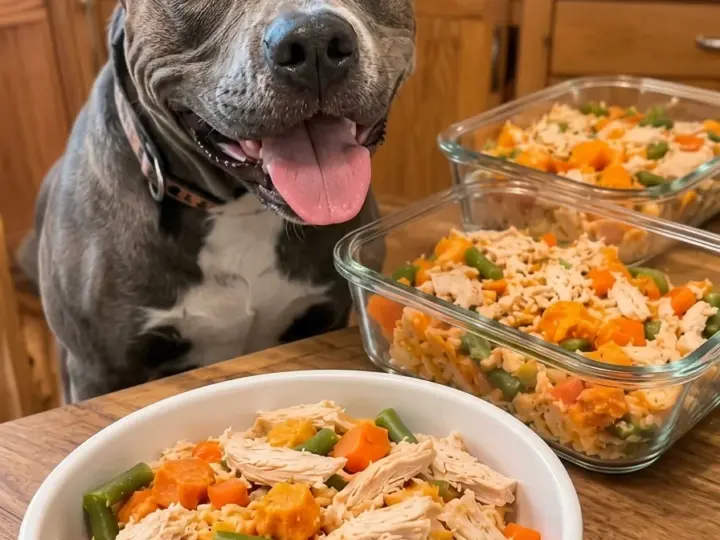
Chicken and Sweet Potato Dog Food Meal Prep is a simple way to cook a big batch of homemade dog food once and portion it out for the days and weeks ahead. Tender shredded chicken, soft sweet potatoes, fresh carrots, and green beans simmer together in one pot with no salt, onion, garlic, butter, or seasoning. The finished food is colorful, mild, and easy to portion, chill, and freeze.
This guide covers the batch recipe and the meal prep side of it: how to portion, label, refrigerate, freeze, and thaw so the food stays safe and convenient.
An important note before you start: this recipe works well as an occasional homemade meal or topper, but chicken, sweet potato, and vegetables alone aren’t nutritionally complete for long-term daily feeding. A regular homemade diet needs correctly balanced calcium, essential fatty acids, vitamins, minerals, and other nutrients this simple recipe doesn’t fully cover. If you’d like homemade food to replace your dog’s regular diet, have the recipe formulated for your individual dog by a veterinarian or veterinary nutritionist. Check with your veterinarian first if your dog has allergies, pancreatitis, kidney disease, diabetes, or any other health condition.
Why Meal Prep Works for Homemade Dog Food
- One cooking session, many meals. A single pot yields enough food to portion into servings for the week and the freezer.
- Consistent portions. Measuring servings into containers at the start makes it easier to keep amounts steady.
- Less daily effort. Pull a portion, thaw or warm it gently, and serve.
- Simple, plain ingredients. You control exactly what goes in, with no hidden onion, garlic, or excess sodium.
- Colorful and appealing. Orange sweet potato and carrots with green beans make a meal many dogs find inviting.
Ingredients for Chicken and Sweet Potato Dog Food Meal Prep
For the Batch
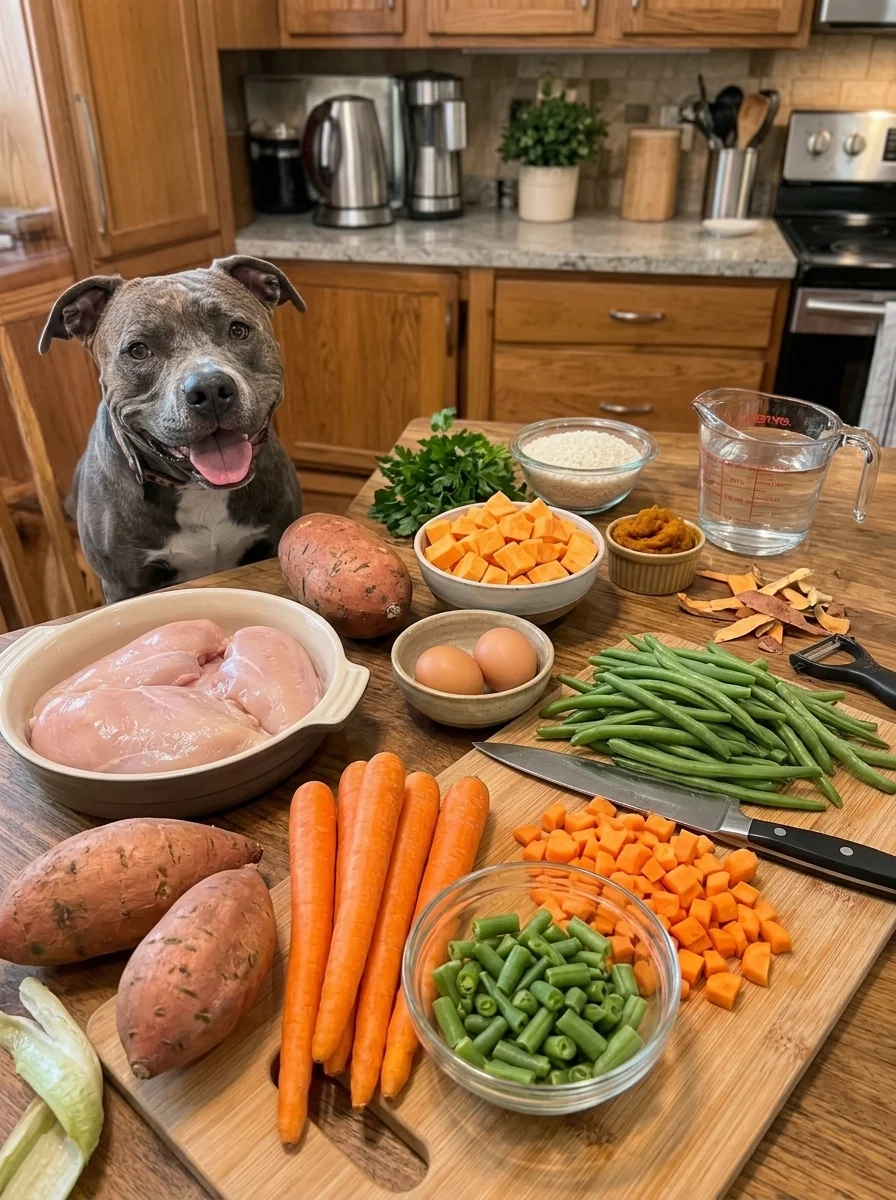
- 2 lbs (900 g) boneless, skinless chicken breast
- 3 large sweet potatoes (about 2 lbs), peeled and diced small
- 2 cups diced carrots, in small pieces
- 2 cups chopped green beans
- 6 to 8 cups water, plus more as needed
Optional Add-Ins
- ½ cup pumpkin purée (100% pure pumpkin)
- 1 cup cooked plain white or brown rice
- 2 tablespoons finely chopped fresh parsley
- 2 cooked eggs, finely chopped
- Fish oil, only if appropriate for your dog and dosed according to your veterinarian or the product directions
Ingredient Notes
Chicken breast. Use plain, boneless, skinless chicken with no seasoning, marinade, or broth. Never include cooked bones, which can splinter and cause serious injury. Lean breast meat keeps the fat content low, which is gentler on digestion.
Sweet potatoes. Peel them and dice small so they cook until completely soft. They add natural sweetness and fiber. Never serve raw sweet potato, and don’t add butter, salt, or sugar.
Carrots and green beans. Classic dog-friendly vegetables that add fiber and texture. Dice and chop them small so they cook through and are easy to chew.
Pumpkin purée, if using. Choose 100% pure pumpkin, not pumpkin pie filling, which contains sugar and spices that aren’t appropriate for dogs.
Water. Cooking in plain water keeps sodium low. Avoid store-bought chicken broth unless it’s labeled dog-safe, low in sodium, and free of onion and garlic, since many human broths contain onion or garlic powder.
Fish oil, if using. Only add it if it’s appropriate for your dog, and follow your veterinarian’s guidance or the product’s dosing instructions rather than guessing at an amount. If you do add it, stir it into individual portions at serving time rather than into the whole batch.
Substitutions and Variations
- Ground turkey instead of chicken: Plain, lean ground turkey works in an equal amount. Brown it with no oil or seasoning, drain the fat, and cook to 165°F (74°C).
- Add pumpkin: Stir in pumpkin purée for a smoother, softer texture.
- Add rice: Cooked plain rice makes the batch heartier and stretches it further.
- Swap some vegetables: Cooked zucchini can replace some of the green beans, in small amounts.
- Add peas: A half cup of peas, fresh or frozen, can go in with the green beans.
Kitchen Equipment
- Large stockpot with a lid
- Meat thermometer
- Two forks, for shredding the chicken
- Cutting board and vegetable peeler
- Large spoon or potato masher
- Shallow baking sheets, for fast cooling
- Airtight containers, freezer-safe bags, or silicone freezer trays, for portioning
- Masking tape and a marker, for labeling
How to Make Chicken and Sweet Potato Dog Food Meal Prep
Step 1: Cook the Chicken
Place the chicken breasts in a large stockpot and cover with about 6 cups of water. Bring to a gentle boil, reduce the heat, cover, and simmer for 20 to 25 minutes, until the chicken is white throughout with no pink inside and the thickest part reaches 165°F (74°C). Don’t add salt, oil, onion, garlic, or seasoning.
Step 2: Shred the Chicken
Transfer the chicken to a cutting board, keeping the cooking liquid in the pot. Let it cool just enough to handle, then shred it with two forks into small pieces, discarding any gristle or fat.
Step 3: Cook the Sweet Potatoes and Carrots
Add the diced sweet potatoes and carrots to the cooking liquid. Add water if needed so the vegetables are covered. Bring to a simmer, cover, and cook for 10 to 12 minutes, until fork-tender.
Step 4: Add the Green Beans
Stir in the green beans and simmer for 5 more minutes, until completely soft.
Step 5: Combine
Turn off the heat. Stir in the shredded chicken, along with any pumpkin, rice, or other add-ins. Lightly mash some of the sweet potato against the side of the pot for a more cohesive texture. If the mixture is too loose, simmer uncovered for a few minutes; if it’s too thick, stir in a little water.
Step 6: Cool Quickly
Spread the food in a thin layer on shallow baking sheets and let it cool until no longer warm to the touch. Cooling it quickly in thin layers, rather than leaving a deep pot on the counter, helps keep the food out of the temperature range where bacteria grow fastest.
Step 7: Portion
Divide the cooled food into individual servings sized for your dog, using airtight containers, freezer bags, or silicone freezer trays. For small dogs, mash or chop the vegetables more finely.
Step 8: Label and Store
Label each container with the date. Refrigerate the portions you’ll use within 3 to 4 days and freeze the rest.
Meal Prep Tips
- Decide portion sizes before you portion. Ask your veterinarian how much homemade food is appropriate for your dog, especially if it will replace more than a topper-sized serving of regular meals.
- Use flat freezer bags. Freezing portions flat saves space, freezes faster, and thaws more evenly.
- Try silicone trays for toppers. Frozen cubes or pucks are easy to pop out for small toppers.
- Label everything. A date on every container makes it easy to use the oldest portions first.
- Keep the batch plain. Add fish oil or other supplements to individual portions at serving time, if your veterinarian recommends them.
Expert Tips for the Best Results
- Confirm the chicken reaches 165°F (74°C). A meat thermometer is the most reliable way to be sure it’s cooked safely.
- Dice everything small and cook until very soft. Firm pieces are harder to digest and chew.
- Keep every component plain. No salt, butter, oil, onion, garlic, or seasoning should touch any part of this recipe.
- Cool fast and refrigerate promptly. Get portions into the refrigerator or freezer within an hour or two of cooking.
- Introduce it gradually. Mix a small amount into your dog’s regular food first, since a sudden change can upset the stomach.
Common Mistakes to Avoid
Adding seasoning, broth, or cooking fats. Onion, garlic, salt, and butter are unsafe or unsuitable for dogs. Stick to plain water and plain ingredients.
Including bones or skin. Cooked bones can splinter, and skin adds fat that can upset digestion.
Cooling the batch too slowly. A large, deep pot of warm food holds heat for a long time. Spread it out to cool.
Storing portions too long. Refrigerated portions are best within 3 to 4 days, so freeze extras on the day you cook.
Refreezing thawed food. Thaw only what you plan to serve, and don’t refreeze portions once thawed.
Using this as a complete long-term diet. This recipe isn’t nutritionally balanced for daily, long-term feeding. Use it as an occasional meal or topper unless a veterinary professional has formulated a complete recipe for your dog.
How to Serve
Serve a portion as an occasional dinner, or stir a few spoonfuls into your dog’s regular food as a topper. Let the food reach lukewarm or room temperature first, since hot food can burn your dog’s mouth.
Storage Instructions
Refrigerating
Store portions in airtight containers in the refrigerator for up to 3 to 4 days.
Freezing
Freeze portions in freezer-safe containers, bags, or silicone trays for up to 2 to 3 months. Leave a little room at the top of rigid containers for expansion.
Thawing
Thaw frozen portions overnight in the refrigerator, not on the counter. Use thawed food within about 24 hours and don’t refreeze it.
Reheating
Warm cold or thawed portions gently, stir well, and test the temperature before serving. The food should be lukewarm or room temperature, never hot.
Frequently Asked Questions
How long does homemade dog food last in the refrigerator? Up to 3 to 4 days in an airtight container. Freeze anything you won’t use in that window.
Can I freeze this meal prep dog food? Yes. Freeze individual portions for up to 2 to 3 months and thaw them in the refrigerator.
Can I feed my dog chicken and sweet potato every day? Not as written. It doesn’t provide all the nutrients dogs need over the long term, including balanced calcium, essential fatty acids, vitamins, and minerals. For regular homemade feeding, have a veterinarian or veterinary nutritionist formulate a complete recipe for your dog.
How much should I feed? It depends on your dog’s size, weight, activity level, and what else they eat. Ask your veterinarian for guidance before deciding on portion sizes.
Can I refreeze thawed portions? It’s best not to. Thaw only what you’ll serve and discard thawed food that isn’t eaten within about a day.
Can I use chicken thighs? You can, but thighs are fattier. Use boneless, skinless thighs and trim visible fat, or stick with breast if your dog is sensitive to rich foods.
Is sweet potato safe for dogs? Plain, fully cooked sweet potato is generally considered a safe, fiber-rich food for dogs in moderation. Serve it peeled and cooked until soft, with no butter, salt, or sugar. Never serve it raw.
Can I add broth for flavor? Only a dog-safe, low-sodium broth with no onion or garlic. Plain cooking water works well and is the safest choice.
Final Recipe Summary
This Chicken and Sweet Potato Dog Food Meal Prep turns plain chicken, sweet potatoes, carrots, and green beans into a big, colorful batch you can portion, chill, and freeze. Cook it once, cool it quickly, label each portion, and thaw only what you need. Because it isn’t nutritionally complete on its own, work with a veterinarian or veterinary nutritionist if you’d like to feed homemade food regularly.
Print
Chicken and Sweet Potato Dog Food Meal Prep
Description
Prep Time: 20 minutes
Cook Time: 45–50 minutes
Total Time: Approximately 1 hour 10 minutes, plus cooling and portioning
Yield: Approximately 12–14 cups, depending on how much liquid you use
Ingredients
For the Batch
- 2 lbs (900 g) boneless, skinless chicken breast
- 3 large sweet potatoes (about 2 lbs), peeled and diced small
- 2 cups diced carrots, in small pieces
- 2 cups chopped green beans
- 6 to 8 cups water, plus more as needed
Optional Add-Ins
- ½ cup pumpkin purée (100% pure pumpkin)
- 1 cup cooked plain white or brown rice
- 2 tablespoons finely chopped fresh parsley
- 2 cooked eggs, finely chopped
- Fish oil, only if appropriate for your dog and dosed according to your veterinarian or the product directions
Instructions
Place the chicken breasts in a large stockpot and cover with about 6 cups of water. Bring to a gentle boil, reduce the heat, cover, and simmer for 20 to 25 minutes, until the chicken is white throughout with no pink inside and the thickest part reaches 165°F (74°C). Don’t add salt, oil, onion, garlic, or seasoning.
Transfer the chicken to a cutting board, keeping the cooking liquid in the pot. Let it cool just enough to handle, then shred it with two forks into small pieces, discarding any gristle or fat.
Add the diced sweet potatoes and carrots to the cooking liquid. Add water if needed so the vegetables are covered. Bring to a simmer, cover, and cook for 10 to 12 minutes, until fork-tender.
Stir in the green beans and simmer for 5 more minutes, until completely soft.
Turn off the heat. Stir in the shredded chicken, along with any pumpkin, rice, or other add-ins. Lightly mash some of the sweet potato against the side of the pot for a more cohesive texture. If the mixture is too loose, simmer uncovered for a few minutes; if it’s too thick, stir in a little water.
Spread the food in a thin layer on shallow baking sheets and let it cool until no longer warm to the touch. Cooling it quickly in thin layers, rather than leaving a deep pot on the counter, helps keep the food out of the temperature range where bacteria grow fastest.
Divide the cooled food into individual servings sized for your dog, using airtight containers, freezer bags, or silicone freezer trays. For small dogs, mash or chop the vegetables more finely.
Label each container with the date. Refrigerate the portions you’ll use within 3 to 4 days and freeze the rest.