
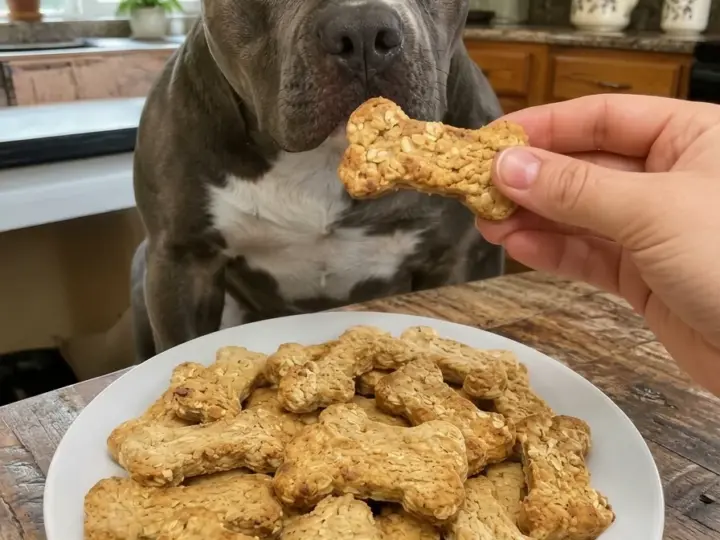
Banana & Oat Dog Biscuits are a simple, crunchy homemade treat made with just a handful of plain ingredients: ripe banana, oats, and an egg. The banana provides all the sweetness, so there’s no added sugar, and the oats give the biscuits a hearty, wholesome crunch. With no wheat flour, peanut butter, or salt, they’re also an easy recipe to adapt for dogs with sensitivities.
Below you’ll find the full recipe along with tips for getting the dough and the crunch right, plus storage guidance.
A quick but important note before you start: homemade treats like these should only make up a small part of your dog’s overall diet. Every dog has different nutritional needs and sensitivities, so if your dog has allergies, diabetes, digestive issues, or any other health condition, check with your veterinarian before introducing a new treat.
Why Your Dog Will Love This Recipe
- Naturally sweet. Ripe banana adds flavor without any added sugar.
- Simple ingredients. Banana, oats, egg, and a little water, with nothing hidden or processed.
- Satisfying crunch. A low, slow finish in the cooling oven dries the biscuits for a firm bite.
- Wheat-free. Made with oats instead of wheat flour.
- Freezer-friendly. Bake a batch and keep the treat jar stocked.
Ingredients for Banana & Oat Dog Biscuits
- 1 large ripe banana, mashed (about ½ cup)
- 1 large egg
- 2 cups plain oat flour (made from about 2⅓ cups old-fashioned rolled oats), plus more for rolling
- ½ cup old-fashioned rolled oats, for texture
- 1 to 3 tablespoons water, if needed
Optional Add-Ins
- ¼ teaspoon ground cinnamon
- 1 tablespoon ground flaxseed
- 2 tablespoons unsweetened applesauce
Ingredient Notes
Ripe banana. A banana with plenty of brown spots is sweeter, mashes smoothly, and helps bind the dough. Bananas are generally considered a dog-safe fruit in moderation. An underripe banana will be less sweet and harder to mash.
Egg. The egg binds the dough and adds a little protein. It’s baked until fully cooked.
Oat flour. To make your own, grind plain old-fashioned rolled oats in a blender or food processor until they’re a fine powder. Oats are gentle and easy to digest for most dogs.
Whole rolled oats. A handful of whole oats adds texture and a rustic look to the finished biscuits.
Cinnamon, if using. A small amount of cinnamon is generally considered safe for dogs and adds a warm flavor, but it’s entirely optional.
Substitutions and Variations
- Whole-wheat flour: If your dog tolerates wheat, you can replace some of the oat flour with whole-wheat flour for a slightly firmer dough.
- Pumpkin: Replace half of the banana with 100% pure pumpkin purée, not pie filling.
- Sweet potato: Plain, cooked, mashed sweet potato can replace the applesauce or part of the banana.
- Peanut butter: For a banana-peanut butter version, add 2 tablespoons of peanut butter that contains no xylitol (sometimes listed as “birch sugar”), which is highly toxic to dogs. Always read the label.
- Egg-free: Replace the egg with 2 tablespoons of unsweetened applesauce, though the dough will be softer and the biscuits less firm.
Kitchen Equipment
- Baking sheet
- Parchment paper
- Food processor or blender, for making oat flour
- Large mixing bowl
- Fork or potato masher
- Rolling pin
- Bone-shaped or other cookie cutters
- Wire cooling rack
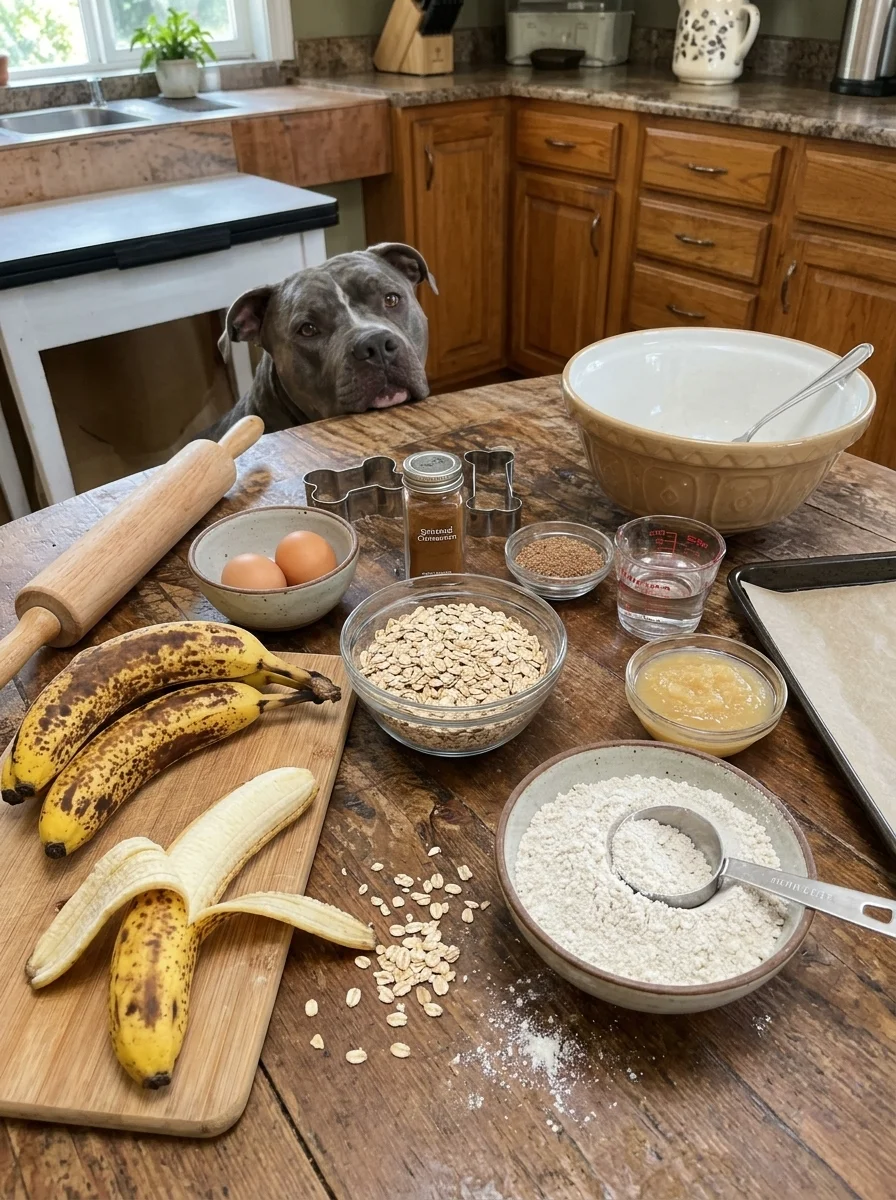
How to Make Banana & Oat Dog Biscuits
Step 1: Preheat and Prep
Preheat the oven to 350°F (175°C) and line a baking sheet with parchment paper.
Step 2: Make the Oat Flour
Grind the rolled oats in a food processor or blender until they form a fine flour. Measure out 2 cups.
Step 3: Mix the Wet Ingredients
In a large bowl, mash the banana until smooth. Stir in the egg, and the optional cinnamon, flaxseed, or applesauce.
Step 4: Make the Dough
Add the oat flour and the whole rolled oats. Mix until a soft, workable dough forms. If it’s too dry or crumbly, add water a tablespoon at a time. If it’s too sticky to roll, work in a little more oat flour. Oat dough is softer than wheat dough, so a short rest of 5 minutes can help it firm up.
Step 5: Roll and Cut
Roll the dough out on a lightly floured surface to about ¼ inch (6 mm) thick. Cut into bone shapes or other shapes and place them on the prepared baking sheet.
Step 6: Bake
Bake for 20 to 25 minutes, until the biscuits are firm and lightly golden around the edges.
Step 7: Crisp in the Oven
For extra-crunchy biscuits, turn off the oven and leave the biscuits inside for 20 to 30 minutes as it cools.
Step 8: Cool Completely
Transfer the biscuits to a wire rack and let them cool completely before serving or storing.
Expert Tips for the Best Results
- Use a very ripe banana. It brings the most sweetness and binds the dough best.
- Grind the oat flour fine. Fine flour makes a smoother, easier-to-roll dough.
- Let the dough rest. A few minutes lets the oats absorb moisture and makes the dough less sticky.
- Roll to an even thickness. Consistent thickness helps the biscuits bake evenly.
- Use the oven-off drying step. It’s the easiest way to a crunchy biscuit without over-browning.
- Cool fully before storing. Warm biscuits trap steam, which softens them.
Common Mistakes to Avoid
Using an underripe banana. It’s less sweet and harder to mash, which affects flavor and texture.
Adding too much water. Oat dough turns sticky quickly. Add water a tablespoon at a time.
Rolling the dough too thin. Very thin biscuits can over-brown and become brittle.
Storing them while warm. Moisture will soften the biscuits and shorten their shelf life.
Using peanut butter that contains xylitol. If you add peanut butter, check the label carefully. Xylitol is dangerous for dogs.
Giving too many. Treats should stay a small part of your dog’s daily intake.
How to Serve
Give a biscuit as an occasional treat, or break one into smaller pieces as a training reward. Cut larger shapes for bigger dogs and smaller ones for small breeds. Supervise your dog the first time they try a new treat.
Make-Ahead Instructions
The dough is best baked right after mixing, but the baked biscuits keep well. Bake a batch at the start of the week and freeze extras for later.
Storage Instructions
Room Temperature or Refrigerating
Store fully cooled biscuits in an airtight container at room temperature for up to 1 week, or in the refrigerator for slightly longer freshness.
Freezing
Freeze biscuits in a freezer-safe container or bag for up to 3 months. Thaw at room temperature before serving.
Re-crisping
If a batch softens in storage, warm it in a 300°F (150°C) oven for a few minutes and let it cool again.
Frequently Asked Questions
Can dogs eat bananas? Yes, in moderation. Ripe banana is generally considered a safe, naturally sweet treat for most dogs, but it’s best as a small part of the diet.
Are oats safe for dogs? Plain oats are generally considered safe for most dogs. Dogs with grain sensitivities or other health conditions should be checked with a veterinarian first.
How long do these keep? About 1 week in an airtight container at room temperature, or up to 3 months in the freezer.
Why is my dough too sticky? Oat dough is naturally softer than wheat dough. Let it rest 5 minutes and work in a little more oat flour.
Why aren’t my biscuits crunchy? They likely need more time in the oven. Use the oven-off drying step, or bake a few minutes longer.
Can I make these without egg? Yes, using applesauce in place of the egg, though the biscuits will be softer.
Can I use instant or quick oats? Old-fashioned rolled oats are best. Quick oats can work for the oat flour, but the texture may be slightly different.
How many can I give my dog? Keep treats to a small part of your dog’s daily intake, and ask your veterinarian for guidance, especially for small dogs.
Final Recipe Summary
These Banana & Oat Dog Biscuits combine ripe banana, oat flour, and an egg into a simple, wheat-free, naturally sweet treat. A quick roll-and-cut and an oven-off drying step give them a satisfying crunch, and they store well for the treat jar. Serve them as an occasional reward alongside your dog’s regular balanced diet.
Print
Banana & Oat Dog Biscuits
Description
Prep Time: 15–20 minutes
Bake Time: 20–25 minutes (plus an optional 20–30 minutes of oven-off drying for extra crunch)
Total Time: Approximately 40 minutes to 1 hour 15 minutes
Yield: Varies by cutter size; typically 20–30 biscuits
Ingredients
- 1 large ripe banana, mashed (about ½ cup)
- 1 large egg
- 2 cups plain oat flour (made from about 2⅓ cups old-fashioned rolled oats), plus more for rolling
- ½ cup old-fashioned rolled oats, for texture
- 1 to 3 tablespoons water, if needed
Optional Add-Ins
- ¼ teaspoon ground cinnamon
- 1 tablespoon ground flaxseed
- 2 tablespoons unsweetened applesauce
Instructions
Preheat the oven to 350°F (175°C) and line a baking sheet with parchment paper.
Grind the rolled oats in a food processor or blender until they form a fine flour. Measure out 2 cups.
In a large bowl, mash the banana until smooth. Stir in the egg, and the optional cinnamon, flaxseed, or applesauce.
Add the oat flour and the whole rolled oats. Mix until a soft, workable dough forms. If it’s too dry or crumbly, add water a tablespoon at a time. If it’s too sticky to roll, work in a little more oat flour. Oat dough is softer than wheat dough, so a short rest of 5 minutes can help it firm up.
Roll the dough out on a lightly floured surface to about ¼ inch (6 mm) thick. Cut into bone shapes or other shapes and place them on the prepared baking sheet.
Bake for 20 to 25 minutes, until the biscuits are firm and lightly golden around the edges.
For extra-crunchy biscuits, turn off the oven and leave the biscuits inside for 20 to 30 minutes as it cools.
Transfer the biscuits to a wire rack and let them cool completely before serving or storing.