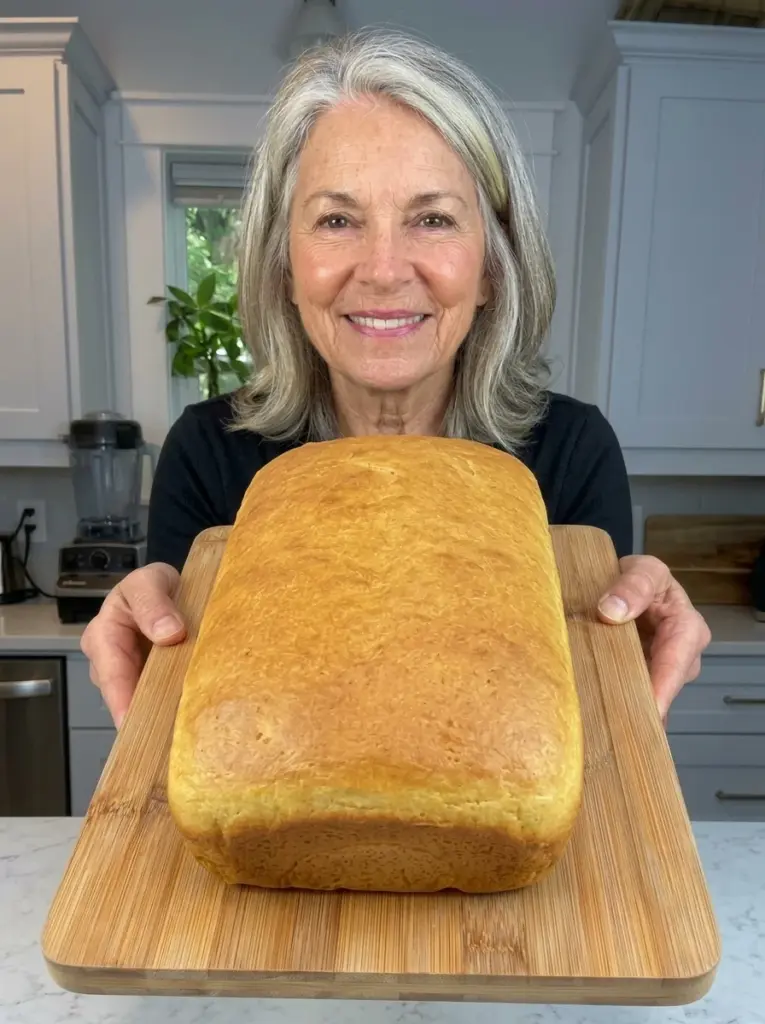
This 3-Ingredient High-Protein Lima Bean Bread is soft, hearty, satisfying, and surprisingly simple to make. 🫘🍞💪✨ Made with creamy lima beans, eggs, and baking powder, this flourless homemade loaf has a tender texture and mild flavor that works beautifully for toast, breakfast, sandwiches, or an easy protein-rich snack.
If you’ve never thought about turning lima beans into bread, this easy recipe is a creative way to transform a simple pantry staple into a versatile homemade loaf. The beans blend into a completely smooth batter with the eggs, creating the base of the bread without traditional flour or yeast.
The preparation couldn’t be much easier. Everything goes into a blender or food processor, gets blended until creamy, and then goes straight into a loaf pan. There’s no kneading, rising, or complicated dough to handle.
Once baked and fully cooled, the loaf can be sliced and enjoyed with both savory and simple toppings. Toast a slice and add avocado or cream cheese, pair it with eggs for breakfast, or use it as the base for your favorite sandwich fillings.
Why You’ll Love This High-Protein Lima Bean Bread
This simple three-ingredient loaf has plenty to love:
Only three ingredients. All you need are cooked lima beans, eggs, and baking powder.
Naturally flourless. There’s no wheat flour in the recipe.
Protein-rich ingredients. Both lima beans and eggs naturally contribute protein to the loaf.
No yeast required. Baking powder provides the leavening, so there’s no proofing or rising time.
No kneading. The batter is made entirely in a blender or food processor.
Easy meal-prep option. Make one loaf, slice it, and keep the portions refrigerated or frozen for later.
Mild and versatile. Its simple flavor makes it suitable for breakfast, toast, snacks, and savory sandwich toppings.
Freezer-friendly. Individual slices can be frozen for up to two months.
Ingredients You’ll Need
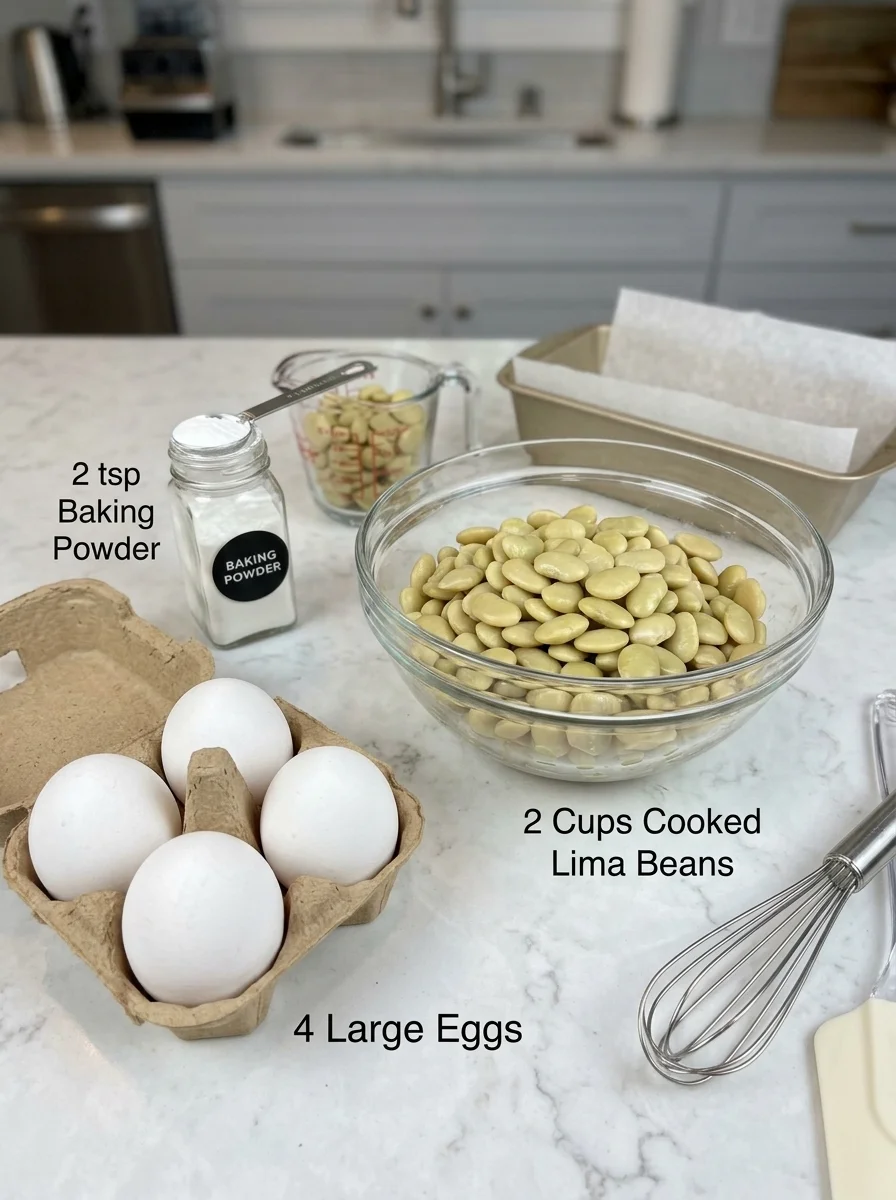
You only need three simple ingredients to prepare this easy lima bean bread.
- 2 cups cooked lima beans, drained and rinsed — Create the creamy, hearty base of the bread while naturally providing protein and fiber. Drain them thoroughly before measuring.
- 4 large eggs — Add protein, moisture, richness, and structure, helping the loaf hold together as it bakes.
- 2 tsp baking powder — Provides leavening and helps the bread rise and develop a lighter texture in the oven.
That’s it—no flour, yeast, or kneading required.
How to Make 3-Ingredient High-Protein Lima Bean Bread
The entire batter comes together in a blender or food processor in just a few minutes.
Step 1: Prepare the Oven and Loaf Pan
Preheat your oven to 350°F (175°C).
Line an 8×4-inch loaf pan with parchment paper and lightly grease the sides.
The parchment will make it much easier to lift the finished loaf from the pan.
Step 2: Add the Ingredients to a Blender
Place the drained and rinsed cooked lima beans into a high-speed blender or food processor.
Add the four eggs and baking powder.
Step 3: Blend Until Completely Smooth
Blend the ingredients for approximately 1–2 minutes.
Stop and scrape down the sides as needed to make sure all the beans are incorporated.
Continue blending until the batter looks very smooth and creamy with no large pieces of lima bean remaining.
Step 4: Fill the Loaf Pan
Pour the smooth batter into your prepared loaf pan.
Use a spatula to gently smooth the surface into an even layer.
Step 5: Bake the Bread
Transfer the loaf pan to the preheated oven.
Bake for 35–45 minutes, or until the center feels firm and a toothpick inserted into the middle comes out mostly clean.
The exact baking time can vary slightly depending on your oven and loaf pan.
Step 6: Cool in the Pan
Remove the bread from the oven and allow it to cool in the loaf pan for 10–15 minutes.
This gives the freshly baked loaf a little time to set before you remove it.
Step 7: Cool Completely
Carefully lift or turn the loaf out of the pan and transfer it to a wire rack.
Allow it to cool completely before slicing.
This step is particularly important for a bean-based loaf because cooling allows the interior texture to fully set and helps you achieve cleaner slices.
Step 8: Slice and Serve
Once completely cooled, cut the loaf into 8–10 slices.
Enjoy as-is or toast individual slices before adding your favorite toppings.
How to Serve High-Protein Lima Bean Bread
The mild flavor makes this bread easy to pair with different toppings and fillings. Try it:
- Toasted with butter — Keep things simple with a warm toasted slice and butter.
- With avocado — Top toasted bread with mashed or sliced avocado for a savory breakfast.
- With cream cheese — Spread cream cheese over a toasted slice for a creamy contrast.
- With eggs — Serve alongside scrambled, fried, or poached eggs for a protein-rich breakfast.
- As sandwich bread — Use slices with turkey, chicken, cheese, vegetables, or your favorite sandwich fillings.
- As breakfast toast — Toast a slice and pair it with your favorite breakfast toppings.
- With savory spreads — The bread’s mild flavor makes it a useful base for flavorful spreads and dips.
- As an easy snack — Reheat or toast a slice whenever you need something quick and satisfying.
Tips for the Best Lima Bean Bread
Drain the lima beans thoroughly. Excess liquid can make the batter wetter than intended.
Rinse canned beans before using. If you’re using canned cooked lima beans, drain and rinse them before measuring.
Blend until completely smooth. Thorough blending is important for achieving an even bread-like texture without noticeable bean pieces.
Scrape down the blender as needed. This ensures all the beans are incorporated into the batter.
Use the correct loaf-pan size. An 8×4-inch loaf pan helps create the intended loaf shape and thickness.
Check the center before removing it from the oven. The middle should feel firm and a toothpick should come out mostly clean.
Don’t slice it while hot. The interior continues setting as the bread cools.
Cool completely for cleaner slices. This is one of the most important steps for getting the best texture from this flourless loaf.
Toast refrigerated slices. Toasting is a great way to refresh the texture after storage.
Freeze it already sliced. This allows you to remove and reheat only the amount you need.
Storage Information
Allow the 3-Ingredient High-Protein Lima Bean Bread to cool completely before storing.
Transfer it to an airtight container and refrigerate for up to 5 days.
For longer storage, slice the loaf first and place pieces of parchment paper between the slices to prevent them from sticking together.
Store the slices in a freezer-safe container or bag and freeze for up to 2 months.
Individual slices can be thawed before serving or reheated and toasted from frozen.
Frequently Asked Questions
Does lima bean bread taste strongly like beans?
Lima beans have a relatively mild flavor, and blending them with eggs creates a simple loaf that works well with a variety of savory toppings. It won’t have the same flavor or texture as traditional wheat bread, however.
Is this bread really made with only three ingredients?
Yes. The recipe uses cooked lima beans, eggs, and baking powder.
Does this recipe contain flour?
No. This particular recipe doesn’t use traditional flour.
Do I need yeast?
No. Baking powder provides the leavening, so there’s no yeast or proofing time required.
Can I use canned lima beans?
Cooked canned lima beans can be used. Drain and rinse them thoroughly before measuring.
Why do the beans need to be blended?
Blending breaks down the lima beans and combines them with the eggs to create a smooth batter. This prevents large bean pieces from remaining in the finished loaf.
Why does the bread need to cool completely?
The interior is still setting immediately after baking. Allowing the loaf to cool completely creates a firmer texture and makes it much easier to cut into clean slices.
Can I toast lima bean bread?
Yes. Toasting individual slices is a great way to serve the bread, especially after it has been refrigerated.
Can I use it for sandwiches?
Yes. Once completely cooled and sliced, the bread can be paired with your favorite sandwich fillings.
Is this the same texture as traditional sandwich bread?
No. Because this is a flourless bread based primarily on lima beans and eggs, expect a softer, more tender texture than a traditional yeast-based wheat loaf.
Can I freeze this bread?
Yes. Slice the cooled loaf, place parchment between the slices, and freeze for up to 2 months.
Recipe Card
Prep Time: 10 minutes
Cook Time: 40 minutes
Total Time: 50 minutes
Servings: 10 slices
Calories: ~115 per slice
This 3-Ingredient High-Protein Lima Bean Bread proves that homemade bread doesn’t have to involve a long ingredient list, kneading, yeast, or rising time. With just cooked lima beans, eggs, and baking powder, you can create a soft, hearty flourless loaf that’s easy to prepare in a blender.
Let the loaf cool completely for the best slicing texture, then enjoy it toasted with butter, avocado, cream cheese, or eggs, or use the slices with your favorite sandwich fillings. Keep extras refrigerated for quick meals throughout the week or freeze individual slices for an easy grab-and-toast option.
Print
3-Ingredient High-Protein Lima Bean Bread
- Total Time: 50 minutes
Ingredients
You only need three simple ingredients to prepare this easy lima bean bread.
- 2 cups cooked lima beans, drained and rinsed — Create the creamy, hearty base of the bread while naturally providing protein and fiber. Drain them thoroughly before measuring.
- 4 large eggs — Add protein, moisture, richness, and structure, helping the loaf hold together as it bakes.
- 2 tsp baking powder — Provides leavening and helps the bread rise and develop a lighter texture in the oven.
That’s it—no flour, yeast, or kneading required.
Instructions
The entire batter comes together in a blender or food processor in just a few minutes.
Step 1: Prepare the Oven and Loaf Pan
Preheat your oven to 350°F (175°C).
Line an 8×4-inch loaf pan with parchment paper and lightly grease the sides.
The parchment will make it much easier to lift the finished loaf from the pan.
Step 2: Add the Ingredients to a Blender
Place the drained and rinsed cooked lima beans into a high-speed blender or food processor.
Add the four eggs and baking powder.
Step 3: Blend Until Completely Smooth
Blend the ingredients for approximately 1–2 minutes.
Stop and scrape down the sides as needed to make sure all the beans are incorporated.
Continue blending until the batter looks very smooth and creamy with no large pieces of lima bean remaining.
Step 4: Fill the Loaf Pan
Pour the smooth batter into your prepared loaf pan.
Use a spatula to gently smooth the surface into an even layer.
Step 5: Bake the Bread
Transfer the loaf pan to the preheated oven.
Bake for 35–45 minutes, or until the center feels firm and a toothpick inserted into the middle comes out mostly clean.
The exact baking time can vary slightly depending on your oven and loaf pan.
Step 6: Cool in the Pan
Remove the bread from the oven and allow it to cool in the loaf pan for 10–15 minutes.
This gives the freshly baked loaf a little time to set before you remove it.
Step 7: Cool Completely
Carefully lift or turn the loaf out of the pan and transfer it to a wire rack.
Allow it to cool completely before slicing.
This step is particularly important for a bean-based loaf because cooling allows the interior texture to fully set and helps you achieve cleaner slices.
Step 8: Slice and Serve
Once completely cooled, cut the loaf into 8–10 slices.
Enjoy as-is or toast individual slices before adding your favorite toppings.
- Prep Time: 10 minutes
- Cook Time: 40 minutes
Nutrition
- Serving Size: 10 slices
- Calories: 115 per slice