Ingredients
- 100 g active sourdough starter
- 500 g bread flour
- 350 g filtered water, room temperature
- 10 g fine sea salt
Optional for Finishing
- A little flour, for dusting
- Melted butter, for brushing after baking, if you prefer a softer crust
Ingredient Notes
Sourdough starter. Your starter should be active and bubbly, ideally near its peak rise, when you use it. A sluggish or underfed starter will slow fermentation significantly and can result in a denser loaf. If you’re unsure whether your starter is ready, try the float test: drop a small spoonful into a glass of water — if it floats, it’s active enough to bake with.
Bread flour. Bread flour’s higher protein content compared to all-purpose flour helps this dough build the strong gluten network needed to hold its shape as a long, freestanding loaf rather than spreading out flat.
Filtered water. Using filtered or dechlorinated water can help support a more active fermentation, since heavily chlorinated tap water can sometimes slow down the beneficial bacteria and wild yeast in your starter. Room-temperature water is ideal for a steady, predictable ferment.
Fine sea salt. Salt does more than season the bread — it also strengthens the dough’s gluten structure and helps regulate fermentation speed, preventing the dough from over-fermenting too quickly.
This recipe is calculated at roughly 70% hydration (the ratio of water to flour), which is a fairly high hydration level well suited to an open, airy crumb, though it does make the dough feel a bit stickier to handle than a lower-hydration loaf.
Instructions
This recipe follows a classic no-knead sourdough method built around stretch-and-folds rather than traditional kneading, which develops strength in the dough gradually while preserving its airy structure.
Add the active sourdough starter and water to a large mixing bowl, and stir until the starter is mostly dispersed throughout the water. Add the bread flour and mix until no dry flour remains. Cover the bowl and let the dough rest for approximately 30 to 45 minutes. This resting period, often called an autolyse, allows the flour to fully hydrate, which makes the dough easier to work with in the next step.
Sprinkle the salt over the rested dough and work it in thoroughly using damp hands. The dough may feel slightly sticky at first — that’s completely normal at this stage, especially given the dough’s fairly high hydration.
During the first two hours of bulk fermentation, perform 3 to 4 sets of stretch-and-folds, spaced about 30 minutes apart. For each set, gently grab one side of the dough, stretch it upward, and fold it over itself, then rotate the bowl and repeat around the dough. This technique builds gluten strength gently, without the aggressive kneading a lower-hydration dough would need. As the folds continue, you’ll notice the dough gradually becoming smoother, stronger, and more elastic.
Cover the bowl and let the dough continue fermenting at room temperature. Rather than relying entirely on the clock, watch the dough itself. You’re looking for dough that has become noticeably puffier, developed visible bubbles at the surface and edges, increased substantially in volume, turned smoother and slightly domed on top, and feels light and airy when gently handled. Fermentation time will vary quite a bit depending on your kitchen’s temperature and how active your starter is, so be patient and let the dough’s appearance guide you.
Turn the fermented dough gently onto a lightly floured work surface and divide it into 2 equal portions, using a bench scraper for clean cuts. Handle the dough carefully to avoid aggressively pressing out all the fermentation gases you worked to build. Gently pre-shape each portion into a loose rectangle or short log, then let the dough rest for approximately 15 to 20 minutes. This short rest, called a bench rest, relaxes the gluten and makes final shaping much easier.
Working with one piece at a time, gently stretch the dough into a rectangle. Fold the upper third toward the center and press the seam gently, then fold the bottom portion upward and seal it. Carefully roll the dough into a long loaf, approximately 12 to 14 inches long, then repeat with the second piece. The goal throughout shaping is to build enough surface tension for the loaves to hold their long, slender shape in the oven, without squeezing out all the air you’ve developed inside.
Place both shaped loaves seam-side down on parchment paper or a lightly floured baker’s couche. Cover them loosely and let them proof until they look noticeably puffier and feel light to the touch. If you’d like to develop deeper sourdough flavor, you can refrigerate the shaped loaves for a longer cold proof instead of proofing them at room temperature — just plan for a longer overall timeline.
Preheat the oven to 450°F (230°C), and place a baking stone, baking steel, or heavy baking sheet inside while the oven heats, giving it plenty of time to get fully hot. Just before baking, dust the loaves lightly with flour if you’d like. Using a bread lame or a very sharp razor, make 3 to 4 diagonal slashes across each loaf, allowing the cuts to slightly overlap along the length of the bread. Scoring controls exactly where the dough expands in the oven, giving you those classic French-loaf slashes as the bread rises.
Carefully transfer the loaves to the hot baking surface. Add steam at the beginning of baking using your preferred method — such as a pan of hot water on a lower oven rack, spritzing the oven walls with water, or covering the loaves briefly with an inverted pan. Steam helps keep the crust flexible during the initial oven spring, before it sets into that beautiful crisp exterior. Bake for approximately 20 to 25 minutes, until the loaves develop a deep golden-brown crust. For a darker, crispier crust, let them bake a few minutes longer. Transfer the finished loaves to a wire cooling rack.
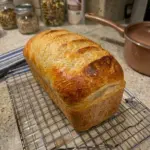
This is the hardest part: try not to slice into the bread right away. Let it cool fully so the crumb has time to finish setting. Once cooled, slice through the crisp golden crust to reveal the soft, chewy sourdough crumb underneath.
- Prep Time: 45–60 minutes (active)
- Cook Time: 20–25 minutes