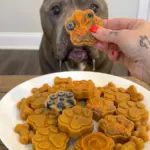
Ingredients
Base Ingredients
- 1 cup plain unsweetened Greek yogurt – Adds protein, calcium, and gut-friendly probiotics.
- ½ cup pumpkin purée (100% pure pumpkin) – Supports digestion and adds fiber and beta-carotene.
- 1 ripe banana – Contributes natural sweetness, potassium, and a smooth texture.
- 1 tbsp natural peanut butter (xylitol-free) – Adds a flavor dogs can’t resist. Always double-check the label for xylitol.
Optional Add-Ins
Customize your pupsicles with any of these dog-safe extras:
- 1 tbsp ground flaxseed – A source of omega-3 fatty acids that may support skin and coat health.
- 2 tbsp unsweetened applesauce – Adds moisture and a touch of natural sweetness.
- ¼ cup blueberries – Adds antioxidants and a burst of natural sweetness.
- 2 tbsp finely shredded carrots – Adds crunch, fiber, and beta-carotene.
- 2 tbsp unsweetened coconut water – Adds hydration and electrolytes, perfect for extra-hot days.
Instructions
This recipe is simple enough to whip up in just a few minutes of hands-on prep time.
Add the Greek yogurt, pumpkin purée, banana, and peanut butter to a blender or food processor.
Blend the mixture until it’s completely smooth and creamy, with no lumps of banana or pumpkin remaining.
If you’re using any optional add-ins, such as flaxseed, applesauce, blueberries, shredded carrots, or coconut water, gently stir them into the blended mixture by hand. This helps evenly distribute chunkier ingredients like blueberries or carrots throughout the mixture.
Pour the mixture into silicone paw-print molds, bone-shaped molds, or pet-safe popsicle molds, depending on what you have available and the treat size you’d like to make.
Tap the filled molds gently on the counter a few times to release any trapped air bubbles. This results in a smoother, more solid finished pupsicle.
Place the molds in the freezer and freeze for 4–6 hours, or until the pupsicles are completely firm all the way through.
Once frozen, remove the treats from their molds and transfer them to an airtight, freezer-safe container to maintain freshness and prevent freezer burn.
Serve one pupsicle as a refreshing reward on warm days, after a walk, or any time your pup deserves something special.