Picture this: the rich aroma of crushed chocolate cookies wafts through your kitchen, teasing your senses and setting the stage for something truly delightful. You squeeze the last drop of vanilla into a bowl, the familiar scent instantly enveloping your space, enhancing the anticipation of the treat to come. As you whisk the smooth, decadent cream cheese into a dreamy mixture, you can almost taste the velvety texture that awaits. Your heart races as you imagine indulging in a layer of creamy cheesecake nestled atop a crispy Oreo crust, finished off with a cushion of fluffy whipped cream. Each bite beckons you—sweet, tangy, chocolatey perfection. Who could resist such a sublime dessert?
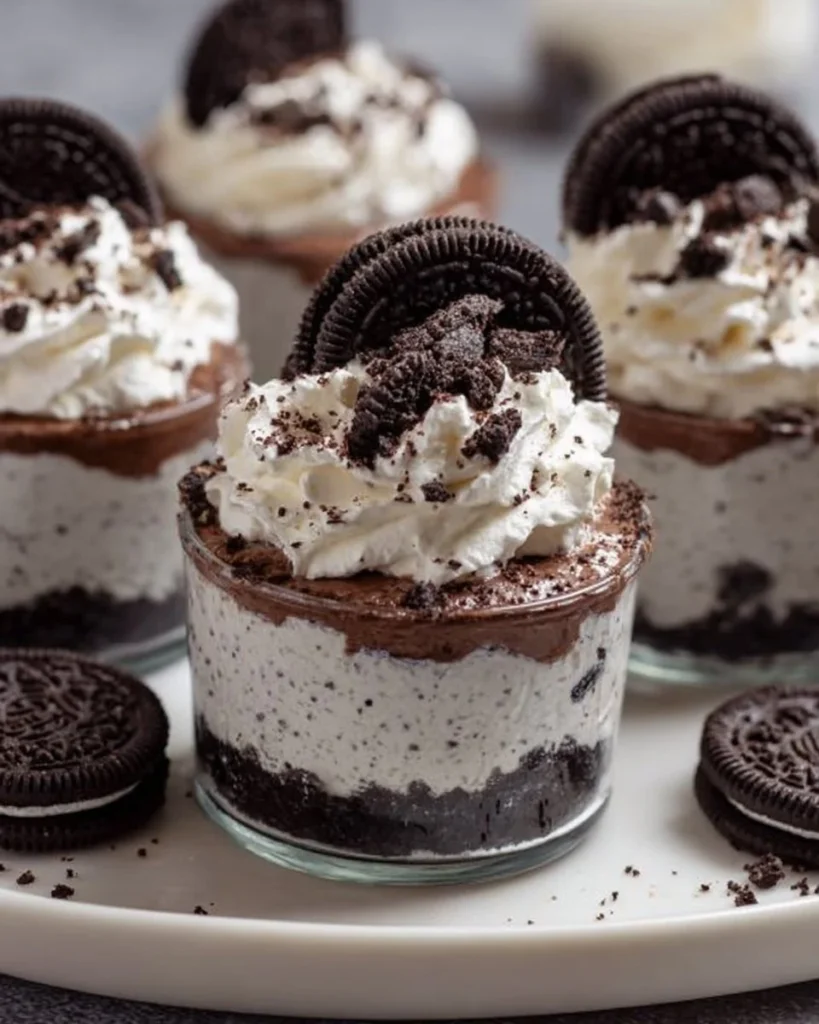
Now, let’s be clear: this isn’t just any dessert. This is an Oreo No-Bake Cheesecake Cup, a chilled dream that feels like pure joy in a glass. No baking, no fuss—just a harmonious blend of flavors and textures that come together effortlessly. You may find yourself captivated by the contrast of crunchy Oreo bits and the smooth richness of the cheesecake filling, making every spoonful something to savor. It transforms ordinary moments into special occasions, from spontaneous gatherings to celebratory parties. This dessert stands out not just for its taste but for the way it brings people together over shared indulgence and laughter.
Why You’ll Love This Oreo No-Bake Cheesecake Cups
Imagine pulling a dessert that requires no baking out of the fridge and watching your guests’ eyes light up with delight. This Oreo No-Bake Cheesecake Cup is incredibly easy to whip up, making it perfect for busy weeknights or last-minute get-togethers. The blend of silky cream cheese and luscious Cool Whip creates a light yet rich flavor that tantalizes your palate. Plus, the Oreo crumbles nestled underneath and on top add a delightful crunch that perfectly balances the creamy filling.
It stands out as a crowd-pleaser due to its simplicity and unique appeal. The combination of contrasts from textures and flavors makes it an unforgettable treat. Whether for a casual family dinner, a festive holiday celebration, or just a way to celebrate life’s small moments, these cheesecake cups fit right in. Each cup is a mini celebration, promising happiness and satisfaction.
Preparation Phase & Tools to Use
Creating these Oreo No-Bake Cheesecake Cups requires minimal equipment yet promises maximum payoff. Here are the essentials:
-
Mixing Bowls: Use quality mixing bowls to allow for easy whisking and folding. The right size helps you mix without worry.
-
Electric Mixer: Either a hand mixer or a stand mixer effortlessly whips the cream cheese to a smooth, creamy texture, essential in achieving the perfect filling.
-
Measuring Cups & Spoons: Precision matters in baking, even in no-bake desserts. Make sure to measure your ingredients accurately for the best results.
-
Rolling Pin: A simple tool for crushing your Oreos into fine crumbs. A heavy object can work if you don’t have one, but the rolling pin do the job with ease.
-
Dessert Dishes: Choose between small mason jars or elegant dessert cups. Their aesthetics add charm to your presentation and serve up perfect portions.
Practical Preparation Tips
-
Soften your cream cheese by leaving it out at room temperature for about 30 minutes. This will ensure a creamy consistency that blends seamlessly.
-
Don’t rush the chilling time! Allowing the cheesecake cups to sit for at least an hour helps develop flavors and ensures the filling is firm enough to hold its shape when served.
Ingredients for Oreo No-Bake Cheesecake Cups
-
1 (8 oz) block of cream cheese, softened: This creamy base brings richness to the dessert. Feel free to substitute with a low-fat version for lighter cheesecake.
-
1 (8 oz) Cool Whip or whipped topping: Adding a luscious lightness, Cool Whip keeps things effortless, but homemade whipped cream can provide an extra touch of love.
-
2/3 cup powdered sugar: This sweetener offers the perfect amount of sweetness and dissolves quickly for a smooth blend.
-
1 teaspoon vanilla: A splash of this fragrant extract enhances sweetness and adds depth to your cheesecake.
-
24-26 Oreo cookies (more as desired): The star ingredient, Oreos offer a delightful contrast of flavors. Consider using other cookies if you want to experiment, like golden Oreos or even mint for a fresh twist.
How to Make Oreo No-Bake Cheesecake Cups
-
Crush the Oreos: Place your Oreos into a plastic bag. Seal it tight! Use a rolling pin or a sturdy spoon to crush them into fine crumbs. Aim for a mixture that resembles sand.
-
Prepare the Bases: Spoon 1 ½ to 2 tablespoons of your crushed Oreos into the bottom of 6 small dessert dishes. Use at least ¾ cup to 1 cup-sized dishes for a perfect serving.
-
Make the Cheesecake Filling: In a mixing bowl, combine the softened cream cheese and powdered sugar. Beat with either your hand mixer or standing mixer until the mixture becomes creamy and smooth.
-
Mix in Vanilla: Add in your teaspoon of vanilla extract. Beat again until fully incorporated.
-
Fold in the Cool Whip: Gently fold in the Cool Whip, taking care to keep the mixture light and airy.
-
Add the Oreo Crumbs: Fold in the remaining crushed Oreos into the cheesecake filling, creating a delicious cookie-studded mixture.
-
Assemble: Divide the cheesecake filling evenly across the dessert dishes, pressing it gently onto the crushed Oreos to secure the layers together.
-
Chill: Refrigerate your cheesecake cups for about 1 hour, or until you’re ready to serve. The longer they chill, the better the flavors meld.
-
Finish and Serve: Just before serving, top your cups with a dollop of whipped cream and a sprinkle of more crushed Oreos for that extra crunch.
Chef’s Notes & Helpful Tips
-
Make-ahead Tips: You can easily prepare these cheesecake cups a day ahead. Just keep them covered in the fridge until you’re ready to serve.
-
Customization Ideas: Want a different flavor? Swap out the Oreos for your favorite cookies or add a layer of fruit like strawberries or raspberries between layers for a burst of color and flavor.
-
Cooking Alternatives: While these cheesecake cups are ideal for chilling, you could also adapt the recipe slightly for a baked version, using a traditional cheesecake crust baked in advance.
Common Mistakes to Avoid
-
Oreo Chunk Size: Avoid big chunks of Oreo when crushing; too large a piece can lead to uneven texture in the cups.
-
Overmixing: Once you add in the Cool Whip, fold it gently. Overmixing can deflate the airy texture that makes this cheesecake so delightful.
-
Skipping Chill Time: Never skip or shorten the chilling time; it’s essential for the flavors to meld and for the cheesecake to set properly.
What to Serve With Oreo No-Bake Cheesecake Cups
-
Fresh Berries: Strawberries or raspberries add a refreshing contrast and a pop of color.
-
Chocolate Sauce: Drizzle some chocolate sauce over the top for an indulgent touch.
-
Caramel Sauce: A swirl of caramel offers a beautiful sweet contrast to the cheesecake.
-
Whipped Cream: Extra creamy goodness never goes amiss!
-
Coffee or Espresso: A warm cup balances the sweetness and enhances the chocolate flavors.
-
Chocolate Mousse: Elegance meets comfort; a small dollop on top transforms your cups into gourmet desserts.
Storage & Reheating Instructions
Store your Oreo No-Bake Cheesecake Cups in the refrigerator, well-covered, for up to 3 days. Don’t freeze them, as the texture may not hold up once thawed. For serving, enjoy them cold right from the fridge.
Estimated Nutrition Information
Per serving (based on 6 servings), approximately 290 calories, 18g fat, 32g carbohydrates, and 3g protein. Note that actual values may vary based on serving sizes and ingredient brands used.
FAQs
1. Can I use low-fat ingredients for this recipe?
Absolutely! You can substitute low-fat cream cheese and whipped topping. Keep in mind that the texture might change slightly but will still be delicious!
2. How can I make this cheesecake gluten-free?
Simply swap regular Oreos for gluten-free Oreos and ensure your whipped topping is gluten-free as well.
3. How long do these cheesecake cups last?
Covered in the fridge, these cheesecake cups last about 3 days. However, they taste best when consumed within the first day or two.
4. What can I do with leftovers?
If you find yourself with leftover cheesecake filling, use it as a dip for fresh fruit or scoop it into cones for an easy twist on ice cream.
5. Can I freeze these cheesecake cups?
It’s best to avoid freezing. The texture can change and become grainy after thawing. For optimal flavor and consistency, enjoy them fresh.
Conclusion
Creating these Oreo No-Bake Cheesecake Cups lets you experience the joy of dessert without the fuss of baking. With creamy, dreamy layers and a satisfying crunch, they satisfy the sweet tooth and lift your spirits. The process is as joyful as the final taste; every step brims with warmth and anticipation. Don’t wait—gather your ingredients, pour a little love into the mix, and delight in the bliss of this unforgettable treat. Enjoy each spoonful, each moment shared, and let the smiles come naturally!
Print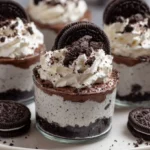
Oreo No-Bake Cheesecake Cups
- Total Time: 75 minutes
- Yield: 6 servings 1x
- Diet: Vegetarian
Description
Indulge in creamy Oreo No-Bake Cheesecake Cups, featuring a rich cream cheese filling atop a crunchy Oreo crust, perfect for any occasion.
Ingredients
- 1 (8 oz) block of cream cheese, softened
- 1 (8 oz) Cool Whip or whipped topping
- 2/3 cup powdered sugar
- 1 teaspoon vanilla extract
- 24–26 Oreo cookies (more as desired)
Instructions
- Crush the Oreos: Place your Oreos into a plastic bag, seal it tight, and crush them into fine crumbs using a rolling pin.
- Prepare the bases: Spoon 1 ½ to 2 tablespoons of crushed Oreos into the bottom of 6 small dessert dishes.
- Make the cheesecake filling: In a mixing bowl, combine the softened cream cheese and powdered sugar, and beat until creamy.
- Mix in vanilla: Add teaspoon of vanilla extract and beat again until incorporated.
- Fold in the Cool Whip: Gently fold in the Cool Whip to maintain a light and airy mixture.
- Add the Oreo crumbs: Fold in the remaining crushed Oreos into the cheesecake filling.
- Assemble: Divide the cheesecake filling evenly across the dessert dishes, pressing it gently to secure the layers.
- Chill: Refrigerate the cheesecake cups for about 1 hour or until ready to serve.
- Finish and serve: Top with whipped cream and a sprinkle of crushed Oreos before serving.
Notes
Make-ahead tips: Prepare a day ahead and store in the fridge until serving. Customize with different cookies or fruit layers for variety.
- Prep Time: 15 minutes
- Cook Time: 0 minutes
- Category: Dessert
- Method: Chilling
- Cuisine: American
Nutrition
- Serving Size: 1 cup
- Calories: 290
- Sugar: 18g
- Sodium: 150mg
- Fat: 18g
- Saturated Fat: 9g
- Unsaturated Fat: 6g
- Trans Fat: 0g
- Carbohydrates: 32g
- Fiber: 1g
- Protein: 3g
- Cholesterol: 30mg
Keywords: no-bake cheesecake, Oreo dessert, easy dessert, chocolate dessert, creamy cheesecake