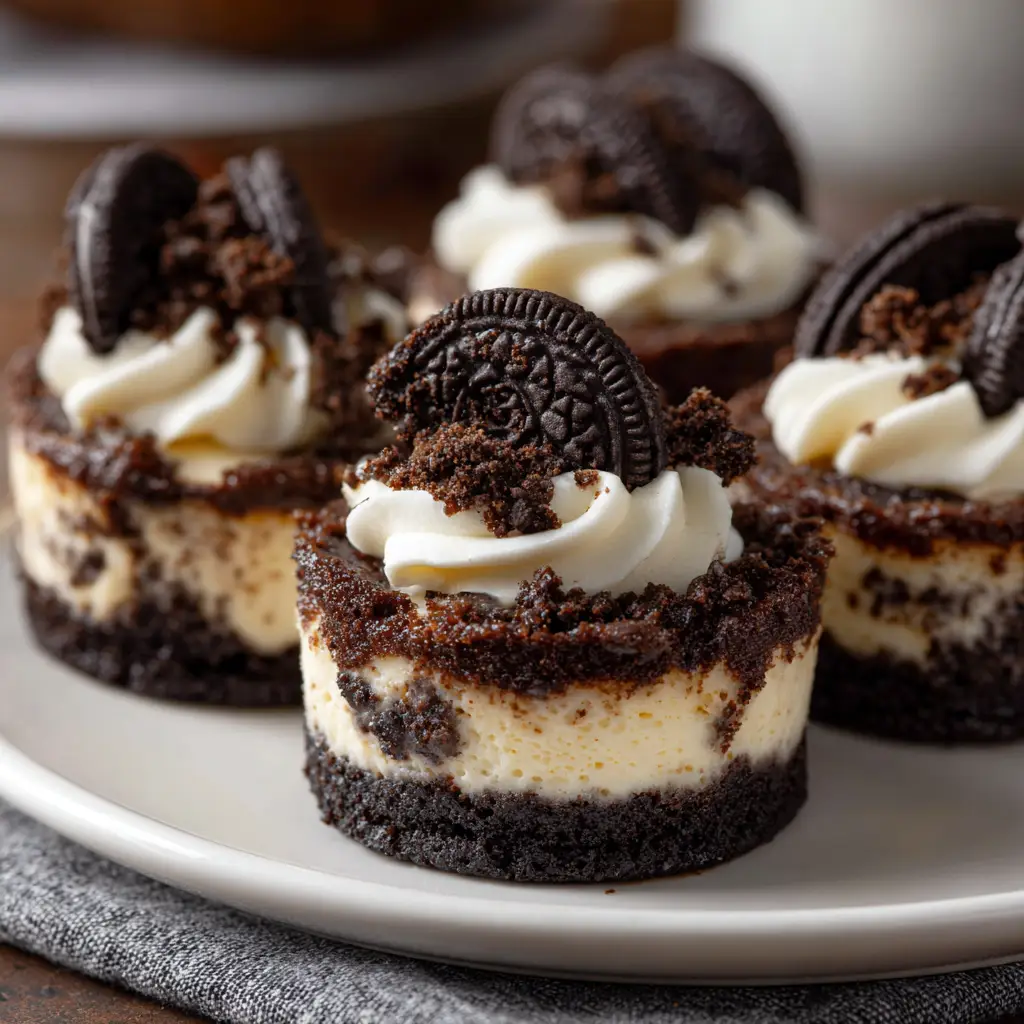
Introduction to Oreo Cheesecake Cups
As a busy mom, I know how precious time can be, especially when it comes to whipping up something sweet. That’s why I absolutely adore these Oreo Cheesecake Cups! They’re a delightful blend of creamy cheesecake and crunchy Oreos, making them a hit with everyone in the family. Whether you’re looking for a quick solution for a busy day or a dessert to impress your loved ones, these little cups are perfect. Plus, they require no baking, which means less mess and more time to enjoy the moments that matter most.
Why You’ll Love This Oreo Cheesecake Cups
These Oreo Cheesecake Cups are a dream come true for anyone short on time but big on flavor. They come together in just 20 minutes, making them a speedy treat for any occasion. The combination of rich cheesecake and crunchy Oreos creates a taste explosion that will leave your taste buds dancing. Plus, they’re perfect for sharing, so you can spread the joy with family and friends!
Ingredients for Oreo Cheesecake Cups
Gathering the right ingredients is the first step to creating these delightful Oreo Cheesecake Cups. Here’s what you’ll need:
- Oreo cookies: The star of the show! These chocolatey delights form the crust and add that signature flavor.
- Unsalted butter: This helps bind the Oreo crumbs together, creating a rich and buttery crust.
- Cream cheese: The creamy base of the cheesecake filling. Make sure it’s softened for easy mixing!
- Granulated sugar: This sweetens the filling, balancing the richness of the cream cheese.
- Vanilla extract: A splash of this adds warmth and depth to the cheesecake flavor.
- Whipped cream: Light and fluffy, it gives the filling a delightful texture. You can use store-bought or homemade!
- Additional Oreo cookies: For topping! Crushed Oreos on top add a nice crunch and make for a beautiful presentation.
For those who want to switch things up, consider using double-stuffed Oreos for an extra creamy crust. You can also make these cups a day in advance, which is a lifesaver for busy schedules. All ingredient quantities are listed at the bottom of the article for easy printing!
How to Make Oreo Cheesecake Cups
Now that you have all your ingredients ready, let’s dive into the fun part—making these Oreo Cheesecake Cups! Follow these simple steps, and you’ll have a delicious dessert that’s sure to impress.
Step 1: Preheat the Oven
Even though this is a no-bake recipe, preheating the oven is essential if you plan to bake anything else later. It sets the stage for a smooth cooking experience. Plus, it’s a good habit to get into when you’re in the kitchen!
Step 2: Prepare the Oreo Crust
Grab your package of Oreo cookies and crush them into fine crumbs. You can use a food processor for a quick job or place them in a zip-top bag and crush them with a rolling pin. Once crushed, mix the crumbs with melted butter until it resembles wet sand. This mixture will be the base of your cheesecake cups.
Step 3: Form the Crust in Muffin Tin
Line a muffin tin with cupcake liners. Then, take your Oreo mixture and press it firmly into the bottom of each liner. Use the back of a spoon or your fingers to ensure it’s packed tightly. This crust will hold everything together, so make sure it’s nice and sturdy!
Step 4: Make the Cheesecake Filling
In a mixing bowl, beat the softened cream cheese, granulated sugar, and vanilla extract until smooth. You want a creamy consistency without any lumps. This step is crucial for a velvety cheesecake filling that will melt in your mouth!
Step 5: Fold in the Whipped Cream
Now, it’s time to add the whipped cream. Gently fold it into the cream cheese mixture using a spatula. Be careful not to overmix; you want to keep that light and airy texture. This is what makes your cheesecake cups so delightful!
Step 6: Assemble the Cups
Pour the cheesecake filling over the Oreo crust in each muffin tin. Fill them to the top, but leave a little space for toppings later. The filling should be smooth and even, creating a beautiful layer of creamy goodness.
Step 7: Chill and Set
Place the muffin tin in the refrigerator and let the cups chill for at least 4 hours. This step is vital for the cheesecake to set properly. Patience is key here, but trust me, it’s worth the wait!
Step 8: Add Toppings
Once your Oreo Cheesecake Cups are set, it’s time to get creative! Top each cup with additional crushed Oreos for that extra crunch. You can also add a dollop of whipped cream for a beautiful presentation. Your guests will be impressed!
Tips for Success
- Use room temperature cream cheese for easier mixing and a smoother filling.
- Don’t skip the chilling time; it’s essential for the perfect texture.
- For a fun twist, try adding a layer of chocolate ganache on top!
- Keep your workspace organized to make the process smoother.
- Double the recipe for larger gatherings; these cups disappear fast!
Equipment Needed
- Muffin tin: A standard muffin tin works great, but you can also use a silicone mold for easy removal.
- Cupcake liners: These help keep the cups neat and tidy. If you don’t have them, you can skip them, but they make serving easier.
- Mixing bowls: A large bowl for the filling and a smaller one for the crust.
- Spatula: Perfect for folding in the whipped cream and scraping down the sides of the bowl.
- Food processor or rolling pin: For crushing the Oreos into fine crumbs.
Variations
- Chocolate Lovers: Swap out regular Oreos for chocolate-flavored Oreos for an extra chocolatey treat.
- Fruit Twist: Add a layer of fruit puree, like raspberry or strawberry, between the crust and cheesecake filling for a fruity surprise.
- Nutty Delight: Incorporate crushed nuts, like pecans or walnuts, into the crust for added texture and flavor.
- Gluten-Free Option: Use gluten-free Oreo cookies to make these cups suitable for those with gluten sensitivities.
- Vegan Version: Substitute cream cheese with a vegan alternative and use coconut whipped cream for a dairy-free delight.
Serving Suggestions
- Pair these Oreo Cheesecake Cups with a scoop of vanilla ice cream for a delightful contrast.
- Serve alongside fresh berries for a pop of color and freshness.
- Drizzle with chocolate or caramel sauce for an extra indulgent touch.
- Present them on a decorative platter for a stunning dessert display.
FAQs about Oreo Cheesecake Cups
As you embark on your journey to create these delightful Oreo Cheesecake Cups, you might have a few questions. Here are some common queries I’ve encountered, along with helpful answers!
Can I make Oreo Cheesecake Cups in advance?
Absolutely! These cups can be made a day in advance, making them perfect for busy schedules. Just store them in the refrigerator until you’re ready to serve.
How do I store leftovers?
Store any leftover Oreo Cheesecake Cups in an airtight container in the refrigerator. They’ll stay fresh for up to three days, but trust me, they won’t last that long!
Can I use different cookies for the crust?
Yes! While Oreos are the classic choice, you can experiment with other cookies like chocolate wafers or even graham crackers for a different flavor profile.
What can I use instead of cream cheese?
If you’re looking for a dairy-free option, try using a vegan cream cheese alternative. It works beautifully in this recipe and keeps the creamy texture intact.
How can I make these cups more festive?
For a festive touch, consider adding colorful sprinkles or seasonal toppings like crushed peppermint during the holidays. It’s a fun way to celebrate any occasion!
Final Thoughts
Creating these Oreo Cheesecake Cups is more than just making a dessert; it’s about bringing joy to your kitchen and your loved ones. The delightful combination of creamy cheesecake and crunchy Oreos is sure to spark smiles and happy memories. Whether you’re celebrating a special occasion or simply treating yourself after a long day, these cups are a sweet reminder that life’s little pleasures matter. So, roll up your sleeves, gather your ingredients, and let the magic happen. Trust me, once you take that first bite, you’ll be hooked on this easy and delicious treat!
Print
Oreo Cheesecake Cups that Will Delight Your Taste Buds!
- Total Time: 4 hours 20 minutes
- Yield: 12 servings 1x
- Diet: Vegetarian
Description
Oreo Cheesecake Cups are a delicious and easy-to-make dessert that combines the rich flavors of cheesecake with the beloved taste of Oreos, perfect for any occasion.
Ingredients
- 1 package Oreo cookies (about 36 cookies)
- 1/2 cup unsalted butter, melted
- 16 oz cream cheese, softened
- 1/2 cup granulated sugar
- 1 tsp vanilla extract
- 2 cups whipped cream
- Additional Oreo cookies for topping
Instructions
- Preheat the oven to 350°F (175°C).
- Crush the Oreo cookies into fine crumbs and mix with melted butter.
- Press the mixture into the bottom of cupcake liners in a muffin tin to form the crust.
- In a mixing bowl, beat the cream cheese, sugar, and vanilla extract until smooth.
- Fold in the whipped cream until well combined.
- Pour the cheesecake mixture over the Oreo crust in the muffin tin.
- Chill in the refrigerator for at least 4 hours or until set.
- Top with additional crushed Oreos before serving.
Notes
- For a richer flavor, use double-stuffed Oreos.
- These cups can be made a day in advance for convenience.
- Store leftovers in an airtight container in the refrigerator.
- Prep Time: 20 minutes
- Cook Time: 0 minutes
- Category: Dessert
- Method: No-bake
- Cuisine: American
Nutrition
- Serving Size: 1 cup
- Calories: 250
- Sugar: 15g
- Sodium: 150mg
- Fat: 18g
- Saturated Fat: 10g
- Unsaturated Fat: 5g
- Trans Fat: 0g
- Carbohydrates: 22g
- Fiber: 1g
- Protein: 3g
- Cholesterol: 40mg
Keywords: Oreo, Cheesecake, Dessert, No-bake, Easy recipe