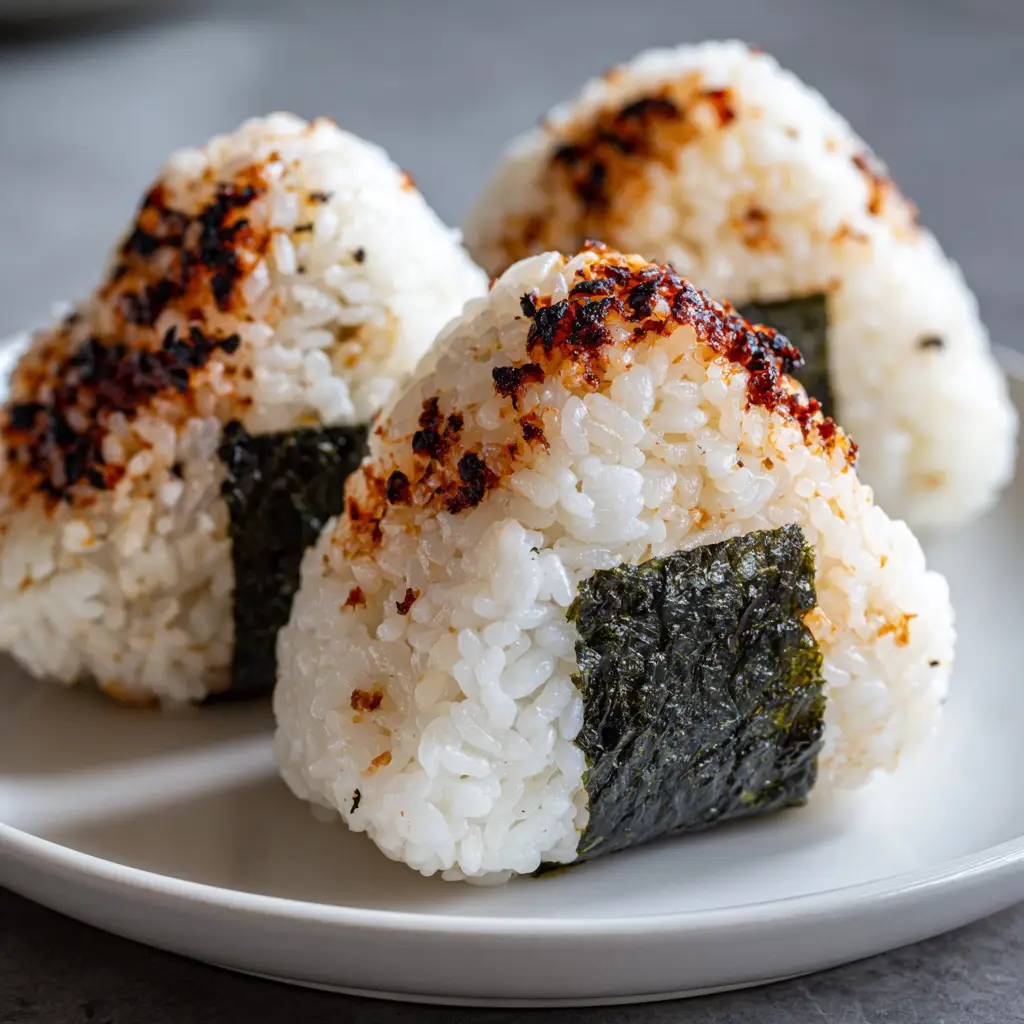
Introduction to Onigiri (Japanese Rice Balls)
As a busy mom, I know how challenging it can be to whip up something delicious yet simple. That’s where onigiri, or Japanese rice balls, come into play! These delightful little bites are not only quick to make but also incredibly versatile. You can fill them with your favorite ingredients, making them a perfect solution for lunchboxes or a snack on the go. Plus, they’re a fun way to impress your loved ones with a taste of Japan right at home. Trust me, once you try making onigiri, you’ll wonder how you ever lived without them!
Why You’ll Love This Onigiri (Japanese Rice Balls)
Onigiri are a lifesaver for busy days! They’re quick to prepare, taking just about 50 minutes from start to finish. The best part? You can customize them to suit your family’s tastes. Whether you prefer savory tuna or tangy pickled plum, there’s a filling for everyone. Plus, they’re portable, making them perfect for picnics or school lunches. With onigiri, you can enjoy a delicious, homemade snack without the fuss!
Ingredients for Onigiri (Japanese Rice Balls)
Creating onigiri is a delightful adventure, and it all starts with the right ingredients. Here’s what you’ll need:
- Sushi Rice: This short-grain rice is sticky and perfect for molding into shapes. It’s the star of your onigiri!
- Water: Essential for cooking the rice to the perfect texture. The right water-to-rice ratio is key!
- Rice Vinegar: This adds a subtle tanginess to the rice, enhancing its flavor. It’s a must for that authentic taste.
- Sugar: Just a touch balances the acidity of the vinegar, making the rice deliciously flavorful.
- Salt: A pinch of salt elevates the overall taste, ensuring your onigiri isn’t bland.
- Nori (Seaweed): These seaweed strips wrap around your onigiri, adding a delightful crunch and umami flavor.
- Fillings of Choice: This is where the fun begins! You can use pickled plum, tuna, salmon, or even veggies. Get creative!
Feel free to experiment with different fillings to discover your favorite combinations. You can find sushi rice and nori at most grocery stores or Asian markets. For exact measurements, check the bottom of the article where you can also find a printable version of the recipe!
How to Make Onigiri (Japanese Rice Balls)
Making onigiri is a fun and rewarding process. Follow these simple steps, and you’ll have delicious rice balls ready to enjoy in no time!
Step 1: Rinse the Sushi Rice
Start by rinsing the sushi rice under cold water. This step is crucial! It removes excess starch, ensuring your rice is fluffy and not too sticky. Keep rinsing until the water runs clear. It’s like giving your rice a refreshing bath!
Step 2: Cook the Rice
Next, combine the rinsed rice and water in a rice cooker. If you don’t have one, a pot works just fine. Cook according to the manufacturer’s instructions. The rice should be tender and slightly sticky when done. This is the foundation of your onigiri!
Step 3: Prepare the Vinegar Mixture
While the rice is cooking, mix the rice vinegar, sugar, and salt in a small bowl. Stir until everything is dissolved. This mixture adds a lovely tang to your rice, making it taste authentic. It’s like a secret ingredient that elevates your dish!
Step 4: Mix the Rice and Vinegar
Once the rice is cooked, transfer it to a large bowl. Gently fold in the vinegar mixture with a spatula. Be careful not to mash the rice! You want to keep that fluffy texture. Let it cool slightly until it’s manageable. This is where the magic happens!
Step 5: Shape the Onigiri
Now comes the fun part! Wet your hands to prevent sticking. Take a handful of rice and flatten it in your palm. Add your desired filling in the center. Then, mold the rice around it to form a triangle or ball shape. It’s like crafting little edible sculptures!
Step 6: Wrap and Serve
Finally, wrap your onigiri with a strip of nori. This adds a delightful crunch and flavor. Serve them immediately or store them in the fridge for later. Enjoy your homemade onigiri as a snack or a meal. They’re sure to impress!
Tips for Success
- Use short-grain sushi rice for the best texture.
- Don’t skip rinsing the rice; it makes a big difference!
- Wet your hands before shaping to prevent sticking.
- Experiment with fillings; try different combinations!
- Store leftover onigiri in an airtight container in the fridge.
Equipment Needed
- Rice Cooker: Ideal for perfectly cooked sushi rice. A pot works too!
- Large Bowl: For mixing the rice and vinegar. Any mixing bowl will do.
- Spatula: To gently fold the rice. A wooden spoon is a great alternative.
- Measuring Cups: For accurate ingredient measurements. You can use any cup you have!
Variations of Onigiri (Japanese Rice Balls)
- Vegetarian Delight: Fill your onigiri with sautéed mushrooms, avocado, or roasted vegetables for a hearty, meat-free option.
- Spicy Tuna: Mix canned tuna with a bit of sriracha and mayonnaise for a zesty filling that packs a punch!
- Sweet Treat: Try a sweet version by using sweetened red bean paste or a slice of fresh fruit like mango or strawberry.
- Herbed Rice: Add chopped herbs like cilantro or basil to the rice for an aromatic twist.
- Protein Boost: Incorporate cooked chicken or shrimp for a protein-packed snack that keeps you full longer.
Serving Suggestions for Onigiri (Japanese Rice Balls)
- Side Salad: Pair your onigiri with a light cucumber salad for a refreshing crunch.
- Pickled Vegetables: Serve with pickled radishes or carrots for a tangy contrast.
- Green Tea: Enjoy with a warm cup of green tea to enhance the flavors.
- Presentation: Arrange on a colorful plate, garnished with sesame seeds for a beautiful display.
FAQs about Onigiri (Japanese Rice Balls)
What is onigiri?
Onigiri, or Japanese rice balls, are delicious snacks made from sushi rice, often filled with various ingredients and wrapped in nori. They’re perfect for lunchboxes or a quick snack!
Can I make onigiri ahead of time?
Absolutely! Onigiri can be made ahead and stored in the refrigerator. Just wrap them in plastic wrap to keep them fresh. They’re great for meal prep!
What fillings can I use for onigiri?
The options are endless! You can use pickled plum, tuna, salmon, or even sautéed vegetables. Get creative and try different combinations to find your favorite!
How do I keep onigiri from getting soggy?
To prevent sogginess, wrap the onigiri in nori just before serving. If you’re storing them, keep the nori separate until you’re ready to eat.
Are onigiri suitable for vegetarians?
Yes! Onigiri can easily be made vegetarian by using fillings like avocado, pickled vegetables, or even sweet options like red bean paste. They’re versatile and delicious!
Final Thoughts on Onigiri (Japanese Rice Balls)
Making onigiri has been a delightful journey for me, and I hope it becomes one for you too! These Japanese rice balls are not just a meal; they’re a canvas for creativity and a way to bring joy to your family’s table. Each bite is a little adventure, filled with flavors that can transport you to Japan. Plus, they’re perfect for busy days, allowing you to enjoy homemade goodness without the hassle. So, roll up your sleeves, gather your ingredients, and let the magic of onigiri brighten your kitchen and your heart!
Print
Onigiri (Japanese Rice Balls): Discover Unique Flavors!
- Total Time: 50 minutes
- Yield: 4 servings 1x
- Diet: Vegetarian
Description
Onigiri are traditional Japanese rice balls that can be filled with various ingredients and wrapped in seaweed, offering a delightful combination of flavors and textures.
Ingredients
- 2 cups sushi rice
- 2 1/2 cups water
- 1/4 cup rice vinegar
- 2 tablespoons sugar
- 1 teaspoon salt
- 1 sheet nori (seaweed), cut into strips
- Fillings of choice (e.g., pickled plum, tuna, salmon, or vegetables)
Instructions
- Rinse the sushi rice under cold water until the water runs clear.
- Combine the rinsed rice and water in a rice cooker and cook according to the manufacturer’s instructions.
- In a small bowl, mix rice vinegar, sugar, and salt until dissolved.
- Once the rice is cooked, transfer it to a large bowl and gently fold in the vinegar mixture.
- Allow the rice to cool slightly until it is manageable.
- Wet your hands to prevent sticking, take a handful of rice, and flatten it in your palm.
- Add your desired filling in the center and mold the rice around it to form a triangle or ball shape.
- Wrap the onigiri with a strip of nori and serve.
Notes
- Experiment with different fillings to discover your favorite flavor combinations.
- Onigiri can be made ahead of time and stored in the refrigerator.
- For added flavor, you can sprinkle sesame seeds on the outside.
- Prep Time: 20 minutes
- Cook Time: 30 minutes
- Category: Snack
- Method: Cooking
- Cuisine: Japanese
Nutrition
- Serving Size: 1 onigiri
- Calories: 180
- Sugar: 1g
- Sodium: 200mg
- Fat: 1g
- Saturated Fat: 0g
- Unsaturated Fat: 0g
- Trans Fat: 0g
- Carbohydrates: 38g
- Fiber: 1g
- Protein: 4g
- Cholesterol: 0mg
Keywords: Onigiri, Japanese Rice Balls, Sushi Rice, Rice Balls, Japanese Cuisine