Introduction to Kit Kat Ice Cream Cake
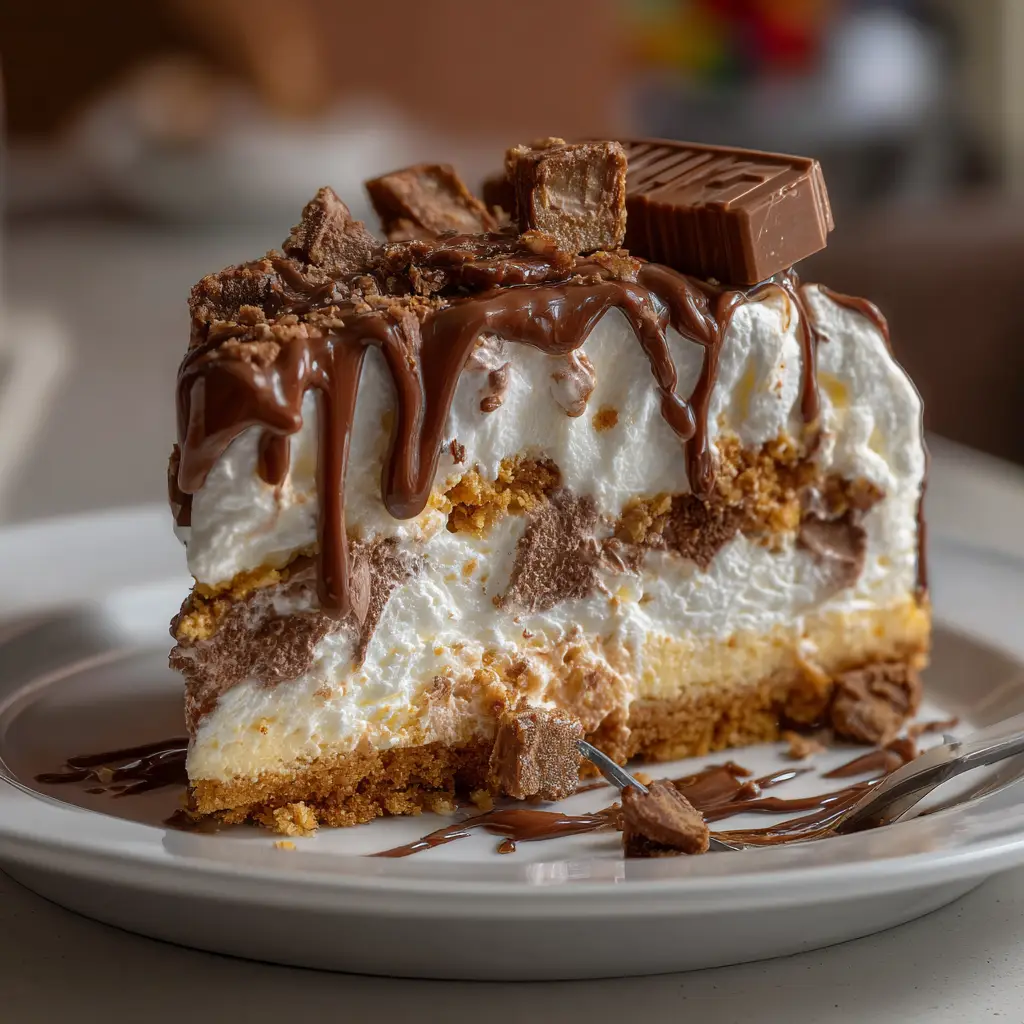
As summer rolls in, I find myself dreaming of cool treats that bring joy to my family. That’s where my Kit Kat Ice Cream Cake comes in! This delightful dessert is not just a feast for the eyes; it’s a quick solution for busy days when you want to impress your loved ones without spending hours in the kitchen. With its creamy layers and crunchy Kit Kat bars, it’s a guaranteed crowd-pleaser. Trust me, this cake will have everyone asking for seconds, making it the perfect addition to your summer gatherings!
Why You’ll Love This Kit Kat Ice Cream Cake
This Kit Kat Ice Cream Cake is a dream come true for busy moms and professionals alike. It’s incredibly easy to whip up, requiring no baking at all! Just layer, freeze, and serve. The combination of creamy ice cream and crunchy chocolate bars creates a delightful contrast that’s hard to resist. Plus, it’s a fun way to get the kids involved in the kitchen, making memories while creating a delicious treat!
Ingredients for Kit Kat Ice Cream Cake
Gathering the right ingredients is the first step to creating this delightful Kit Kat Ice Cream Cake. Here’s what you’ll need:
- Kit Kat bars: These iconic chocolate bars add a satisfying crunch and rich chocolate flavor. You’ll need about 10-12 bars, but feel free to grab a few extra for snacking!
- Vanilla ice cream: The creamy base of this cake. It’s versatile and pairs beautifully with the chocolate. If you want a richer flavor, consider using chocolate ice cream instead.
- Chocolate syrup: This sweet drizzle adds an extra layer of indulgence. You can use store-bought or make your own for a personal touch.
- Whipped cream: A fluffy topping that brings everything together. It adds a lightness to the cake, making each bite feel like a cloud of sweetness.
- Crushed nuts (optional): For those who enjoy a bit of crunch, crushed nuts can be sprinkled on top. They add texture and a nutty flavor that complements the chocolate.
For exact measurements, check the bottom of the article where you can find everything listed for easy printing. Happy gathering!
How to Make Kit Kat Ice Cream Cake
Now that you have your ingredients ready, let’s dive into the fun part—making this Kit Kat Ice Cream Cake! Follow these simple steps, and you’ll have a stunning dessert that’s sure to impress.
Step 1: Prepare the Cake Pan
Start by lining a round cake pan with plastic wrap. This makes it super easy to remove the cake later. Just press the wrap into the pan, letting it hang over the edges. This little trick will save you from any sticky situations!
Step 2: Line with Kit Kat Bars
Next, break the Kit Kat bars into individual pieces. Arrange them around the sides of the pan, standing them upright. This creates a beautiful chocolatey border that will be the star of your cake. Don’t worry if they don’t fit perfectly; a little creativity goes a long way!
Step 3: Add the Ice Cream
Now it’s time to spread half of the vanilla ice cream into the bottom of the pan. Use a spatula to smooth it out evenly. This layer is the foundation of your cake, so make sure it’s nice and flat. If the ice cream is too hard, let it sit out for a few minutes to soften up.
Step 4: Drizzle with Chocolate Syrup
Once the first layer is set, drizzle half of the chocolate syrup over the ice cream. Use a spoon to create a beautiful pattern. This adds a rich flavor that complements the ice cream perfectly. Don’t be shy—let that syrup flow!
Step 5: Complete the Layers
Next, add the remaining ice cream on top. Smooth it out with your spatula, making sure it’s even. This layer will be the icing on the cake, so take your time to get it just right. You want it to look as good as it tastes!
Step 6: Freeze the Cake
Cover the cake with plastic wrap and pop it in the freezer. It needs to freeze for at least 4 hours, or until it’s firm. This step is crucial for a perfect slice. Patience is key here, but trust me, it’s worth the wait!
Step 7: Serve the Cake
When you’re ready to serve, remove the cake from the pan by lifting the plastic wrap. Place it on a serving plate. Top it with whipped cream, crushed nuts, and the remaining chocolate syrup. This final touch makes it look irresistible. Slice and enjoy the smiles on everyone’s faces!
Tips for Success
- Let the ice cream soften for easier spreading.
- Use a hot knife to slice through the cake smoothly.
- Experiment with different toppings like sprinkles or fruit.
- For a fun twist, try adding layers of crushed cookies.
- Make it a day ahead for stress-free entertaining!
Equipment Needed
- Round cake pan: A standard 9-inch pan works well. If you don’t have one, a square pan will do!
- Plastic wrap: Essential for easy removal. Aluminum foil can be a substitute in a pinch.
- Spatula: Perfect for smoothing ice cream. A butter knife can also work if you’re in a hurry.
- Serving plate: To showcase your masterpiece. Any large plate will suffice!
Variations of Kit Kat Ice Cream Cake
- Chocolate Ice Cream: Swap vanilla for chocolate ice cream for an extra indulgent treat that chocolate lovers will adore.
- Nut-Free Option: Omit the crushed nuts to make it suitable for those with nut allergies. You can add crushed cookies instead for a different crunch.
- Fruit Layer: Add a layer of fresh berries or sliced bananas between the ice cream layers for a fruity twist that brightens the flavor.
- Mint Chocolate: Use mint chocolate chip ice cream and top with crushed peppermint candies for a refreshing variation.
- Vegan Version: Substitute dairy ice cream with coconut or almond milk ice cream and use vegan whipped cream for a plant-based delight.
Serving Suggestions for Kit Kat Ice Cream Cake
- Fresh Berries: Serve with a side of strawberries or raspberries for a pop of color and freshness.
- Chocolate Milkshake: Pair with a chocolate milkshake for a decadent dessert experience.
- Presentation: Garnish with mint leaves for a touch of elegance.
- Ice Cream Scoops: Offer extra scoops of ice cream on the side for those who can’t get enough!
FAQs about Kit Kat Ice Cream Cake
Can I make Kit Kat Ice Cream Cake ahead of time?
Absolutely! This no-bake cake is perfect for making a day in advance. Just keep it covered in the freezer until you’re ready to serve. It’ll save you time and stress!
What can I use instead of Kit Kat bars?
If you’re looking for alternatives, try using other chocolate bars like Twix or Snickers. They’ll add a different flavor and texture, making your cake uniquely yours!
How do I store leftovers?
Store any leftover cake in the freezer, covered with plastic wrap. It should stay fresh for up to a week. Just remember to let it sit at room temperature for a few minutes before slicing!
Can I customize the toppings?
Definitely! Feel free to get creative with toppings. Sprinkles, crushed cookies, or even fresh fruit can add a fun twist to your Kit Kat Ice Cream Cake!
Is this recipe suitable for kids?
Yes! This Kit Kat Ice Cream Cake is a hit with kids. It’s easy to make, and they’ll love helping out in the kitchen. Just be ready for some sticky fingers!
Final Thoughts
Creating this Kit Kat Ice Cream Cake is more than just making a dessert; it’s about bringing joy to your family and friends. The smiles on their faces as they take that first bite are priceless. This cake is a celebration of summer, laughter, and sweet memories. It’s a simple yet delightful way to show your love, whether it’s a birthday, a family gathering, or just a sunny afternoon. So, roll up your sleeves, gather your loved ones, and dive into this delicious adventure. Trust me, you’ll be making this cake again and again!
Print
Kit Kat Ice Cream Cake: A Must-Try Summer Delight!
- Total Time: 4 hours 20 minutes
- Yield: 8-10 servings 1x
- Diet: Vegetarian
Description
A delicious and refreshing Kit Kat Ice Cream Cake perfect for summer gatherings.
Ingredients
- 1 package of Kit Kat bars (about 10–12 bars)
- 1.5 quarts of vanilla ice cream
- 1 cup of chocolate syrup
- 1 cup of whipped cream
- 1/2 cup of crushed nuts (optional)
Instructions
- Line a round cake pan with plastic wrap.
- Break the Kit Kat bars into individual pieces and line the sides of the pan with them.
- Spread half of the vanilla ice cream into the bottom of the pan.
- Drizzle half of the chocolate syrup over the ice cream.
- Add the remaining ice cream on top and smooth it out.
- Cover the cake with plastic wrap and freeze for at least 4 hours or until firm.
- Once frozen, remove the cake from the pan and place it on a serving plate.
- Top with whipped cream, crushed nuts, and remaining chocolate syrup before serving.
Notes
- For a richer flavor, use chocolate ice cream instead of vanilla.
- Let the cake sit at room temperature for a few minutes before slicing for easier serving.
- Feel free to customize with your favorite toppings.
- Prep Time: 20 minutes
- Cook Time: 0 minutes
- Category: Dessert
- Method: No-Bake
- Cuisine: American
Nutrition
- Serving Size: 1 slice
- Calories: 350
- Sugar: 30g
- Sodium: 150mg
- Fat: 20g
- Saturated Fat: 10g
- Unsaturated Fat: 8g
- Trans Fat: 0g
- Carbohydrates: 40g
- Fiber: 1g
- Protein: 4g
- Cholesterol: 30mg
Keywords: Kit Kat Ice Cream Cake, summer dessert, no-bake cake, ice cream cake