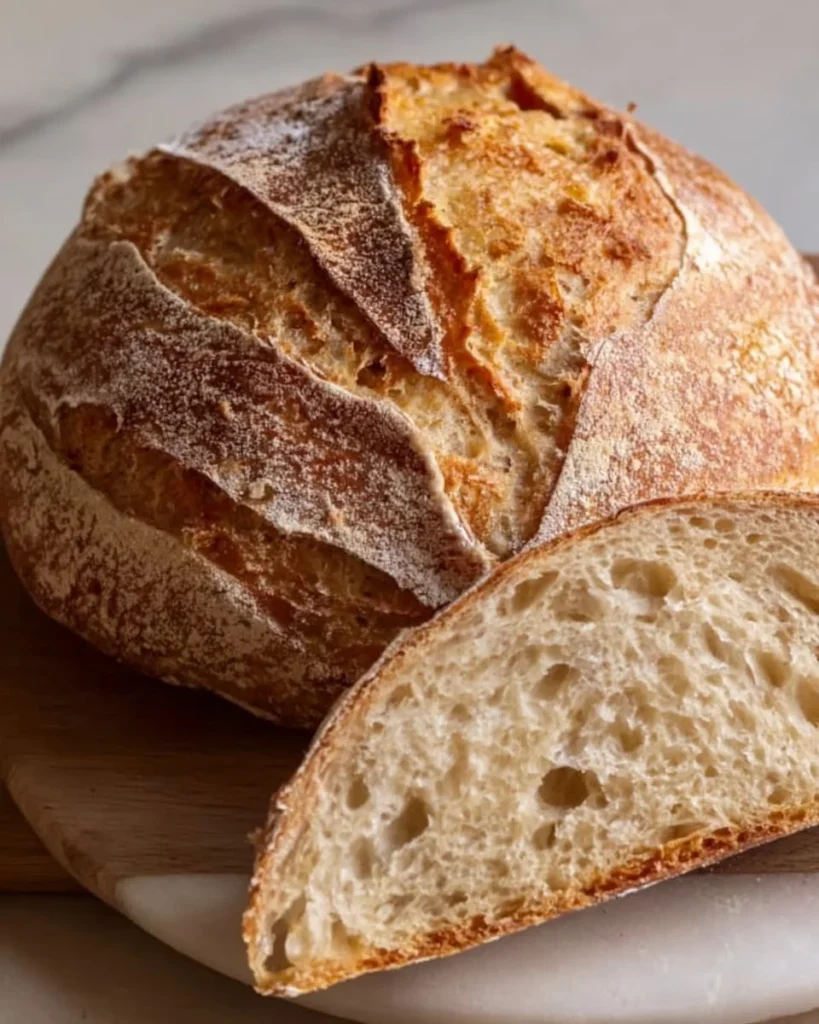
Every kitchen has that one recipe that fills the heart with warmth and the home with an enticing aroma. Effortless sourdough bread is one of those magical creations that transforms four simple ingredients into a crusty, golden masterpiece. Imagine the gentle crunch of the crust giving way to a soft, airy interior, each bite releasing the delightful tang of fermentation that only a well-cultivated sourdough starter can achieve. The fragrant smell wafting through your home invites everyone to gather around, eagerly waiting for the moment they can indulge in the warm loaf that awaits, each slice promising comfort and taste that dances on the palate.
Baking sourdough bread feels like alchemy as you mix flour, water, salt, and your active starter into an almost therapeutic ritual. When you knead and shape the dough, you connect with something primal and genuine—a love letter to the centuries-old tradition of bread making. It has this glorious way of bringing people together, whether you’re hosting a cozy dinner, celebrating a special occasion, or simply enjoying a quiet afternoon with a good book. The texture is a delightful contrast: crunchy on the outside yet tender on the inside, with a hint of that rustic, homemade quality that store-bought bread can never replicate.
Why You’ll Love This Effortless Sourdough Bread
Effortless sourdough bread stands out not just for its incredible flavor but also for its many benefits. First, it’s the perfect addition to any meal. The tanginess pairs beautifully with robust soups, fresh salads, and rich cheeses, ensuring that there’s always a complement to your dish. It provides a hearty foundation for breakfast avocado toasts or a delightful vehicle for your favorite sandwich fillings at lunchtime.
This recipe takes away the intimidation often associated with sourdough bread. With a bit of patience and a few essential tools, you will bring forth a loaf that could easily take center stage at any dinner party. Plus, baking this bread at home means you avoid preservatives and artificial flavors commonly found in commercial alternatives. Nothing beats that feeling of pride from pulling a perfectly baked loaf from the oven, its golden crust glistening, inviting, and just begging to be sliced!
Preparation Phase & Tools to Use
Before diving into the recipe, ensure you have the right tools. Each piece of equipment plays a vital role in crafting the perfect loaf of sourdough.
- Mixing Bowls: Sturdy, large bowls will allow you to mix and let the dough rise without spilling.
- Dutch Oven: This creates a mini-oven effect, trapping steam to achieve that coveted crust.
- Bench Scraper: This tool makes dough handling easier, perfect for transferring and shaping.
- Kitchen Scale (optional): Weighing your ingredients is the secret to precision in baking—especially useful for sourdough.
Preparation tips for effortless baking:
- Ensure your sourdough starter is active and bubbly before beginning; this guarantees that your bread rises adequately.
- Measure all ingredients before you start for a smoother process.
Ingredients for Effortless Sourdough Bread
To create your masterpiece, gather the following ingredients:
- 3 cups all-purpose flour: This provides the structure. For a gluten-free version, consider a gluten-free flour blend.
- 1 1/2 cups water: Tap water works well, but you can use bottled water if your tap is heavily treated.
- 1/2 cup active sourdough starter: This is your bread’s secret weapon, and it must be bubbly and fed for best results. You can substitute with a starter fed just hours before.
- 1 teaspoon salt: This enhances flavor and strengthens dough structure. Sea salt is preferred, but any unrefined salt will do.
How to Make Effortless Sourdough Bread
Let’s transform those ingredients into a loaf that speaks of tradition and skill with these simple steps:
-
Combine the Flour and Salt: In a large bowl, whisk together the flour and salt until well mixed, ensuring even distribution of flavors.
-
Mix Wet Ingredients: In another bowl, blend the water and sourdough starter until smooth. The smoothness ensures a uniform dough.
-
Merge Dry and Wet Ingredients: Gradually pour the wet mixture into the flour and mix with a spatula until a shaggy dough forms. Don’t overwork it—this advice is key.
-
First Rise: Cover the bowl with a clean towel and let it rest at room temperature for 12-18 hours. Patience is crucial here; the longer you let it rest, the more flavors develop.
-
Shape the Dough: After resting, flip the dough onto a well-floured surface. Gently shape it into a round loaf with floured hands, being careful not to deflate it too much.
-
Second Rise: Transfer it to a floured proofing basket or bowl, cover it again, and let it rise for another 1-2 hours.
-
Preheat Your Oven: Set your oven to 450°F (232°C) and place your Dutch oven inside to heat while you’re waiting.
-
Bake Covered: Carefully remove the hot Dutch oven, place the dough inside, cover it, and bake for 30 minutes. This locks in steam, essential for the crust.
-
Finish Baking: Remove the lid and continue baking for another 15-20 minutes until the crust is golden brown and your kitchen smells like heaven.
-
Cool and Slice: Let your bread cool on a wire rack for at least 30 minutes before slicing to maintain its structure—if you can withstand the temptation!
Chef’s Notes & Helpful Tips
- Make-ahead tips: Prepare your dough the night before, allowing for a slow fermentation that enhances flavor.
- Alternatives: If you don’t have a Dutch oven, a heavy-duty baking sheet with hot water in a pan at the bottom can mimic the steam capture.
- Customization ideas: Experiment with adding herbs, spices, or seeds (like sunflower or sesame) for unique flavor profiles.
Common Mistakes to Avoid
- Underproofing: Skipping the resting period leads to dense bread. Ensure your dough has visibly expanded.
- Using an Inactive Starter: A sluggish starter will yield poor results. Always feed it beforehand.
- Skipping the Cooling Step: Slicing too soon leads to gummy bread. Patience rewards you with the right texture.
What to Serve With Effortless Sourdough Bread
Whether slathered with butter or presented as an accompaniment to a dish, this sourdough complements many flavors beautifully. Consider pairing it with:
- Creamy soups: The crispness of sourdough balances the smoothness of pumpkin or tomato soup.
- Cheese boards: The acidity cuts through rich cheeses, enhancing the tasting experience.
- Salads: Thick slices topped with greens create a satisfying contrast of textures.
- Breakfast spreads: Enjoy with jam or honey for a cozy morning treat.
- Grilled meats: The bread’s flavor stands up to robust flavors in BBQ.
- Charcuterie: Its versatility shines through as a foundation for a variety of charcuterie meats and spreads.
- Avocado toast: A trendy breakfast that makes this bread shine.
- Dips: Serve alongside hummus or tapenade for a delightful appetizer.
Storage & Reheating Instructions
Store your sourdough in a paper bag or wrapped in a kitchen towel at room temperature for up to three days. For longer storage, slice and freeze the loaf, keeping it in a sealed bag. To enjoy, simply toast slices from frozen, and you’ll have a delicious, freshly baked taste ready in minutes.
Estimated Nutrition Information
Approximate values per slice:
- Calories: 80
- Carbohydrates: 15g
- Protein: 3g
- Fat: 1g
- Fiber: 1g
Disclaimer: Nutritional values may vary based on preparation and portion sizes.
FAQs
1. Do I need a special sourdough starter?
Yes, an active and bubbly sourdough starter is crucial to ensuring your bread rises properly and has that signature tangy flavor.
2. How can I tell if my dough has risen enough?
Your dough should have nearly doubled in size and feel light and puffy to the touch. An excellent trick is to gently poke it; if it springs back slowly, it’s ready.
3. Can I make this bread without a Dutch oven?
Absolutely! You can use a baking stone or a pizza stone on a preheated baking sheet, along with a pan of water to create steam.
4. How do I know if my sourdough bread is done baking?
Look for a deep golden-brown crust, and knock on the bottom of the loaf; it should sound hollow when finished.
5. Can I add ingredients to the dough?
Definitely! Feel free to include nuts, seeds, or herbs to give your bread unique flavors and textures.
Conclusion
Nothing compares to the joy of baking your own loaf of sourdough bread. With its effortless charm, this recipe invites you to embark on a culinary adventure that pays off in droves. As the delightful aroma fills your home, your heart swells with pride knowing you’ve crafted something extraordinary. Embrace the process, savor each step, and watch as your family and friends revel in their first bite. Here’s to creating your effortless sourdough bread—may it rise beautifully and fill your home with warmth and love!
Print
Effortless Sourdough Bread
- Total Time: 18 hours 20 minutes
- Yield: 1 loaf 1x
- Diet: Vegetarian
Description
Transform four simple ingredients into a crusty, golden masterpiece with this effortless sourdough bread recipe.
Ingredients
- 3 cups all-purpose flour
- 1 1/2 cups water
- 1/2 cup active sourdough starter
- 1 teaspoon salt
Instructions
- Combine the flour and salt in a large bowl, whisking until well mixed.
- Mix the water and sourdough starter in another bowl until smooth.
- Merge the wet mixture into the flour, mixing with a spatula until a shaggy dough forms.
- Cover the bowl with a clean towel and let it rest at room temperature for 12-18 hours.
- Shape the dough gently into a round loaf on a floured surface.
- Transfer it to a floured proofing basket, cover it, and let it rise for another 1-2 hours.
- Preheat your oven to 450°F (232°C) with the Dutch oven inside.
- Bake the covered dough for 30 minutes, then uncover and bake for an additional 15-20 minutes.
- Cool the bread on a wire rack for at least 30 minutes before slicing.
Notes
Ensure your sourdough starter is active, and measure all ingredients before starting. Customization options include adding herbs or seeds.
- Prep Time: 30 minutes
- Cook Time: 50 minutes
- Category: Bread
- Method: Baking
- Cuisine: French
Nutrition
- Serving Size: 1 slice
- Calories: 80
- Sugar: 0g
- Sodium: 400mg
- Fat: 1g
- Saturated Fat: 0g
- Unsaturated Fat: 0g
- Trans Fat: 0g
- Carbohydrates: 15g
- Fiber: 1g
- Protein: 3g
- Cholesterol: 0mg
Keywords: sourdough, bread, baking, homemade, comfort food