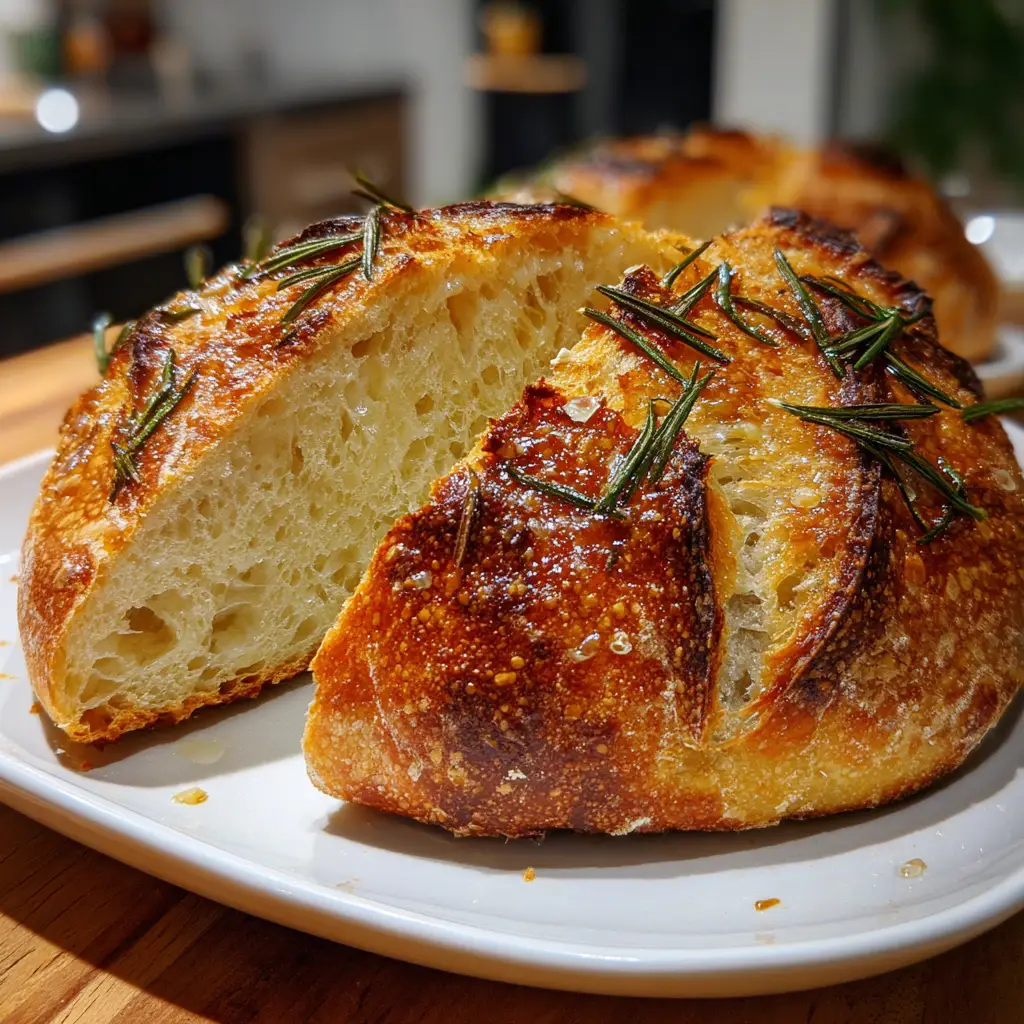
Introduction to Easy Roasted Garlic Rosemary Artisan Bread
Welcome to the world of baking, where the aroma of fresh bread can turn any ordinary day into something special! Today, I’m excited to share my recipe for Easy Roasted Garlic Rosemary Artisan Bread. This delightful bread is not just a treat for the taste buds; it’s a quick solution for busy days when you want to impress your loved ones without spending hours in the kitchen. Imagine serving warm, crusty bread infused with roasted garlic and fragrant rosemary at your next family dinner. Trust me, this recipe will become a cherished favorite in your home!
Why You’ll Love This Easy Roasted Garlic Rosemary Artisan Bread
This Easy Roasted Garlic Rosemary Artisan Bread is a game-changer for busy moms and professionals alike. It’s incredibly simple to make, requiring just a handful of ingredients and minimal hands-on time. The rich, savory flavor of roasted garlic combined with the earthy notes of rosemary creates a taste sensation that will have your family begging for more. Plus, the delightful aroma wafting through your home is an added bonus that makes baking this bread a joy!
Ingredients for Easy Roasted Garlic Rosemary Artisan Bread
Gathering the right ingredients is the first step to creating your masterpiece. Here’s what you’ll need for this Easy Roasted Garlic Rosemary Artisan Bread:
- All-purpose flour: The backbone of your bread, providing structure and texture. You can substitute with whole wheat flour for a nuttier flavor.
- Active dry yeast: This little powerhouse helps your bread rise. Make sure it’s fresh for the best results.
- Warm water: Activates the yeast and brings the dough together. Aim for a temperature that feels warm to the touch, but not hot.
- Sugar: A touch of sweetness that feeds the yeast, helping it to bloom and create a lovely rise.
- Salt: Enhances flavor and strengthens the dough. Don’t skip this; it’s essential for taste!
- Roasted garlic: Adds a rich, mellow flavor. You can roast your own or buy pre-roasted garlic for convenience.
- Fresh rosemary: This aromatic herb brings a delightful fragrance and taste. Feel free to experiment with other herbs like thyme or oregano.
For exact measurements, check the bottom of the article where you can find everything listed for easy printing. Happy baking!
How to Make Easy Roasted Garlic Rosemary Artisan Bread
Now that you have your ingredients ready, let’s dive into the fun part: making your Easy Roasted Garlic Rosemary Artisan Bread! Follow these simple steps, and you’ll be on your way to baking a loaf that will impress everyone.
Step 1: Preheat the Oven
First things first, preheat your oven to 450°F (230°C). Preheating is crucial because it creates the perfect environment for your bread to rise and develop that beautiful crust. A hot oven helps the bread spring up quickly, giving it that artisan look we all love!
Step 2: Prepare the Yeast Mixture
In a bowl, combine warm water, sugar, and yeast. Let it sit for about 5-10 minutes until it becomes frothy. This step is vital because it activates the yeast, which is the magic ingredient that makes your bread rise. If your mixture doesn’t foam, your yeast might be old, and it’s best to start over.
Step 3: Combine Dry Ingredients
In a large mixing bowl, whisk together the all-purpose flour and salt. The flour provides structure, while the salt enhances flavor and strengthens the dough. Make sure to mix them well; this ensures an even distribution of salt throughout your bread.
Step 4: Mix in the Wet Ingredients
Now, it’s time to bring it all together! Pour the yeast mixture into the flour mixture. Add in the roasted garlic and chopped rosemary. Stir until a shaggy dough forms. Don’t worry if it looks a bit messy; that’s perfectly normal at this stage!
Step 5: Knead the Dough
Transfer the dough to a floured surface and knead it for about 10 minutes. You want the dough to become smooth and elastic. If it’s too sticky, sprinkle a little more flour. Kneading is like giving your dough a workout, helping to develop the gluten that gives bread its chewy texture.
Step 6: First Rise
Place the kneaded dough in a greased bowl, cover it with a clean kitchen towel, and let it rise for about 1 hour or until it doubles in size. This step is essential for creating that airy texture. You’ll know it’s ready when you can poke it gently, and it springs back slowly.
Step 7: Shape the Loaf
Once your dough has risen, punch it down gently to release the air. Shape it into a round loaf by tucking the edges under. This step is important because it helps create surface tension, which gives your bread a nice shape and helps it rise evenly.
Step 8: Second Rise
Place the shaped loaf on a baking sheet lined with parchment paper. Cover it again and let it rise for another 30 minutes. This final rise is crucial for achieving that light, fluffy texture. You’ll notice it puffing up nicely!
Step 9: Score the Loaf
Before baking, use a sharp knife to score the top of the loaf. This allows steam to escape and helps the bread expand while baking. Plus, it gives your bread a beautiful, rustic look. Don’t be shy; make a few shallow cuts!
Step 10: Bake the Bread
Now, it’s time to bake! Place your loaf in the preheated oven and bake for 25-30 minutes. You’ll know it’s done when it’s golden brown and sounds hollow when tapped on the bottom. The aroma will fill your kitchen, making it hard to resist!
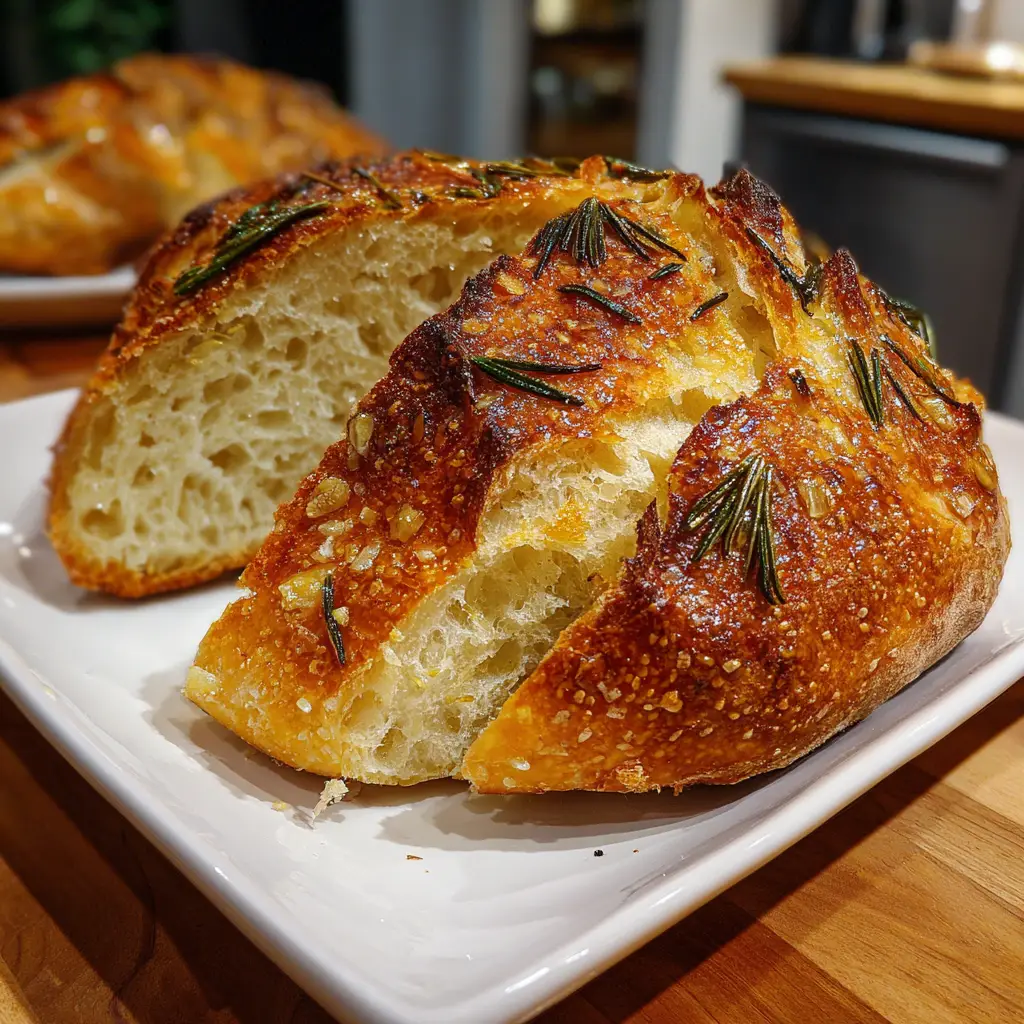
Step 11: Cool and Slice
Once baked, remove the bread from the oven and let it cool on a wire rack. This step is important because slicing too soon can make the bread gummy. Allow it to cool completely for the best texture, then slice and enjoy your homemade masterpiece!
Tips for Success
- Always use fresh yeast for the best rise.
- Measure your flour accurately; too much can lead to dense bread.
- Don’t rush the rising times; patience is key for fluffy bread.
- Experiment with different herbs for unique flavors.
- Store leftover bread in a paper bag to keep the crust crispy.
Equipment Needed
- Mixing bowls: A large bowl for mixing dough and a smaller one for the yeast mixture.
- Measuring cups and spoons: Essential for accurate ingredient measurements.
- Wooden spoon or spatula: Great for mixing the dough.
- Floured surface: A clean countertop or cutting board for kneading.
- Baking sheet: Use a regular sheet or a pizza stone for baking.
Variations of Easy Roasted Garlic Rosemary Artisan Bread
- Cheesy Delight: Add shredded cheese, like mozzarella or cheddar, to the dough for a cheesy twist.
- Herb Medley: Mix in a combination of herbs such as thyme, oregano, or basil for a fragrant flavor explosion.
- Olive Oil Infusion: Replace some of the water with olive oil for a richer taste and softer texture.
- Whole Wheat Option: Substitute half of the all-purpose flour with whole wheat flour for a heartier loaf.
- Sun-Dried Tomatoes: Incorporate chopped sun-dried tomatoes for a burst of flavor and color.
Serving Suggestions for Easy Roasted Garlic Rosemary Artisan Bread
- Serve warm with a drizzle of olive oil and balsamic vinegar for dipping.
- Pair with a fresh garden salad for a light lunch or dinner.
- Enjoy alongside hearty soups or stews to soak up the flavors.
- Slice and toast for a delicious breakfast topped with avocado or butter.
- Present on a rustic wooden board for a charming table display.
FAQs about Easy Roasted Garlic Rosemary Artisan Bread
As you embark on your baking journey, you might have a few questions about this Easy Roasted Garlic Rosemary Artisan Bread. Here are some common queries I’ve encountered, along with helpful answers to guide you along the way!
Can I use instant yeast instead of active dry yeast?
Absolutely! You can substitute instant yeast for active dry yeast in a 1:1 ratio. Just mix it directly with the dry ingredients, skipping the activation step.
How do I store leftover bread?
To keep your bread fresh, store it in a paper bag at room temperature. This helps maintain the crust’s crispiness. Avoid plastic bags, as they can make the crust soggy.
Can I freeze the bread?
Yes, you can freeze your Easy Roasted Garlic Rosemary Artisan Bread! Wrap it tightly in plastic wrap and then in aluminum foil. It can last up to three months in the freezer.
What can I serve with this bread?
This bread pairs wonderfully with olive oil and balsamic vinegar for dipping. It also complements soups, salads, and cheese platters beautifully!
Can I add more garlic for a stronger flavor?
Definitely! If you love garlic, feel free to add more roasted garlic to the dough. Just remember, the flavor will intensify as it bakes!
Final Thoughts
Baking this Easy Roasted Garlic Rosemary Artisan Bread is more than just a cooking task; it’s a delightful experience that fills your home with warmth and love. The joy of pulling a golden loaf from the oven, with its crusty exterior and soft, flavorful interior, is truly unmatched. Each slice is a testament to your effort and creativity, perfect for sharing with family and friends. Whether enjoyed with a meal or as a snack, this bread brings people together, creating memories that linger long after the last crumb is gone. Happy baking, my friends!
PrintEasy Roasted Garlic Rosemary Artisan Bread: Bake Perfectly!
- Total Time: 1 hour 45 minutes
- Yield: 1 loaf 1x
- Diet: Vegetarian
Description
A simple and delicious recipe for artisan bread infused with roasted garlic and fresh rosemary, perfect for any occasion.
Ingredients
- 3 cups all-purpose flour
- 1 packet (2 1/4 tsp) active dry yeast
- 1 1/2 cups warm water
- 1 tbsp sugar
- 1 tbsp salt
- 1 head of garlic, roasted
- 2 tbsp fresh rosemary, chopped
Instructions
- Preheat your oven to 450°F (230°C).
- In a bowl, combine warm water, sugar, and yeast. Let it sit for 5-10 minutes until frothy.
- In a large mixing bowl, combine flour and salt.
- Add the yeast mixture, roasted garlic, and chopped rosemary to the flour mixture. Stir until a dough forms.
- Knead the dough on a floured surface for about 10 minutes until smooth.
- Place the dough in a greased bowl, cover, and let it rise for 1 hour or until doubled in size.
- Punch down the dough and shape it into a round loaf.
- Place the loaf on a baking sheet lined with parchment paper and let it rise for another 30 minutes.
- Score the top of the loaf with a sharp knife.
- Bake in the preheated oven for 25-30 minutes until golden brown and hollow-sounding when tapped.
- Let cool on a wire rack before slicing.
Notes
- For a stronger garlic flavor, add more roasted garlic.
- Store bread in a paper bag to keep the crust crispy.
- This bread pairs well with olive oil and balsamic vinegar for dipping.
- Prep Time: 15 minutes
- Cook Time: 30 minutes
- Category: Bread
- Method: Baking
- Cuisine: American
Nutrition
- Serving Size: 1 slice
- Calories: 150
- Sugar: 0.5g
- Sodium: 200mg
- Fat: 1g
- Saturated Fat: 0g
- Unsaturated Fat: 0g
- Trans Fat: 0g
- Carbohydrates: 30g
- Fiber: 1g
- Protein: 4g
- Cholesterol: 0mg
Keywords: Easy Roasted Garlic Rosemary Artisan Bread, homemade bread, artisan bread recipe, garlic bread